
Prey Tweak Guide
[Page 6] In-Game Settings (Pt.2)
[Advanced 1]
Clicking this tab under the Video Settings screen takes you to the first set of Advanced Video Settings which allow you to fine tune the graphics in Prey. These are each covered below:
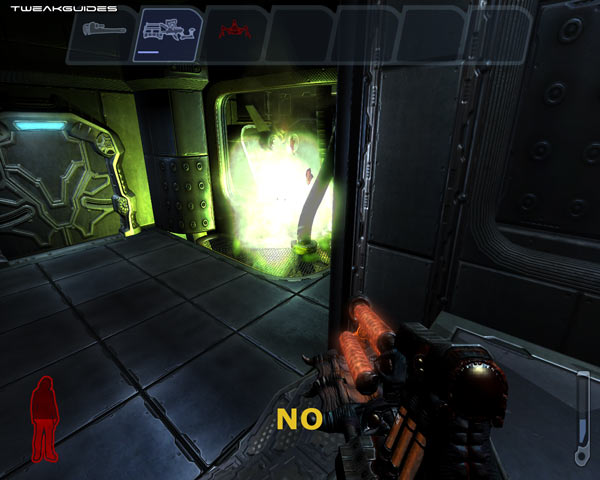
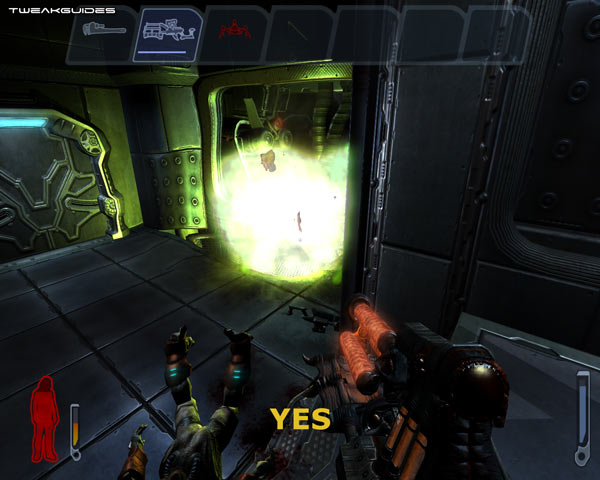
Use Shader Programs: This option determines whether you can use additional shader-based effects in Prey. Shader effects rely on your graphics card hardware to increase the realism of the environment and add special effects in certain circumstances. For example in the screenshot comparison above you can see that with Use Shader Programs set to Yes, there is a distortion effect visible around the crawler grenade explosion. When set to No, there is no such distortion. See Shader Detail below for another comparison. Note that setting this option to No disables the Shader Detail options as well, and while disabling shader programs can boost FPS, this is primarily best disabled only for older graphics cards. Fortunately even with Shader Programs disabled the difference in image quality is not significant - again, see the animated comparison below for further indication of its impact.
Shader Detail: If Use Shader Programs (see above) is set to Yes, you can determine the level of shader effects here, with the available options here being Low, Medium, High and Highest. To see the image quality difference between them check this animated screenshot comparison: Prey_Shaders.gif (969KB). Look closely at the wall to the left, and note that the most significant difference appears at the transition between High and Medium, whereby the details on the wall change to less fine/less realistic wrinkling. Note further that lowering the shader detail level all the way to Low does not result in removal of the distortion effect visible near explosions - only setting Use Shader Programs to Off will do that. In general the difference is not large but unless you have an older graphics card, or are struggling for FPS, I suggest leaving this at High or above.

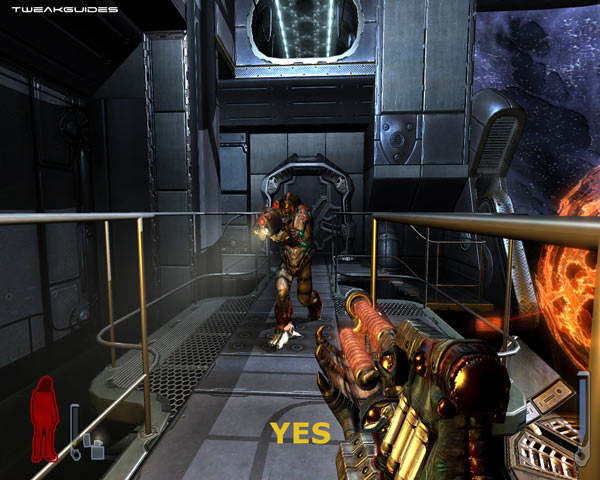
Enable Shadows: This setting determines whether you see any real-time shadows cast for objects in the game. If set to Yes you will see most objects casting very realistic shadows, which move with dynamic sources of lighting (such as swinging lamps), however your FPS will be lower as your system has to do more calculations to determine where shadows are cast at any point in time. This is particularly noticeable when there are multiple characters/enemies on the screen, as they cast very complex shadows. If set to No, these shadows will disappear, as shown in the screenshot comparison above - note in particular all the railing and character shadows are gone. However disabling shadows doesn't mean all the areas of darkness in the game will be removed; some are static shadows. Disabling shadows will improve your performance, but the atmosphere of the game may suffer quite a bit. If you feel comfortable turning this option off, then the performance improvement (which is significant on older systems) may be worth it.
Note that your own cigarette lighter doesn't seem to cast any additional objects or character shadows, however having your lighter on can still reduce graphics performance as it adds another layer of effects to the scene. Further note that you can enable your own player's shadow for added realism by using the g_showPlayerShadow command (See Advanced Tweaking section).
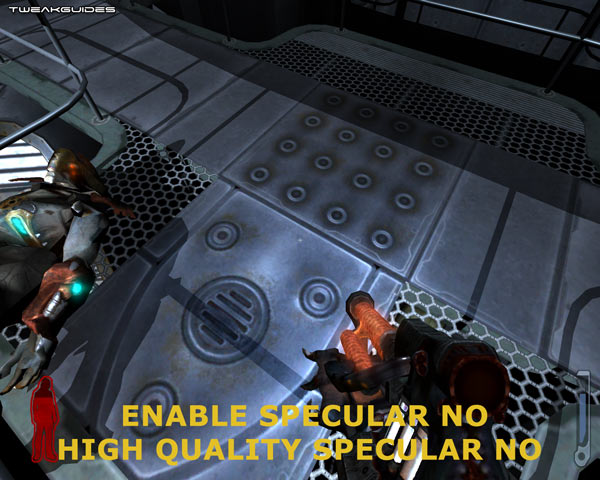
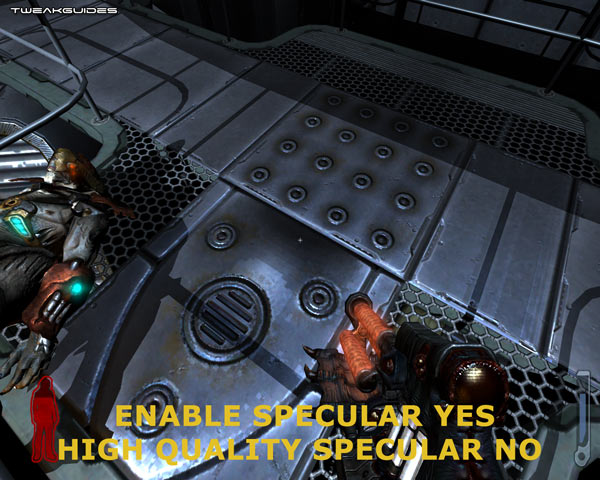
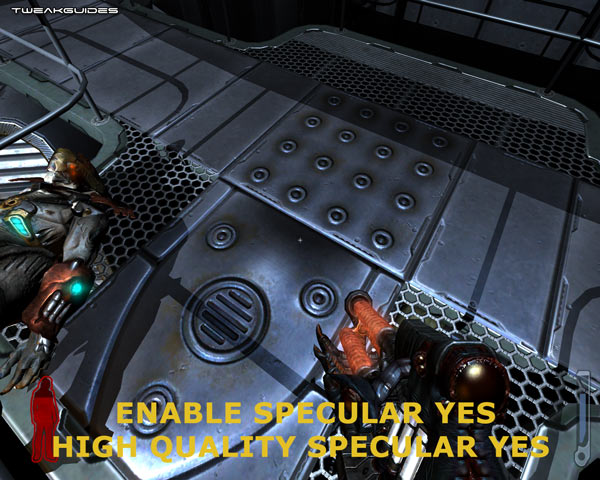
Enable Specular: If set to Yes, specular lighting gives the surfaces of objects, ranging from metals to skin, a realistic sheen. When combined with Bump Maps (see below), this option creates some very realistic surfaces in Prey, and for this reason I recommend setting it to Yes for most people. However obviously it can reduce performance, so if you're after more FPS and don't mind the drop in realism, set this option to No. See the screenshot comparison above, where the difference between enabling and disabling specular is quite obvious. Note also that the High Quality Specular option also has an impact on surface appearance - see further below for details of this setting, but I have included its effects in the screenshots above for comparitive purposes.
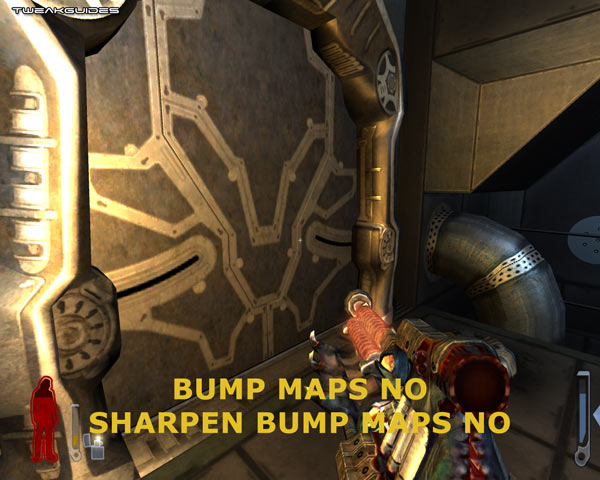
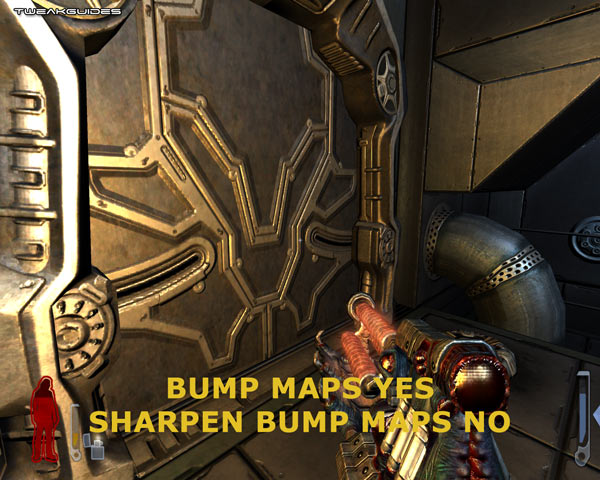
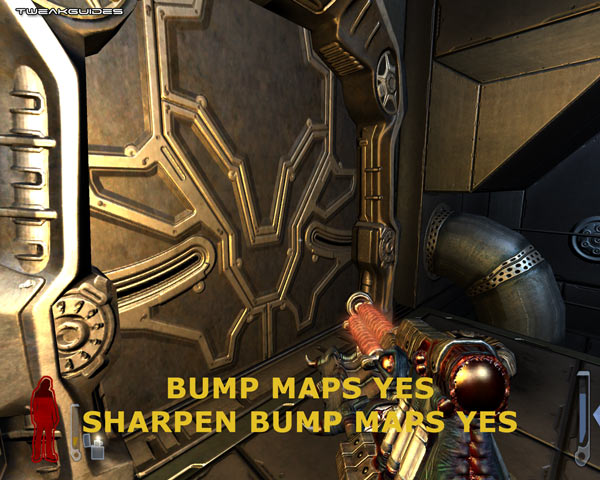
Enable Bump Maps: Bump mapping is an effect which makes 2D textured surfaces appear as though they are 3D, with depth and grain. If set to Yes, surfaces will appear much more realistic, especially when light shines on them, however your performance will be lower. Again, if you need the extra FPS then turn it off, but in general disabling this can greatly impact on realism. The screenshot comparison above shows that with bump mapping disabled, surfaces appear much less 3D. Note that the impact of the Sharpen Bumpmaps setting is also shown (See below for the setting description).
Vertical Sync: Vertical Sync (or simply VSync) is the synchronization of your graphics card and monitor's abilities to redraw the screen a number of times each second (measured in Hz). If VSync is disabled (set to No), you may see some image 'tearing' as your monitor and graphics card go slightly out of synchronization at certain times. This does no damage, it just may be annoying to see. Of course it is always recommended that you have as high a refresh rate as possible for your particular monitor (using tools like Refresh Force), but it is also recommended that you disable VSync to increase performance. Enabling VSync can result in better visual quality (i.e. no tearing), but it will also reduce average FPS, often by up to 50%. For that reason, I recommend disabling VSync. For more details see my Gamer's Graphics & Display Settings Guide.
Prey and Screen Tearing: There is something important to understand when talking about VSync and Prey though: the Doom 3 engine on which Prey is based is specifically capped at 60FPS, so you cannot exceed this framerate regardless of your VSync setting. You can still have a refresh rate higher than 60Hz, but your FPS will remain capped at 60FPS max even with VSync off. Some people have noticed the excessive level of tearing visible in the starting sequence of Prey and at certain points in the game, whether on an LCD or CRT monitor. Tearing was a problem in the original Doom 3, and is now even more apparent in Prey because many modern systems now easily push the 60FPS hard cap of the Doom 3 engine. To demonstrate what I mean, by using the com_fixedtic 1 command, we can temporarily remove the 60FPS cap on Prey (See com_fixedtic under the Advanced Tweaking section and note this also throws the game physics and audio out of sync so is not recommended for general gameplay). In doing so, a typical wall scene in the starting bathroom where Tommy turns around now shows its true potential framerate (111FPS shown in the top right corner):
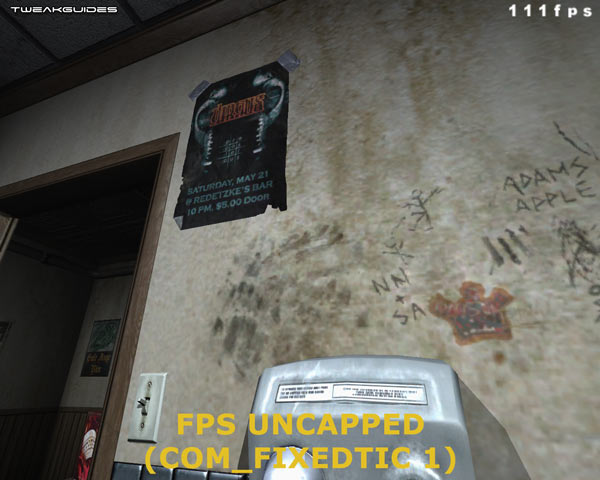
This means that although restricted to a total of 60 frames per second in the Doom 3 engine, my graphics card is normally able to render twice that much in the same time (or 60 frames in half the time), so with VSync disabled, the graphics card is free to race ahead and the results are that the monitor and graphics card will be well out of sync and produce visible tearing - lots of partial frames which are slightly out of alignment. To reduce tearing without enabling VSync (which can give a severe FPS hit), I recommend increasing your graphics settings such that your FPS falls between 30 and just under 60FPS on average, i.e. smooth but not constantly pushing the 60FPS ceiling. By making your graphics card work harder, your monitor and graphics card will be closer in Sync in most areas and hence you will see less visible tearing and also enjoy better visual quality, as opposed to enabling VSync and greatly reducing your FPS to around 30FPS with lower graphics settings. If you still want to enable VSync, then also enable Triple Buffering in your graphics card's control panel to reduce the performance hit, but see the top of the Conclusion page of this guide for more details.
Antialiasing: Antialiasing is a method of smoothing the jaggedness of lines in 3D graphics. For more details see my Gamer's Graphics & Display Settings Guide. This setting has three options: Off, 2x and 4x. When set to Off, there is no additional Antialiasing used, unless you have forced Antialiasing enabled in your Graphics card's control panel. Antialiasing set to Off provides the fastest performance. When set to 2x Antialiasing, this uses your graphics card to smooth out jagged lines at the cost of some FPS. Antialiasing 4x smooths out jagged lines even more but also reduces FPS further. Note that if you have any level of Antialiasing enabled in your graphics card control panel, they will override these settings. If you want to use Antialiasing in Prey I recommend selecting 'Application Preference' in your graphics card's control panel and then setting the AA level in-game here. If you have an older system I recommend setting Antialiasing to Off to start with since it can be a major performance drain.
High Quality Specular: This option improves the appearance of the specular effect - see Enable Specular above for details and the screenshot comparison. In general it is recommended that if you enable specular, that you enable this also, otherwise the effect can be quite pixellated. However specular effects can be particularly draining on older graphics card, so in such cases I suggest turning this off (along with specular altogether if required).
Sharpen Bumpmaps: This option improves the appearance of bump map effects - see Enable Bump Maps above for details and the screenshot comparison. Once again, I recommend enabling this if you're going to use bump maps, as it really enhances the bump mapping effect. But of course for older systems or those in need of FPS, turn this off for an FPS boost.
Once you're done with these options click 'Apply Changes' to implement them, and move on to the next set of Advanced options covered on the next page.
|
|