
Prey Tweak Guide
[Page 5] In-Game Settings
This section contains full descriptions and recommendations for Prey's in-game settings. You can use these to get a good balance between image quality and performance, however I can't give you specific instructions on what to turn on and what to turn off. It all depends on your particular hardware combination, and more importantly your personal taste for the trade-off between performance and image quality. Many of these settings are heavily dependent on your particular graphics card, and older graphics cards will show markedly different performance impacts than more recent cards for example. You can check out the Prey Performance Analysis articles here and here for more details.
To access Prey's in-game settings, start the game and under the Main Menu click the Options item, and from there you will see a large range of settings which are explained in detail below:
Controls
This section has several separate categories (tabs on the left side) for player control options you can change: Movement, Combat, Weapons, Look, and System. The procedure to change any of the control bindings is simple: left-click on the key/button currently assigned to an action under the Key Assignment column, then press the relevant mouse button or key you wish to assign to that control setting. Go through all these sections and set the controls according to your taste, none of them have any performance impacts.
Note however that mouse-related controls like Mouse Smoothness, Mouse Sensitivity and Invert Mouse can be found under the Game Options>Feel tab (See below). Also see the Advanced Tweaking section for more details of how to use the bind command to create your own custom control bindings.
Importantly, if you want to see and change your key assignments in one glance at any time during the game, press the F1 key (by default) and a graphical keyboard layout with mapped keys will be shown on screen.
Game Options
Look
Show Decals: Decals are the small marks left on surfaces when a weapon is fired or an explosion occurs for example. Setting this option to No prevents any such decals from appearing, which can improve FPS particulary during heavy combat scenes, however it obviously also reduces realism. Note that disabling decals does not disable blood spurts; to do that you need to use the g_bloodEffects command (See the Advanced Tweaking section).
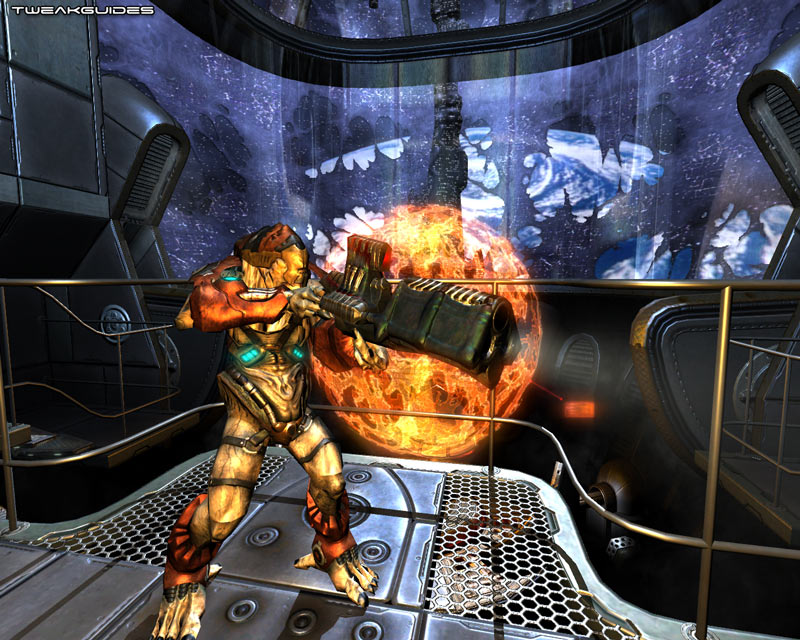
Show HUD: If set to No, disables your Heads Up Display (HUD) - the graphical user interface which shows you various bits of information such as your health status (the image of the man in the left bottom corner) and what weapon/item you've equipped. Furthermore, disabling the HUD also disables your weapon crosshair, even in zoom mode, so it is definitely not recommended. At best disabling the HUD is useful for taking screenshots, as any FPS difference is minimal on most systems, so again it is strongly recommended you leave this set to Yes.
Show Weapon: If set to No, this option removes your weapon from the first person screen view. It is still equipped and you can still use it as normal, but you won't see it on screen. This can help improve performance slightly since weapons models are quite complex, however obviously it can also cause confusion to yourself and reduce realism.
Subtitles: If set to Yes, displays subtitled text whenever a main character speaks (including Tommy). Unless you spefically require this functionality, it is best to leave it set to No, although the FPS impact is negligible either way.
Allow Profanity: If set to Yes, allows the characters in the game to use profanity - basically swear words. Once again this has no performance impact, so set it to suit your taste. Be warned that Prey does contain a fair bit of cursing throughout.
Crosshair: Allows you to choose the type of crosshair generally displayed in your HUD. Set to suit your taste as there is no performance impact, although note that sometimes a custom crosshair may appear depending on the object you're holding/facing.
Feel
Adaptive Difficulty: This is an interesting feature of Prey: there is no difficulty slider in the game - instead, you start off in Normal difficulty mode when selecting a New Game, which gives an average level of difficulty (only after completing the entire game can you then restart in Cherokee mode which is much harder). However if you enable Adaptive Difficulty (set to Yes), the game will constantly track your combat statistics and depending on how well you're doing, the game will alter everything from enemy behavior to the number of ammo and health pickups based on this. For this reason, I strongly recommend setting this option to Yes, as it should provide everyone with a fair challenge: if you start to struggle the game should react accordingly to make things easier for you; if you're finding things too easy it should ramp up the difficulty. Enabling Adaptive Difficulty does not appear to have any noticeable FPS impact, but it may reduce performance slightly on machines with low end CPUs.
Invert Mouse: If you are using a mouse in the game to control your player's view, setting this option to Yes means that pushing your mouse forward will make the character look down, and pulling the mouse backward will make him look up. If set to No, the results are the exact opposite. Has no impact on performance, set to your personal taste.
Mouse Smoothness: This slider controls how smooth your mouse movements will be in the game. The further to the right you move the slider, the less jerky your mouse will feel as your mouse movements are averaged out. Unfortunately for some people, increasing mouse smoothness also results in noticeable mouse lag, whereby there will be a slight delay between your mouse movements and how that's translated to what appears on your screen. I recommend you move the slider to the far left to disable mouse smoothing if you want to minimize any potential mouse lag.
Mouse Sensitivity: This slider determines how sensitive your mouse is in the game. The further to the right the slider, the more sensitive your mouse is to being moved. Adjust this setting until you can turn around rapidly, yet also make small changes in your aim without excessive jumpiness. Has no impact on performance. Note, if your mouse is lagging in the game, aside from Mouse Smoothness (see above), this is primarily due to low FPS in certain areas. You must adjust your settings to improve your average FPS (particularly in detailed scenes and during heavy combat) and you should then notice an improvement in mouse lag. Mouse lag can also result from enabling Triple Buffering in your graphics card's control panel, especially on graphics cards with less Video RAM - see the Conclusion of this guide for more details.
Free Look: When set to Yes, this allows you to use the mouse to change your character's view direction. If set to No, moving the mouse back and forward will not make your character look up or down, it will make him walk back or forward. Has no performance impact, set to your personal taste, although setting this to Yes is the normal configuration for most people.
Video
[Video]
Auto Detect Video Settings: This option will attempt to detect and automatically adust all the graphics settings to suit your system. Generally not recommended, as you can get a much better result by understanding and manually adjusting the various settings below (plus some config tweaking in the Advanced Tweaking section).
Texture Quality: This setting controls the overall image quality of the graphics in the game, in particular the way in which textures (the 2D images covering the surface of all 3D objects in the game) appear. This setting has a major impact on your performance and on visual quality, so it's very important that you choose the right one for your system based on your graphics card and your tastes. There are three levels of quality: Low, Medium, High, and each is covered below:
Low Quality: This mode is designed for a graphics card with 64MB of Video RAM. It uses compressed textures and light maps, and texture resolution is also quite low. The reason for this is that high resolution uncompressed textures quickly fill up your Video RAM and cause a lot of swapping into and out of the Video RAM, creating small pauses and freezes. Texture compression and reducing the resolution of textures and light maps keeps the Video RAM overhead low, with the down side being some "compression artifacts" (i.e. blurriness, some pixelation and most noticeably a purplish tinge to textures) and generally quite blurry, more pixellated low res textures at this setting level.
Medium Quality: This mode is designed for a graphics card with 128MB of Video RAM. There is still compression used for textures, and light and render maps. Texture sizes are not automatically reduced however, so all textures will appear at their full resolution. There will still be compression artifacts however, but once again this must be done to keep Video RAM demand low. This mode is the one recommended for many people as it is a good balance of image quality and performance.
High Quality: This mode is designed for a graphics card with 256MB of Video RAM or more. In this mode there is no texture compression (which increases Video RAM usage), however light maps are still compressed. Essentially in High Quality mode texture quality is improved over Medium Quality due to removal of compression and through use of high level Anisotropic Filtering, but at the cost of a performance hit on cards with lower Video RAM and processing power.
Ultra Quality: There is no actual 'Ultra Quality' mode in the in-game settings for Prey. To implement Ultra Quality mode you need to set Image Anisotropy to 8x or higher (See the next page), and alter several config settings (See Advanced Tweaking section), namely image_usePrecompressedTextures=0, image_useNormalCompression=0 and image_UseCompression=0. While this method doesn't work in the demo version of Prey, it does work in the full version. It reduces FPS and can increase stuttering/hitching for a minimal increase in image quality, but for recent graphics cards with 256MB or especially 512MB VRAM, the performance drop should not be significant. Of course this is only recommended if you want the absolute highest Texture Quality.
To see an animated screenshot comparison of the three Texture Quality settings, click the following link: Prey_TextureQuality.gif (1.1MB). Note the more obvious differences - pay particular attention to the metallic floor on the left, the surface detail on the creature to the left, and the ball on the right, and even the fleshy wall on the left side of the shot. Note further that no Anisotropic Filtering was used in any of the comparison screens.
Video Resolution: This setting determines the resolution of the game image. That means how many pixels are displayed on the screen. A resolution of 800x600 means 800 pixels wide by 600 pixels high on your monitor. The higher the resolution, the more pixels shown and the more detailed and clearer the game image, but it takes more graphics card power (and some CPU power) and hence you will see less frames per second. The highest resolution available in this list of resolutions is limited to what your graphics card and monitor are actually capable of rendering. The resolution has an important impact on your framerate in Prey in conjunction with the Texture Quality settings (see above). If nothing else helps you improve your FPS you will have to reduce the resolution.
Note: To set a custom screen size in Prey see the r_mode, r_customheight and r_customwidth commands in the Advanced Tweaking section, as well as the Aspect Ratio setting further below.
Update: As of the 1.1 Patch, widescreen resolutions have been added to the Video Resolution setting, so if you run a widescreen monitor make sure to install the latest patch (see page 4).
Fullscreen: If set to Yes, this means Prey will run in fullscreen mode. This is recommended, as it provides optimal trouble-free performance. However if you want to run the game in a window instead - and possibly see a performance improvement - select No. This will run the game in a window with the resolution you specify in the Video Resolution setting. Note that if the resolution is larger than your Windows Desktop resolution, parts of the game window will not be visible. Therefore if you plan on running Prey in windowed mode you should specify a resolution of equal to or less than your current Windows Desktop resolution. Note that to reduce the potential for problems in windowed mode, your Windows Desktop should be set to 32-bit color. Also note that running in windowed mode may cause additional problems and instability, due to memory management issues, so bear this in mind if you're troubleshooting an issue with Prey.
Brightness: The Brightness slider controls the brightness of the game image. The further right you move the slider, the brighter the image. Brightness values which are too high result in unrealistically brigh images (such as making nighttime into day), so don't ramp this setting up. This setting has no impact on performance.
Gamma: The Gamma slider is similar to the Brightness slider, however Gamma controls the overall brightness of the screen. Unlike brightness, altering gamma also alters the correctness of certain colors. So in the first instance adjust brightness using the Brightness slider. However if things still appear odd, use gamma for further adjustment, and once again don't increase this value dramatically as this will result in incorrect color and washed out images. Again has no impact on performance.
Aspect Ratio: This setting determines the ratio of width to height of the onscreen image. The options here are 4:3, 16:9 and 16:10. Most display devices are 4:3 aspect ratio, which is the traditional TV/monitor aspect ratio. However newer Widescreen HDTV's and some LCD monitors have a 16:9 (or even 16:10) aspect ratio. If you run a normal display device, 4:3 is the correct aspect ratio choice. However if you run a widescreen device, or are outputting to an HDTV, select 16:9 or 16:10 to reduce/remove the black bars around the image or any odd stretching. If this doesn't work, or you need to set a specific custom resolution to match the native resolution on your panel, refer to the Resolution setting above and also the Advanced Tweaking section.
Once you're done with the changes here, click the 'Apply Changes' button at the bottom of the screen. Note that changing some of the above settings will require the game to restart.
The next page continues the in-game settings by looking at the Advanced Video and Audio settings in detail.
|
|