
Nvidia GeForce Tweak Guide
[Page 11] Advanced Tweaking (Pt.3) & Conclusion
SweetFX & ReShade
SweetFX is a free tool which can apply a range of post-processing shader effects to games. This ranges from the shader-based antialiasing methods of FXAA and SMAA, to image sharpening, color tone and saturation changes, and other special effects. In short it provides you with the ability to alter image quality in virtually any game with minimal performance impact.
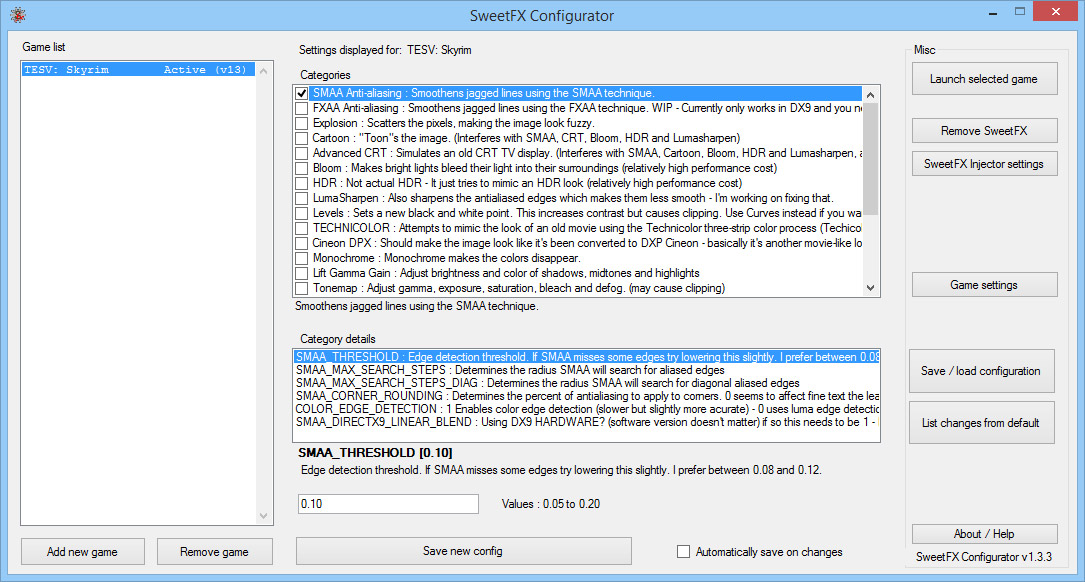
Configuring SweetFX can seem quite complex at first, so the simplest method of using SweetFX is to download the free SweetFX Configurator Tool, a graphical interface tool which also includes the latest stable version of SweetFX. Download and extract the SweetFX Configurator files, and launch SweetFX_config.exe. The best way for me to demonstrate how to use the SweetFX Configurator, and the types of changes possible with it, is to run through an example of applying SweetFX to a game. In this example, I will use the Steam version of The Elder Scrolls V: Skyrim:
Note: Before we begin, we must disable any program that provides a screen overlay/on-screen display, such as Fraps, Dxtory, or Afterburner, as they will prevent SweetFX effects from being implemented in a game.
1. To implement SweetFX in a game, several files need to be copied into the directory where the game's primary executable resides. SweetFX Configurator automates this process, but needs to know the path to the game executable. So we click the Add New Game button, navigate to C:\Program Files (x86)\Steam\SteamApps\common\Skyrim, select TESV.exe and click Open.
2. With TESV: Skyrim highlighted in the game list, we can now select which effects to apply in the Categories pane. The most popular effects are already ticked in the list, so we'll untick them all to start with, and implement them indvidually, describing each.
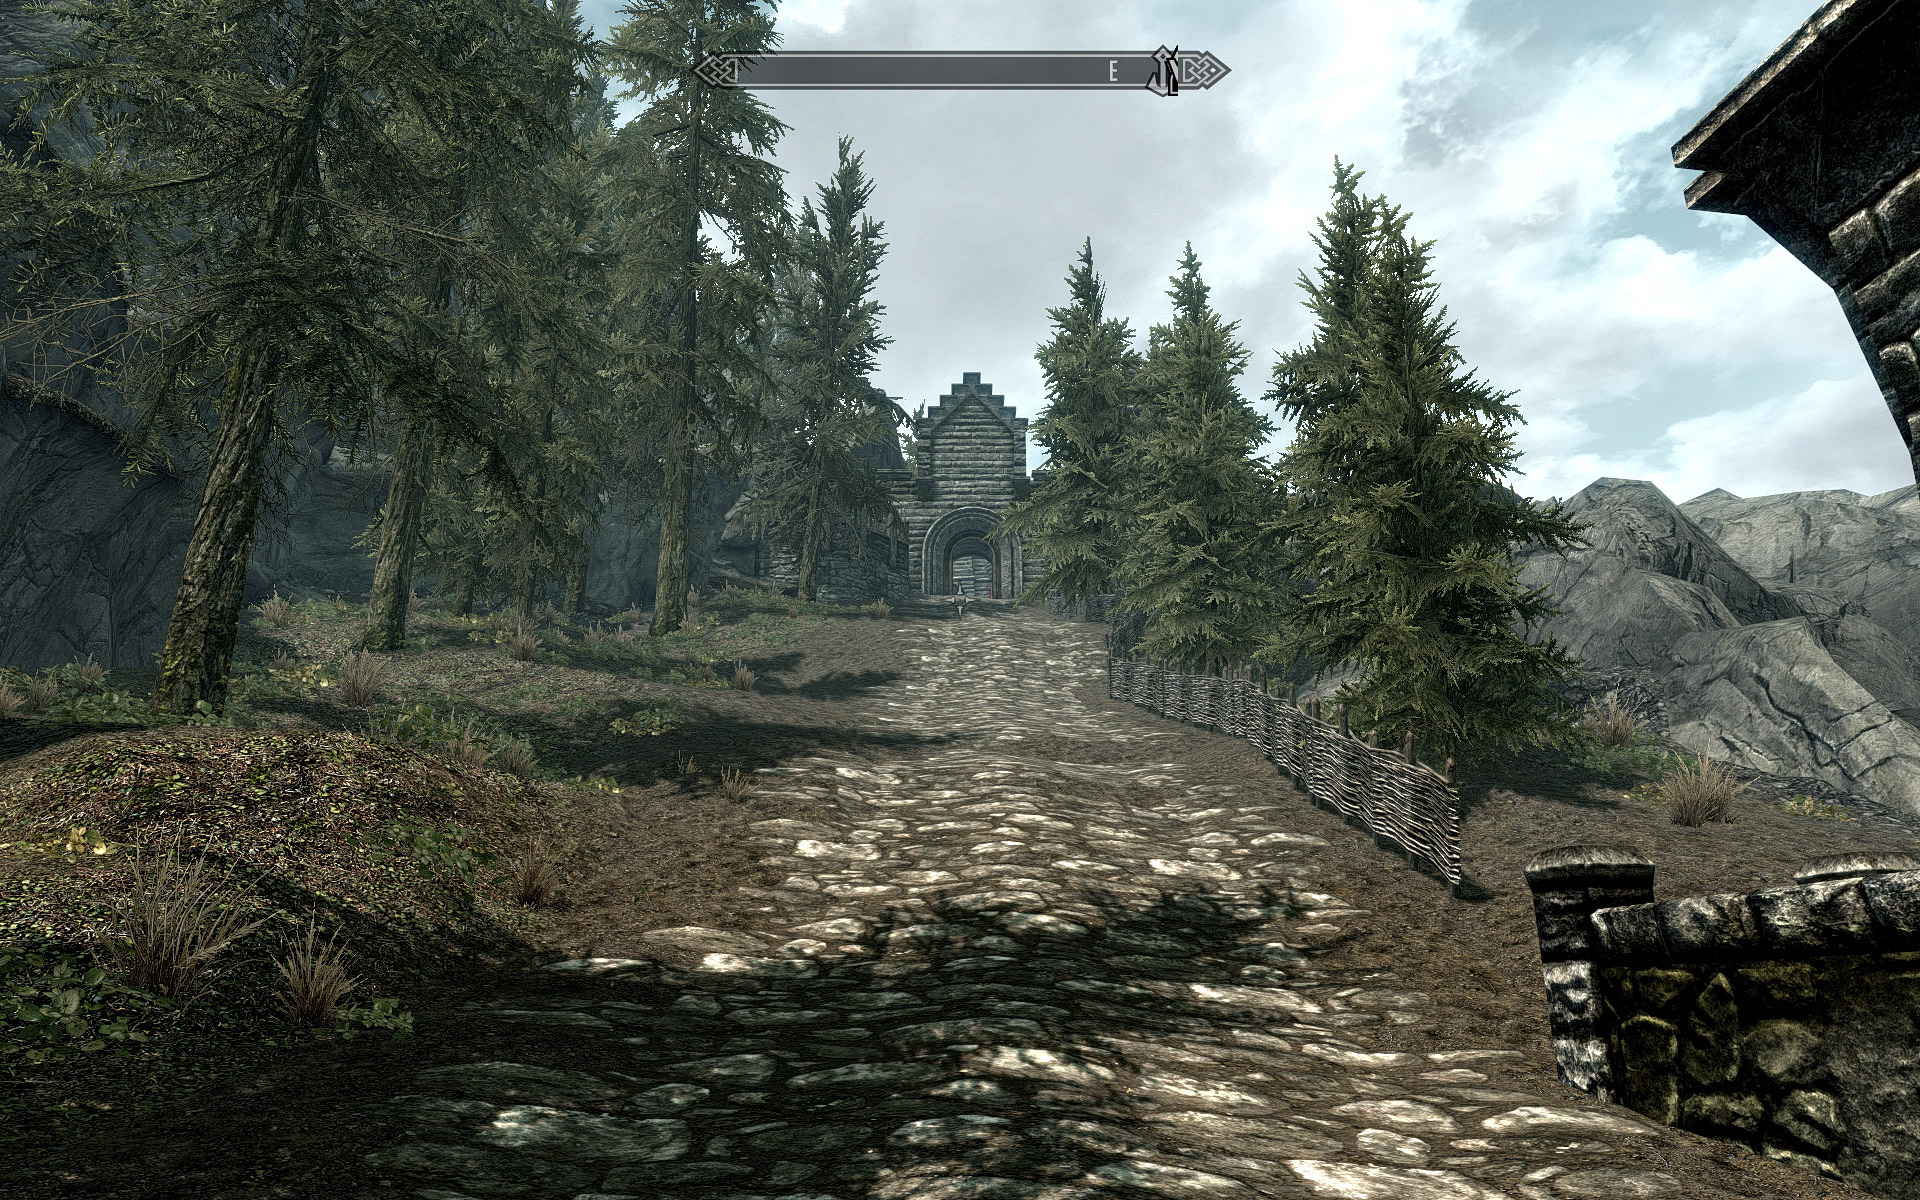
3. First we'll tick the SMAA Anti-aliasing box, and in the Category details pane at the bottom of the Configurator, we can highlight each component of SMAA and adjust its value in the box just beneath to alter the appearance of SMAA. In this case, we'll leave these at their defaults, and click the Save New Config button to save this change. We can now launch Skyrim to view the SMAA, implemented by SweetFX automatically, and we can toggle SweetFX effects on or off during the game using the SCRLK key by default. This key binding can be reconfigured if you wish by clicking the SweetFX Injector Settings button.
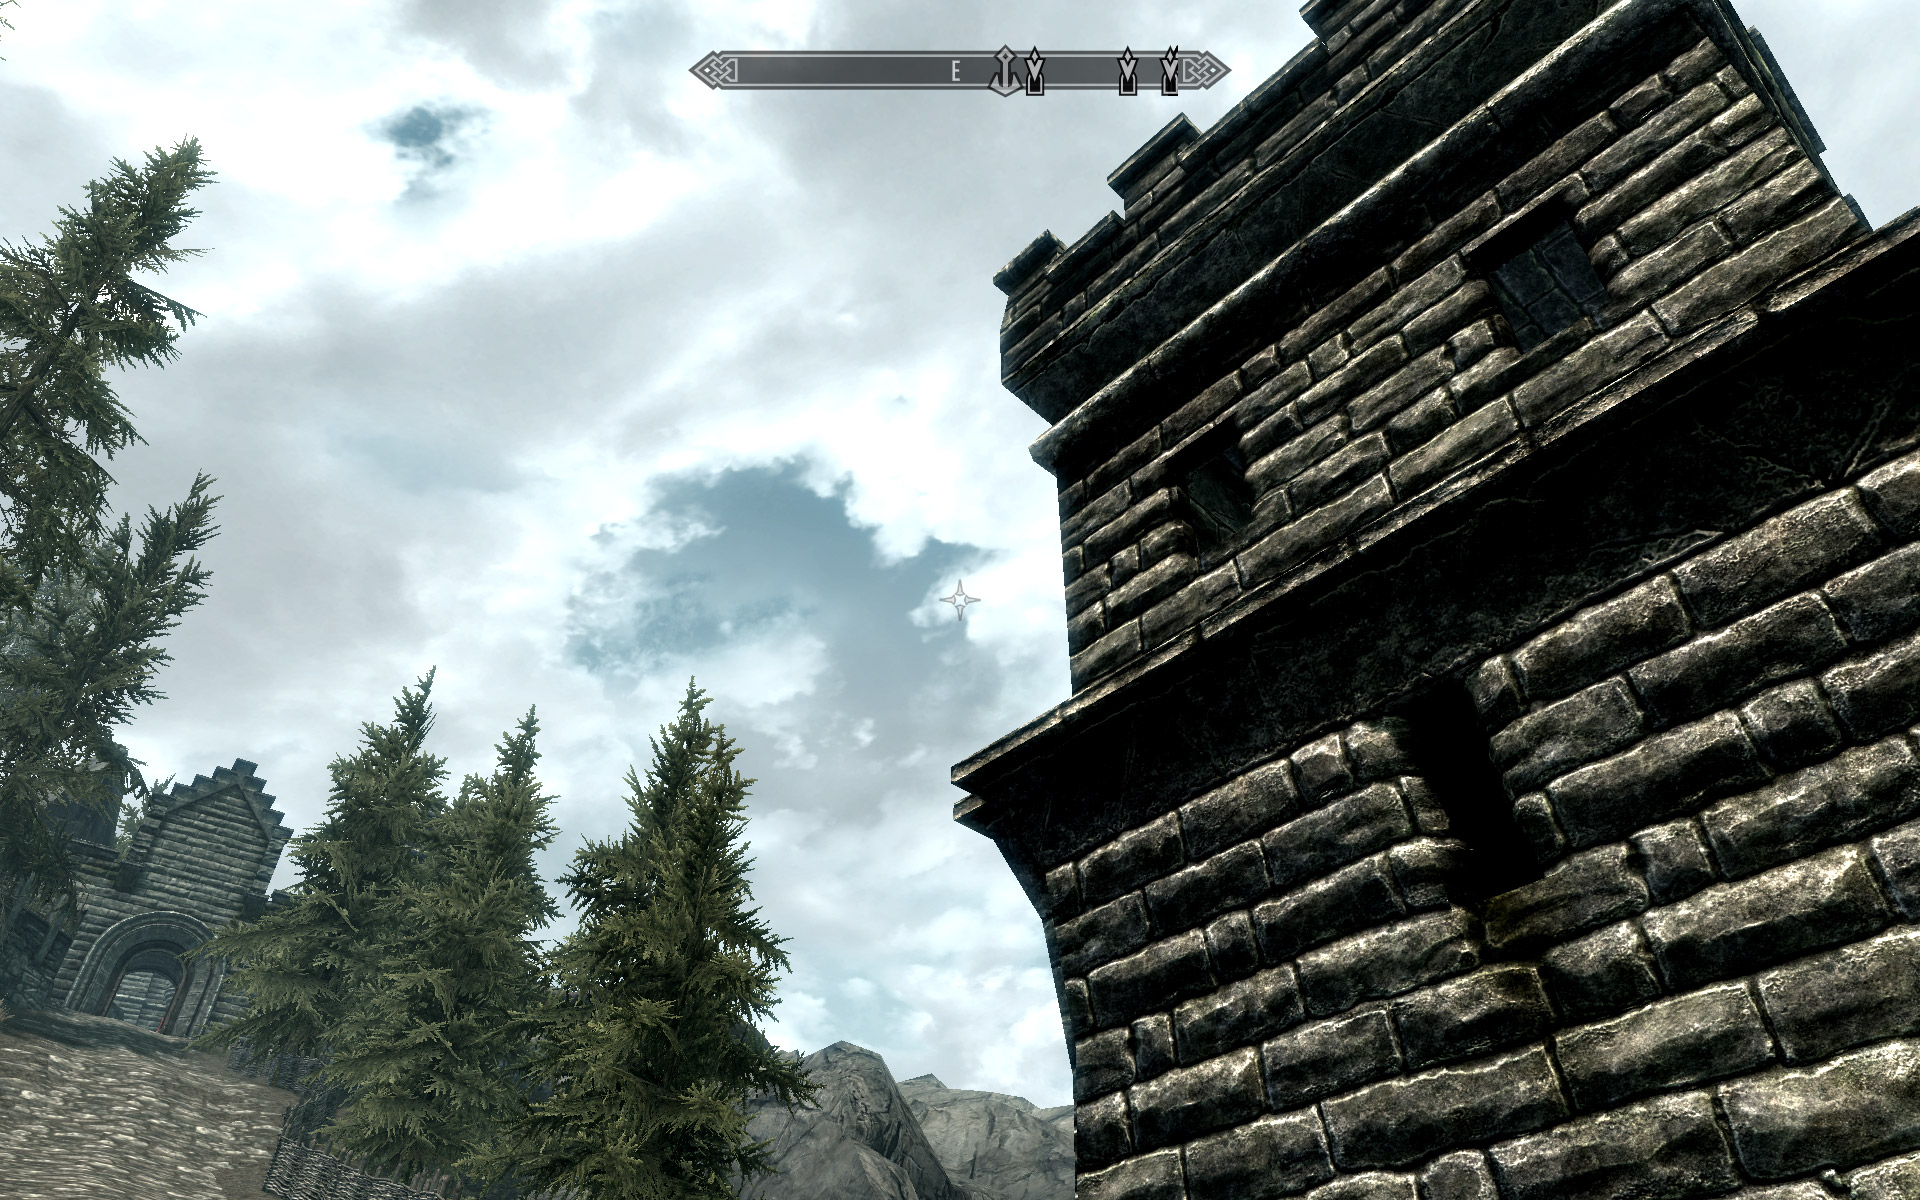
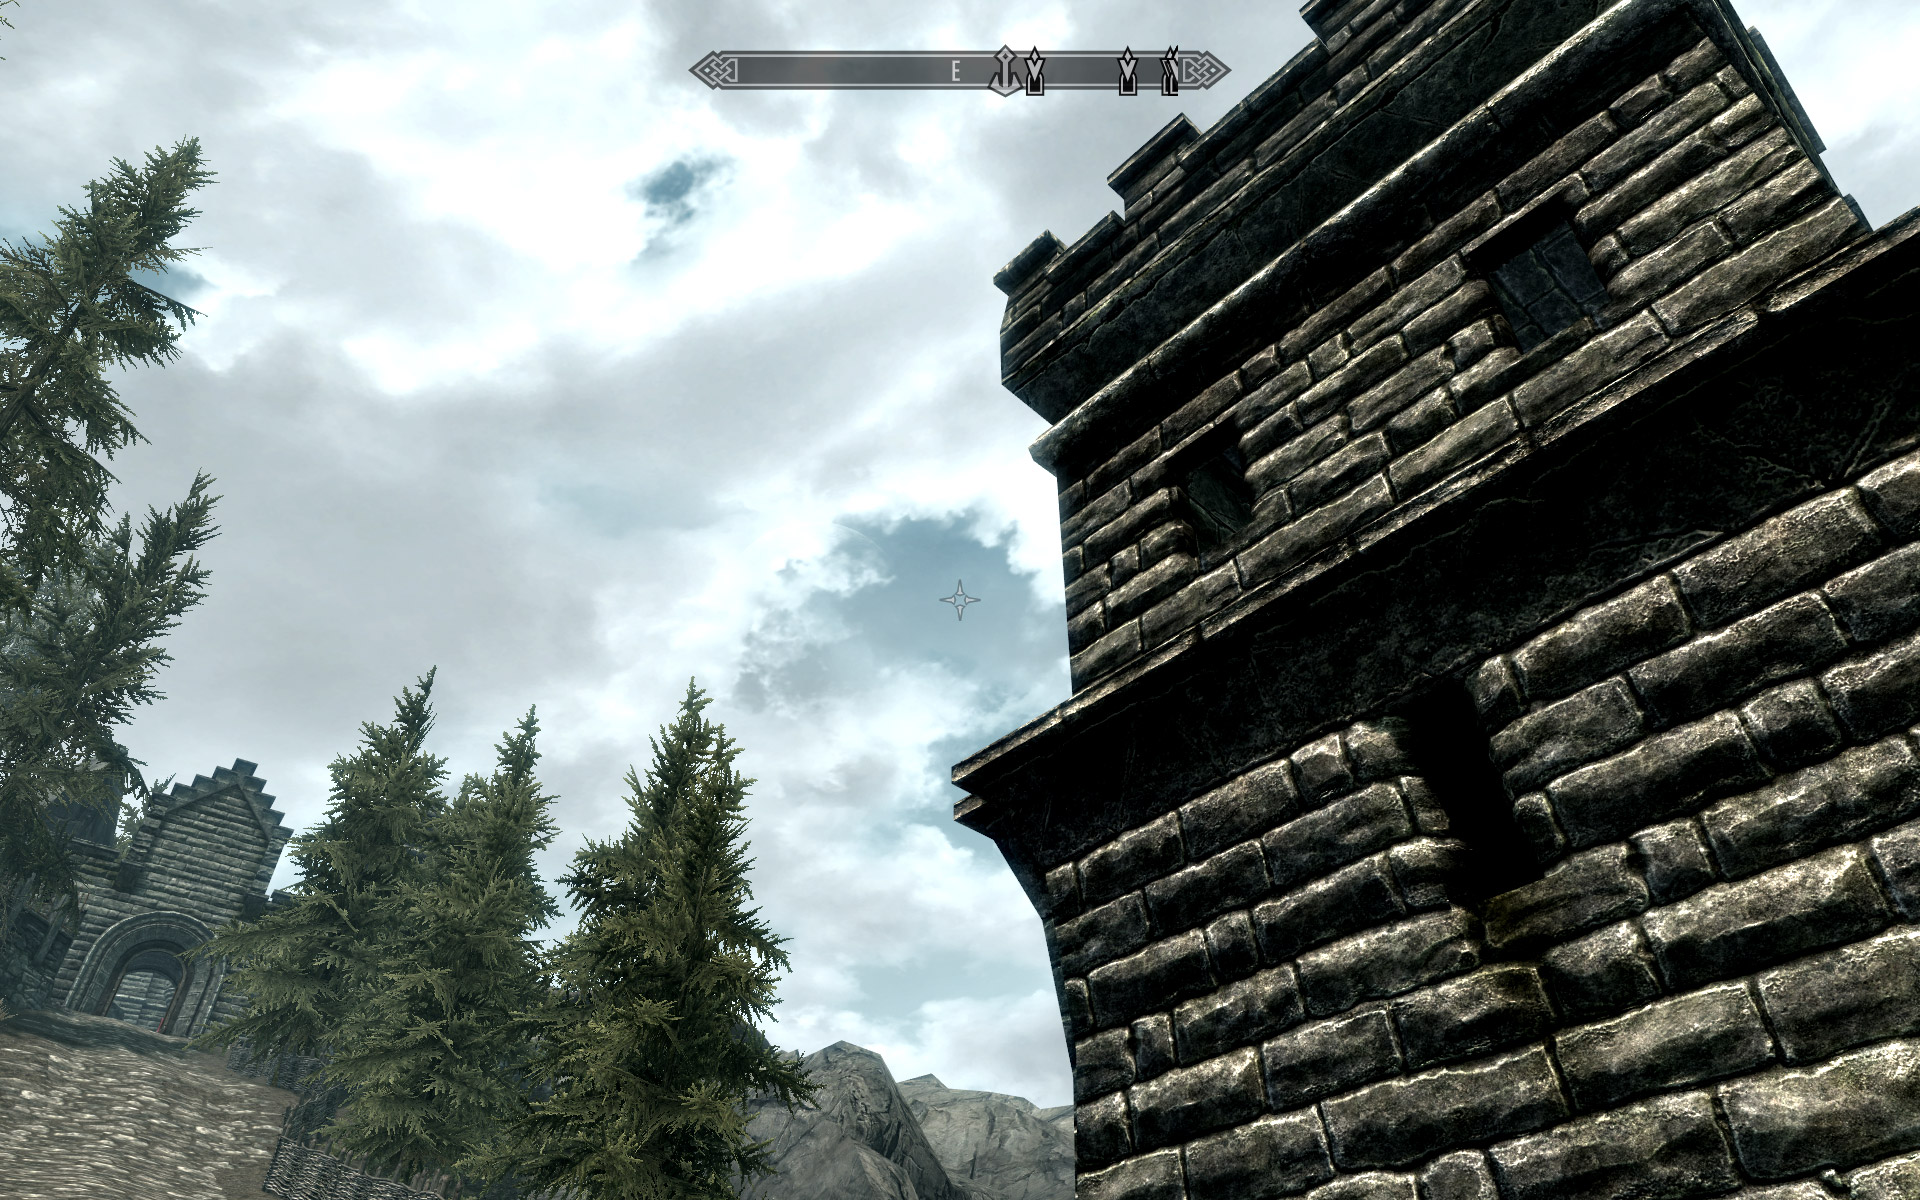
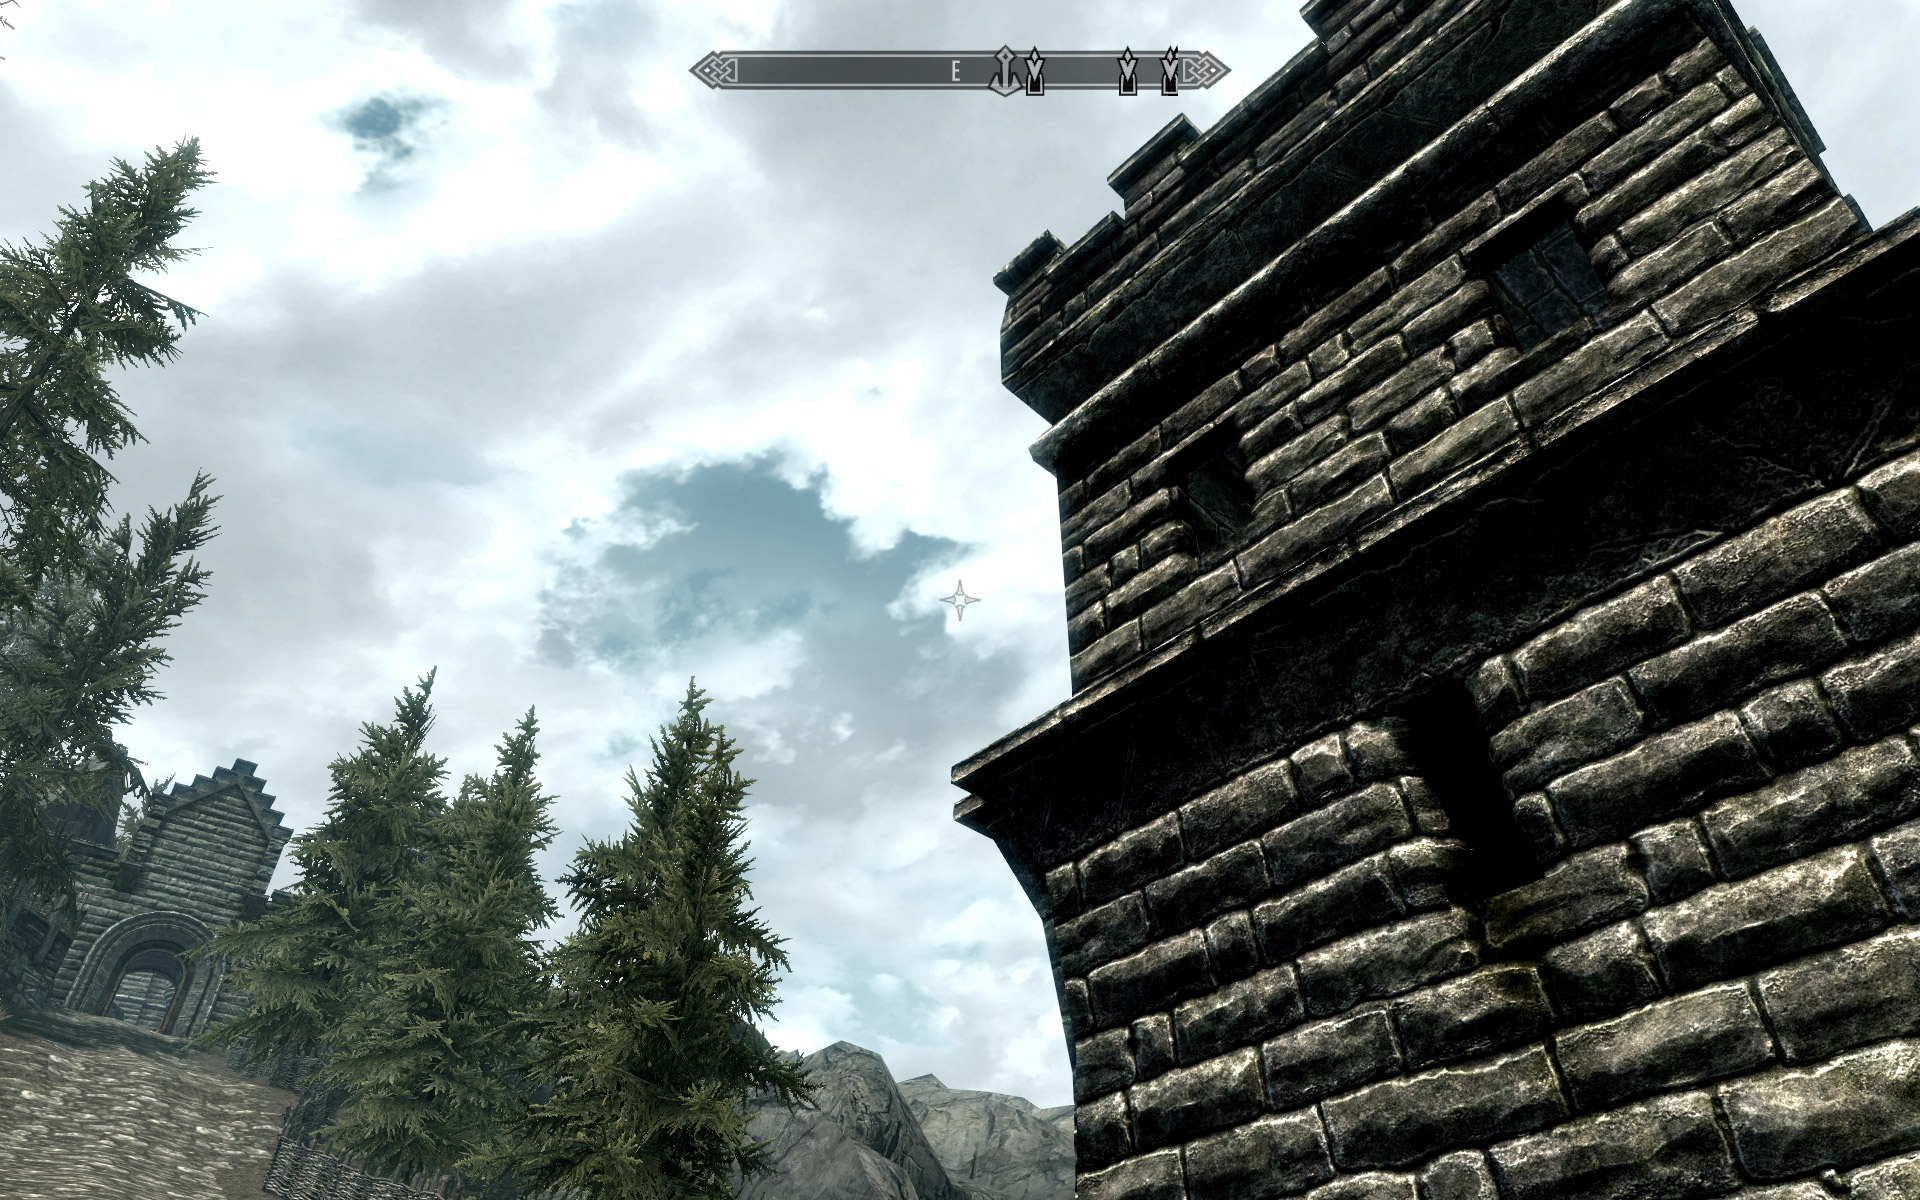
SMAA (Subpixel Morphological Antialiasing) is a very efficient form of shader-based Anti-aliasing, similar in principle to FXAA (covered on page 5), but without the noticeable blurring that FXAA introduces. As the screenshot comparison above shows, SMAA fares quite well against 8x MSAA in Skyrim in terms of smoothing out most jagged lines, most prominently the line of the wall just to the right of the crosshairs. But as an added bonus, it also helps smooth out transparent textures such as foliage, similar to Transparency Anti-aliasing (covered on page 6). It does all this at a fraction of the performance cost of 8x MSAA. If you want a cheap, effective form of Antialiasing, SMAA is highly recommended. Note that you may have to disable any in-game AA for SMAA to work.

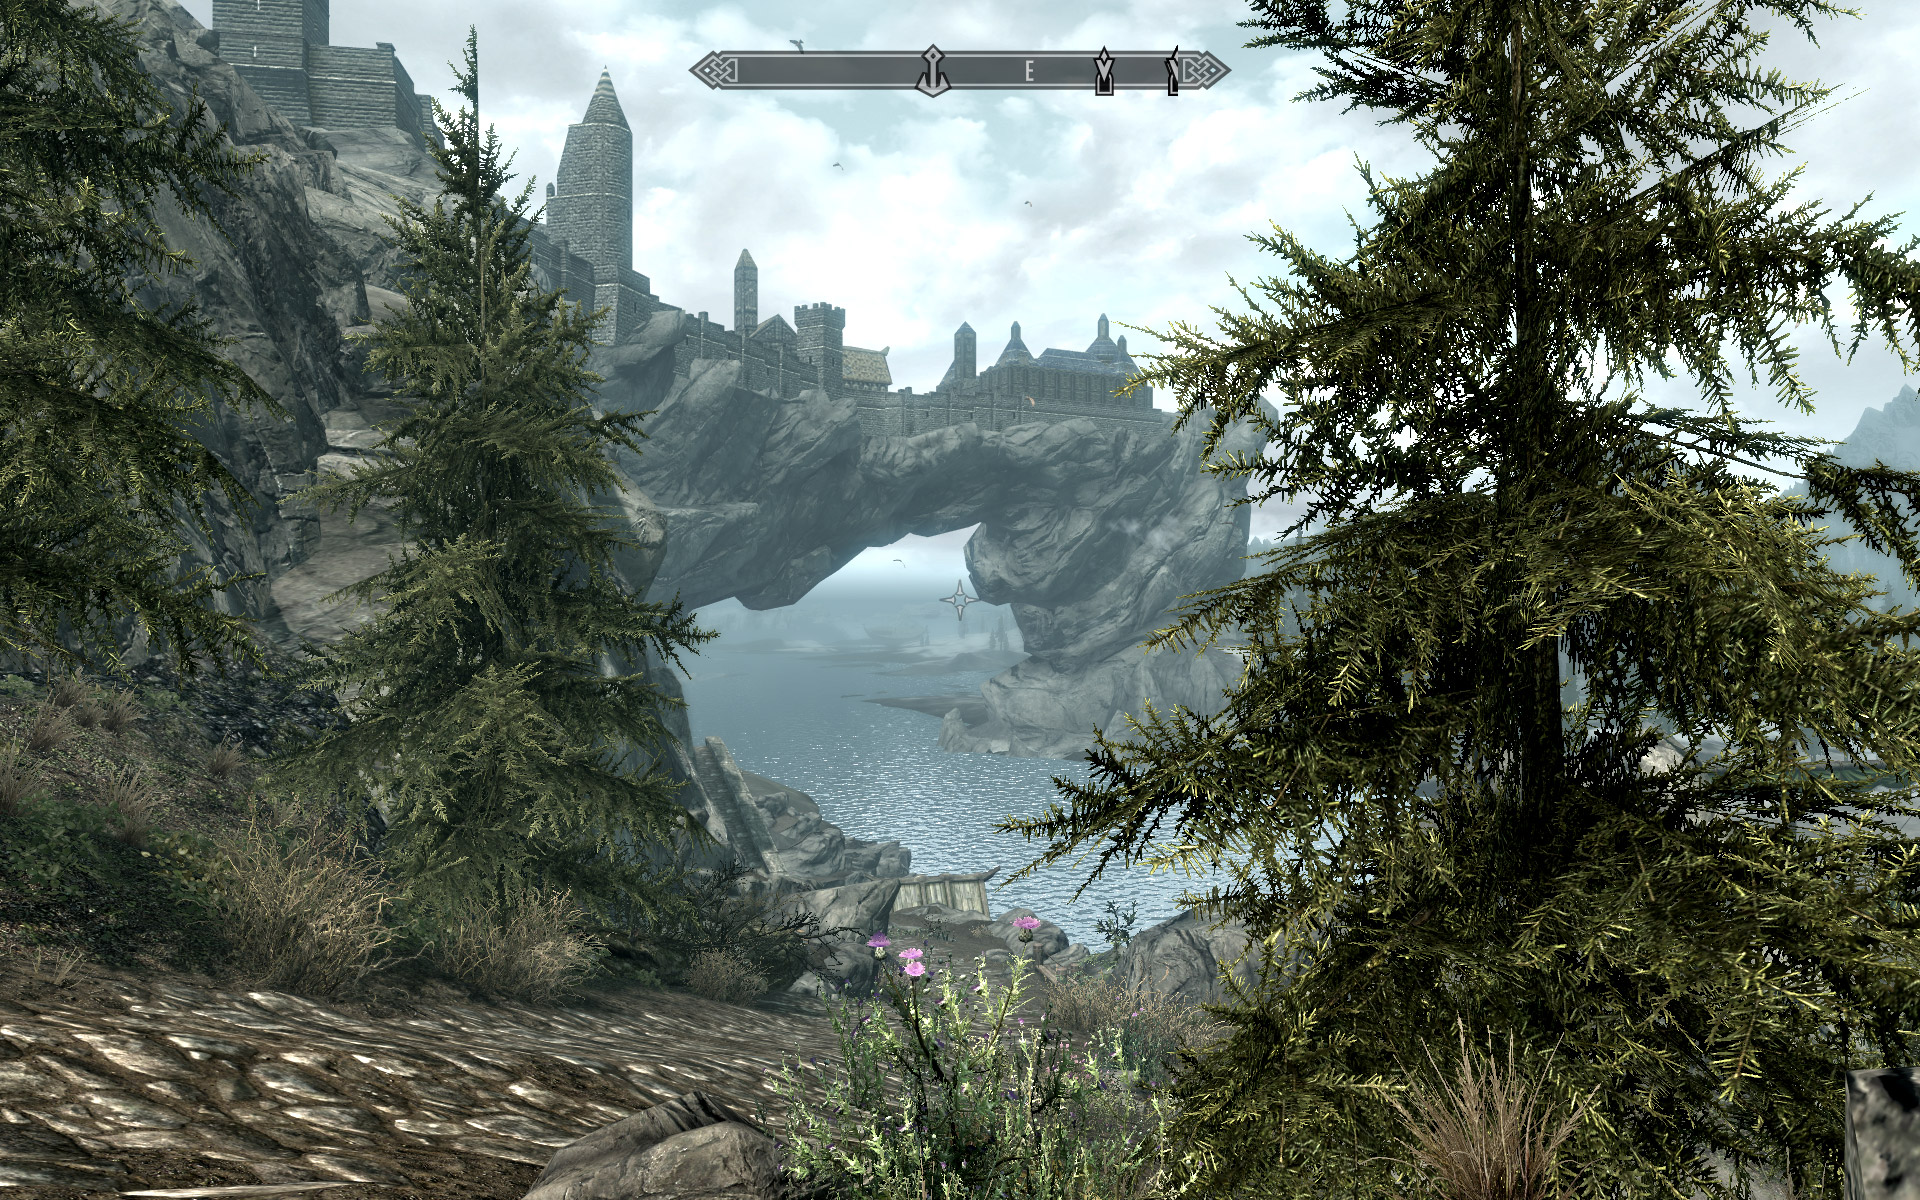
4. The next effect we'll enable in the SweetFX Configurator is image sharpening by ticking the LumaSharpen box. In the Category details pane underneath, I'm going to select the sharp_strength parameter and assign the maximum value of 3.00 to it, then click the Save New Config button again. I'm using the maximum value for sharpening strength so as to give a clearer distinction between when it's off and when it's on in the screenshot comparison provided above. In practice, lower values are recommended since too high a value makes the game world look unnaturally brittle, for want of a better description. LumaSharpen in SweetFX does not actually add more detail to textures, like the various Texture Filtering settings (See page 7), or raising in-game Texture detail settings do; LumaSharpen is a form of edge enhancement that artificially increases edge contrast. However, if used in moderation it can increase the perception of clarity, making the game world seem more crisp and detailed.
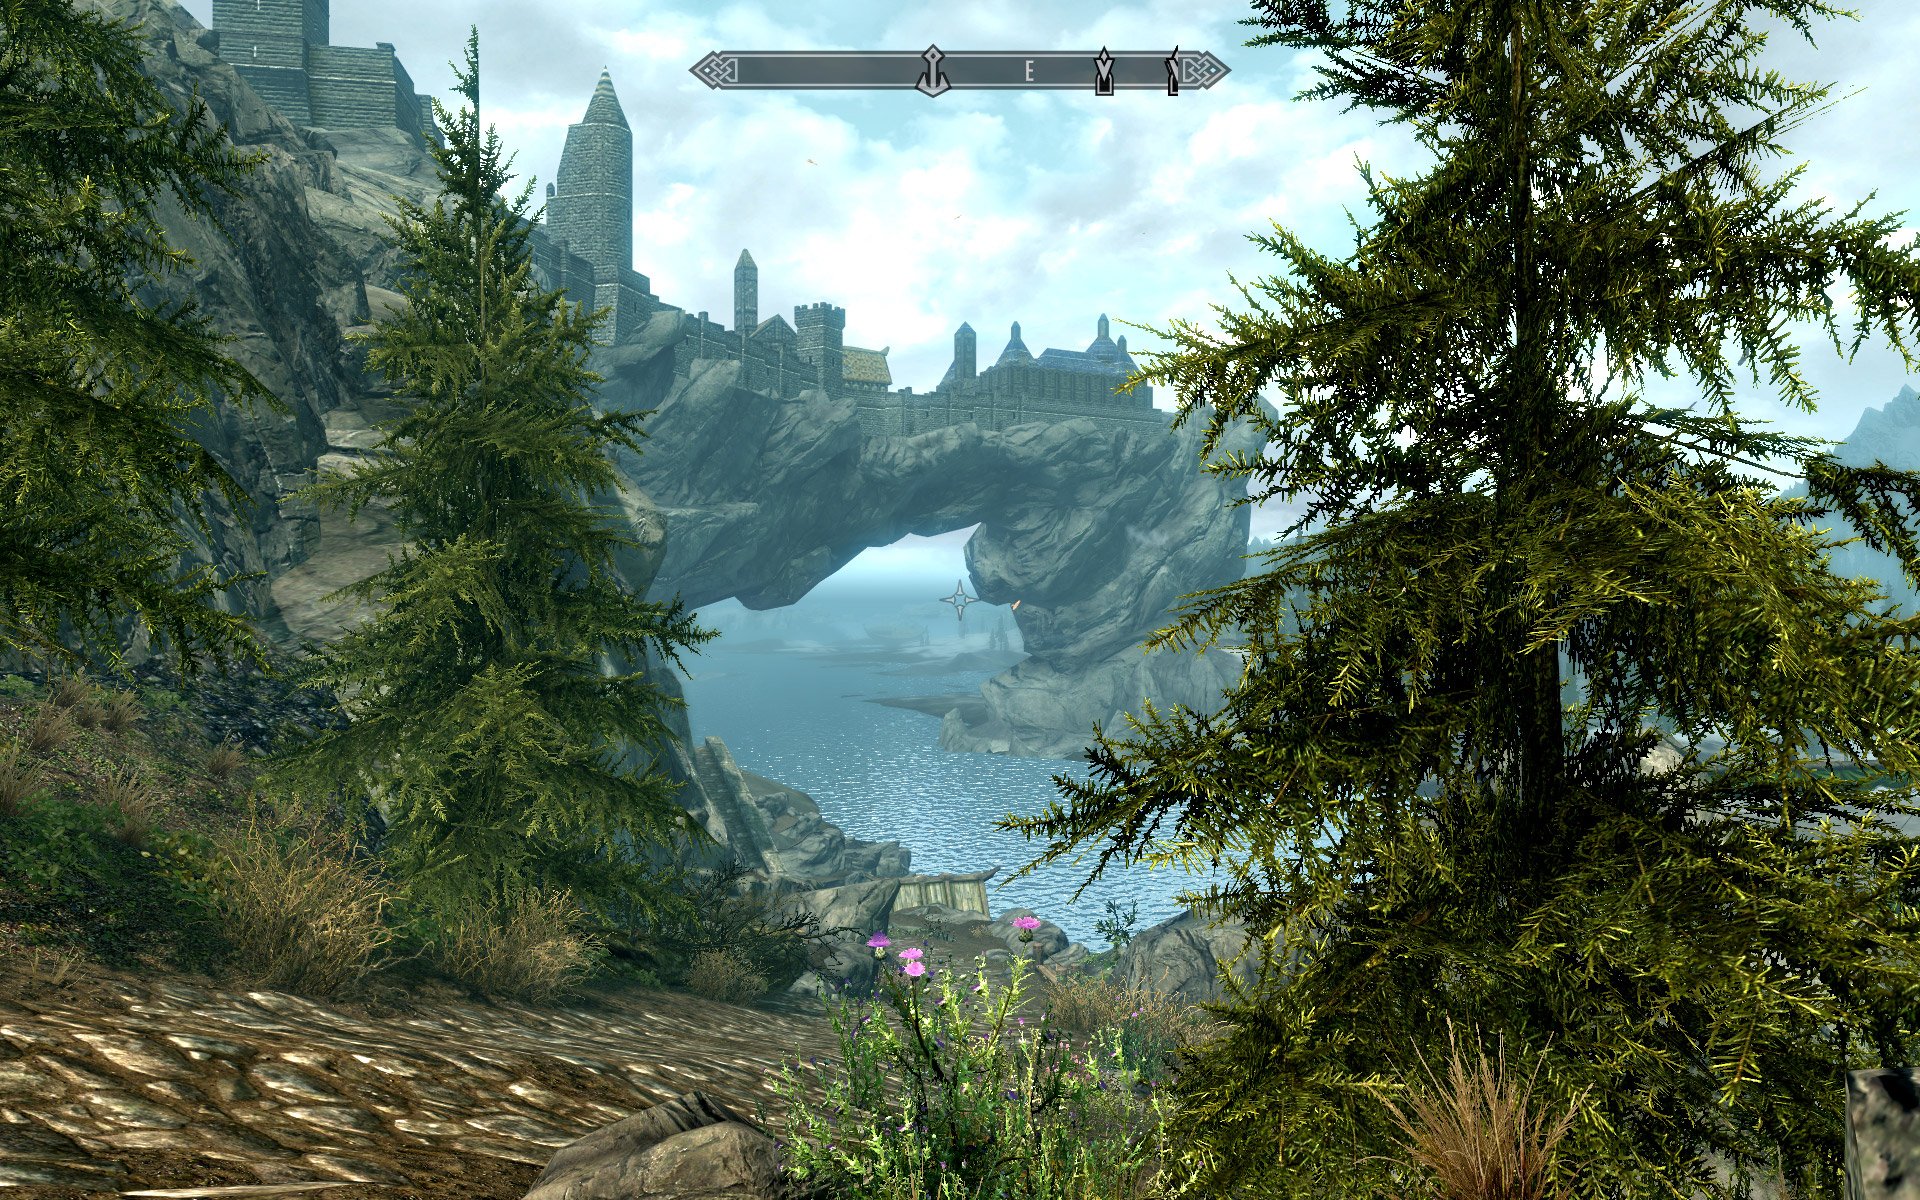
5. Finally, we'll increase color saturation by ticking the Vibrance box in the SweetFX Configurator, and in the Category details pane underneath, I'm going to select the Vibrance parameter and assign the maximum value of 1.00 to it - once again purely to highlight the effect for comparison purposes - then click the Save New Config button. The screenshot comparison above demonstrates the richer colors when Vibrance is in effect, though just how rich the colors look on your screen also depends on your monitor and its settings.
Having configured the effects, SweetFX Configurator can now be closed; it doesn't need to run in the background for SweetFX effects to be applied. As long as you click the Save New Config button each time you make a change, the settings are stored and automatically implemented via the files placed in the game's directory when we added a new game in Step 1 above. To remove SweetFX effects from a game, highlight the game's name in the Game list in SweetFX Configurator and click the Remove SweetFX button.
Unfortunately, a major drawback of the current stable version of SweetFX included with the SweetFX Configurator is that it won't work under all circumstances, particularly in newer DirectX 10/11 or 64-bit games. This makes the instructions above more suitable for older DX9-based games. If you're uncertain about whether SweetFX will work in a certain game on your system, refer to the SweetFX Settings Database. The database provides user feedback as well as custom user SweetFX configurations (Presets) you can download as .TXT files, and import using the SweetFX Configurator by clicking the Save / Load Configuration button, then clicking Import Preset.
Luckily, a newer Beta version of SweetFX is out, with support for OpenGL, DirectX 10/11 and 64-bit games. It comes as part of a new, more comprehensive post-processing injector called ReShade. Using ReShade is more complex than using the SweetFX Configurator, but the underlying method is much the same.
Update: The instructions further below refer to an older version of ReShade. A newer version is now available which comes with a configuration utility to make things easier. See this Fallout 4 AA Tweaks page for a detailed example of how to use the new ReShade to implement changes on a 64-bit DirectX 11 game.
Download the ReShade + SweetFX package from the link above, extract the contents, and launch the ReShade Setup.exe file. Once again we'll run through an example to illustrate how to configure various effects using ReShade. In this example, I will use the UPlay version of Watch Dogs:
1. Upon launching the ReShade Setup.exe file, a Welcome window appears. Here we need to click the Select Game button, and find the main game executable. So we navigate to the C:\Program Files (x86)\Ubisoft\Ubisoft Game Launcher\games\Watch_Dogs\bin directory, select watch_dogs.exe and click Open. ReShade will attempt to detect the game's API, but in this case it fails to do so, so I manually select the Direct3D 10/11 option, as I know Watch Dogs is a DirectX 11 game. If in doubt, a web search should clarify a game's API.
2. With the game executable and API selected, the Select Game button turns into a Run WatchDogs button. Clicking this button launches Watch Dogs, but first a ReShade information prompt appears, to which I click Yes to continue launching the game.
3. Once the game has started loading, a ReShade overlay appears confirming that ReShade is in effect, and importantly, informs me that the default key to toggle ReShade effects on or off is Scroll Lock (SCRLK). During the game, when using SCRLK, ReShade will provide a text overlay at the top left of the screen to inform you whether you have enabled or disabled the ReShade effects each time you press the key.
4. Now here's the tricky part. ReShade doesn't have a Configurator interface, so to implement and alter various SweetFX effects, we must go to the SweetFX folder that ReShade has automatically created under the directory which holds the game executable. In this case, we need to go to C:\Program Files (x86)\Ubisoft\Ubisoft Game Launcher\games\Watch_Dogs\bin\SweetFX. Here we open SweetFX_settings.txt with a text editor like Windows Notepad. This text file is formatted similar to the SweetFX Configurator - the main effects categories are under the area at the top with the Choose Effects heading, and each effect category's more detailed settings are provided in appropriately labeled sections further below in the same file.
Note: You may not initially be able to save any changes to the SweetFX_settings.txt file while it resides under the game directory due to Windows file permission issues. Copy the file to an unprotected folder such as your \Downloads, edit and save it there, then copy it back and overwrite the version in the game directory.
5. Watch Dogs already has its own in-game SMAA setting, so let's implement and adjust image sharpening. First we go to the following line under Choose Effects:
#define USE_LUMASHARPEN 1 //[0 or 1] LumaSharpen : Sharpens the image.
The value 1 shown before the // means it's already on; as with older versions of SweetFX, ReShade automatically enables certain effects by default. Had the value been 0 (off), we would have had to change it to 1.
Next, to adjust the amount of sharpening applied, we scroll down the file to the section headed LumaSharpen Settings, and look at the following line beneath it:
#define sharp_strength 0.65 //[0.10 to 3.00] Strength of the sharpening
The value before the // shows the current strength of 0.65. I'll change the 0.65 to 3.00, once again to make the effect more noticeable in screenshot comparisons. I'll save and close the SweetFX_settings.txt file, and the next time I launch Watch Dogs normally (no need to use the ReShade launcher now), the sharpening is in effect.
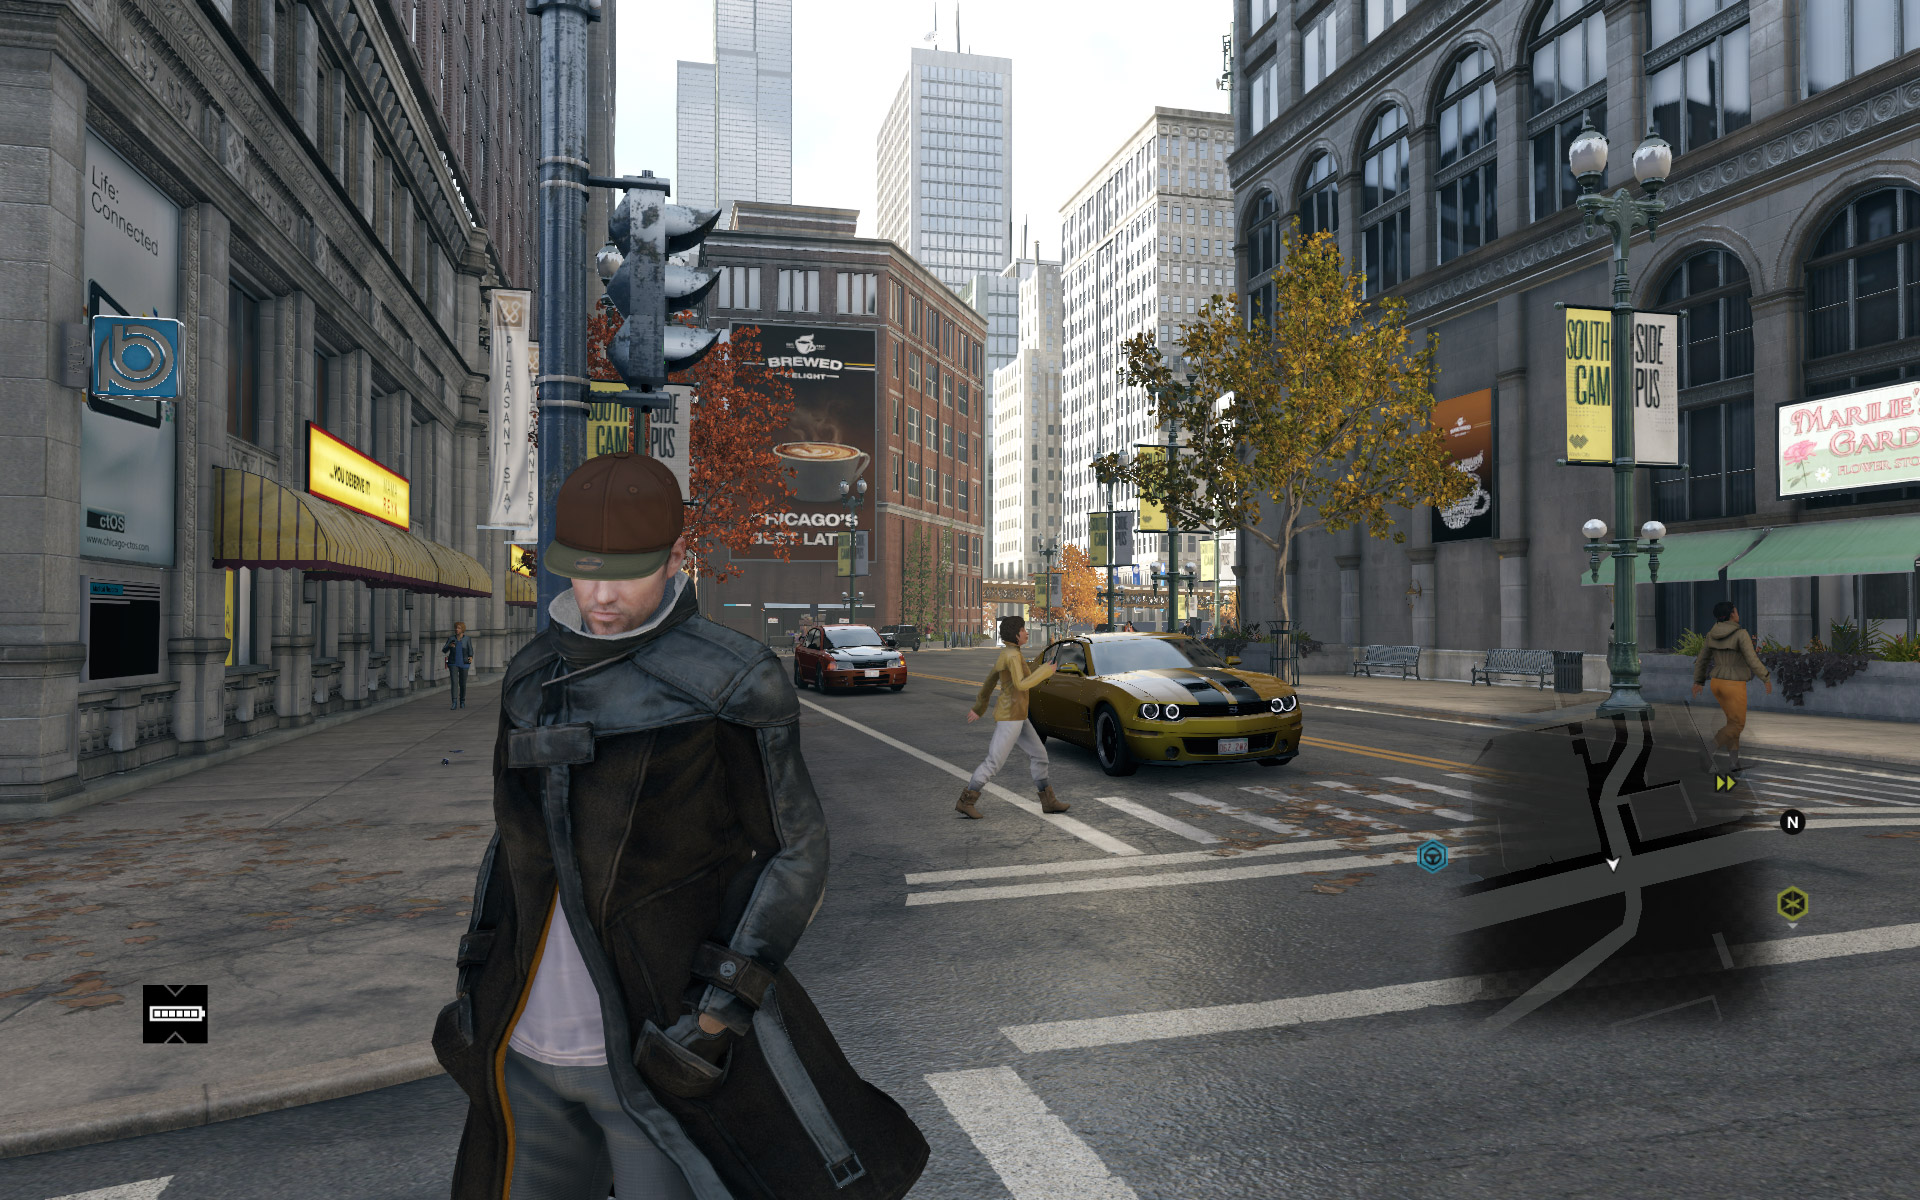
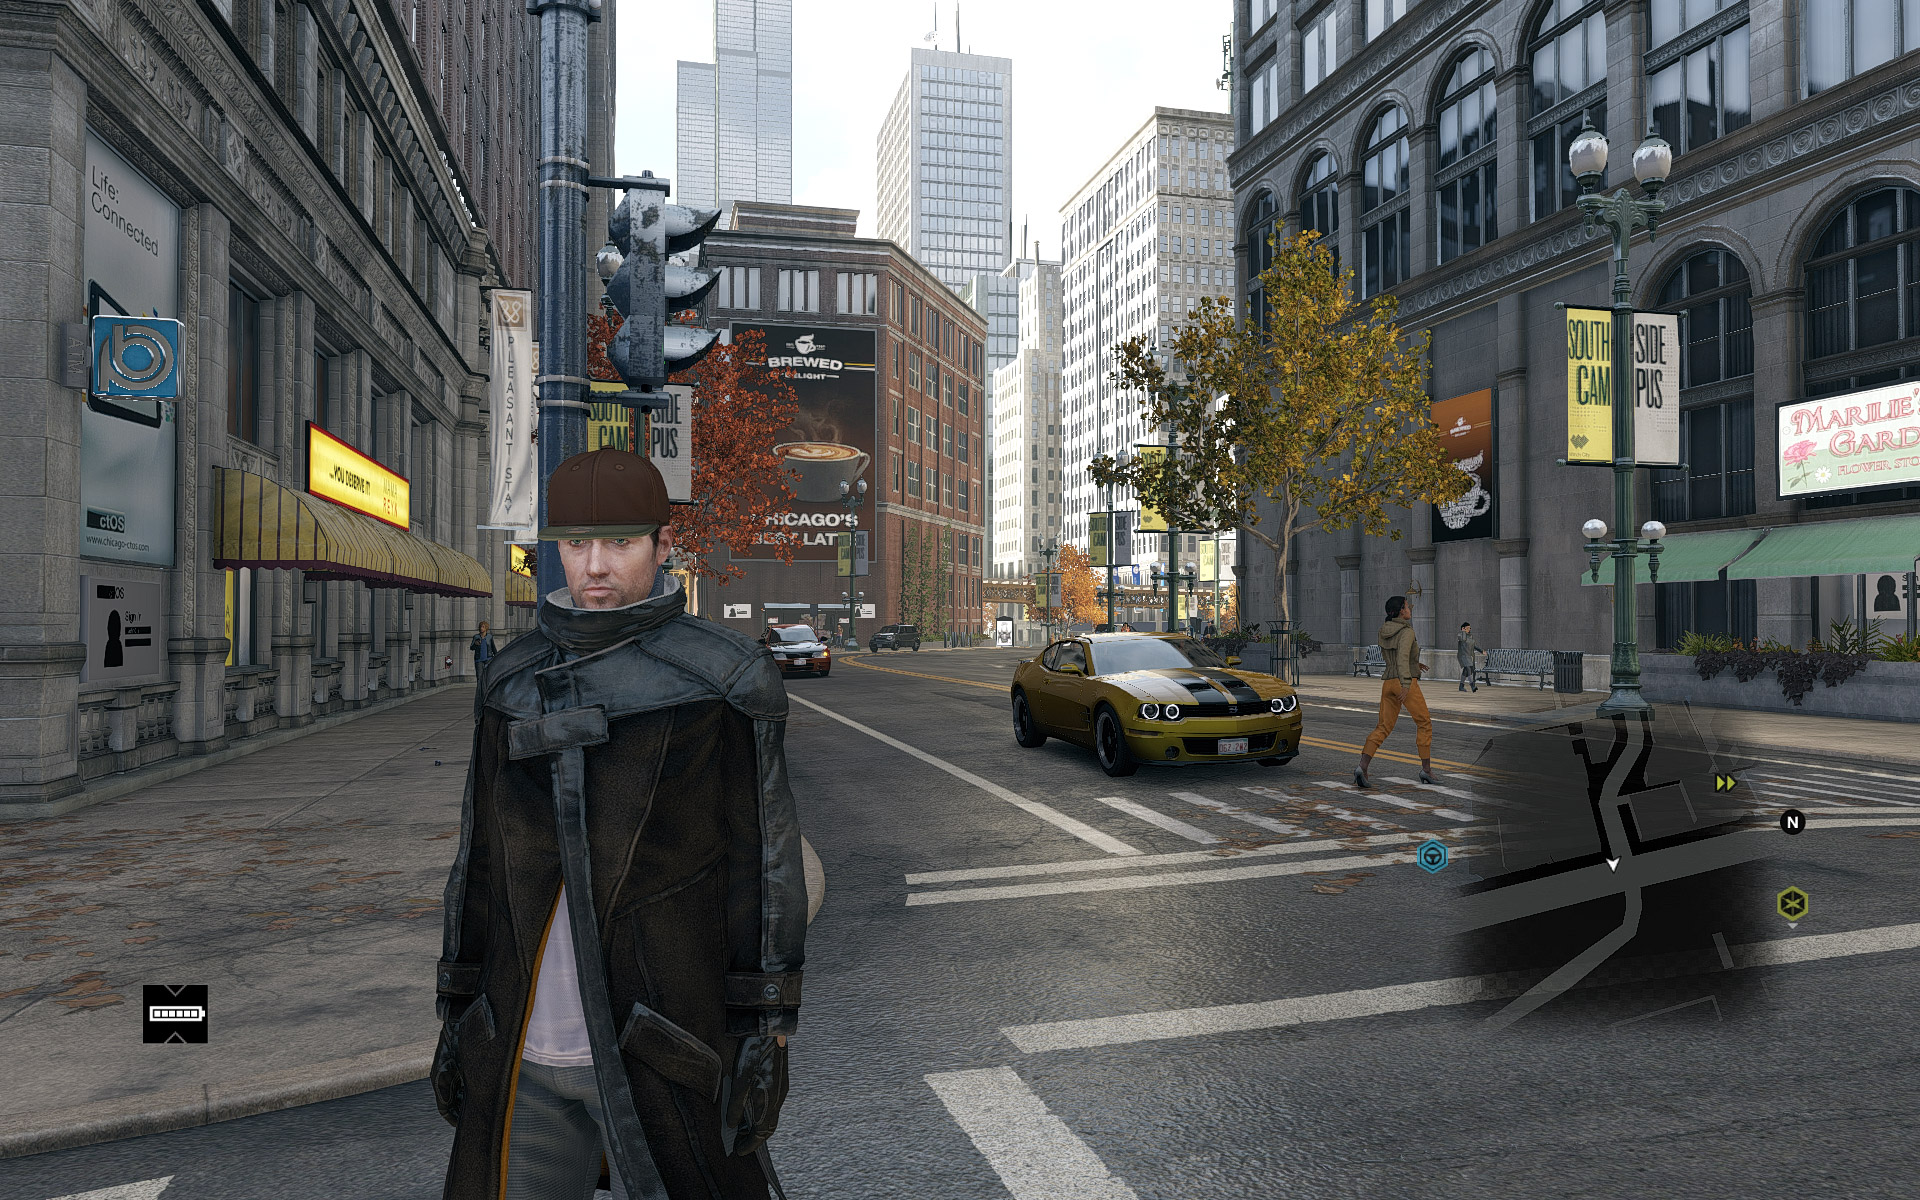
The screenshot comparison above shows that ReShade is clearly working in a DirectX 11 game on Windows 8.1, and that there is a noticeable difference when sharpening is applied.
6. Now to alter one more ReShade setting as another example, we'll add Bloom. This essentially makes light sources give off a stronger, slightly hazy form of light. In the SweetFX_settings.txt file, I'll first go to the following line:
#define USE_BLOOM 0 //[0 or 1] Bloom : Makes bright lights bleed their light into their surroundings (relatively high performance cost)
I'll change the 0 before the // to a 1 to enable Bloom, and scrolling down the file to the Bloom settings section, I'll adjust one of the bloom parameters to fine tune the way bloom effect looks in the game:
#define BloomPower 1.446 //[0.000 to 8.000] Strength of the bloom
I'll change the 1.446 to a 2.500, increasing the brightness of many light sources in the game.
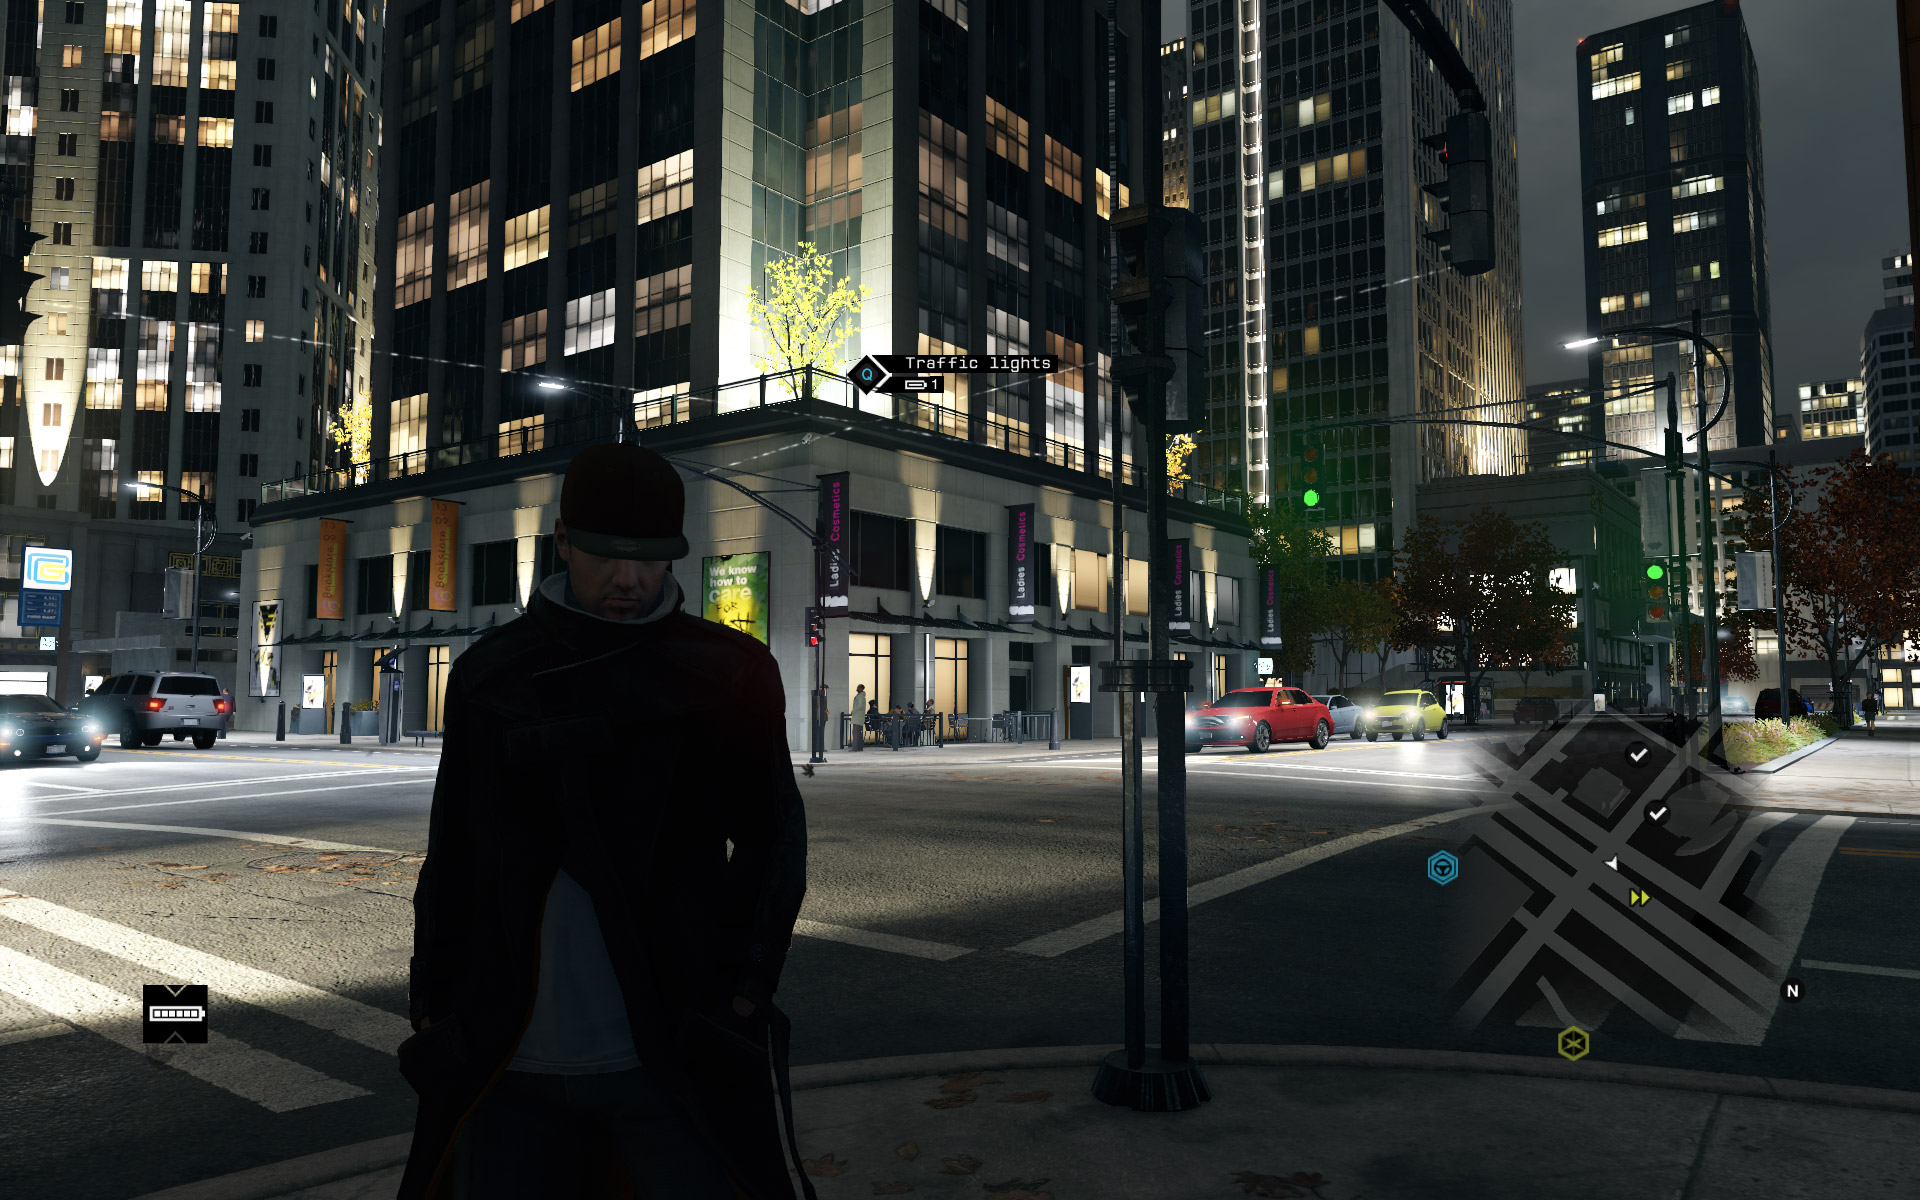
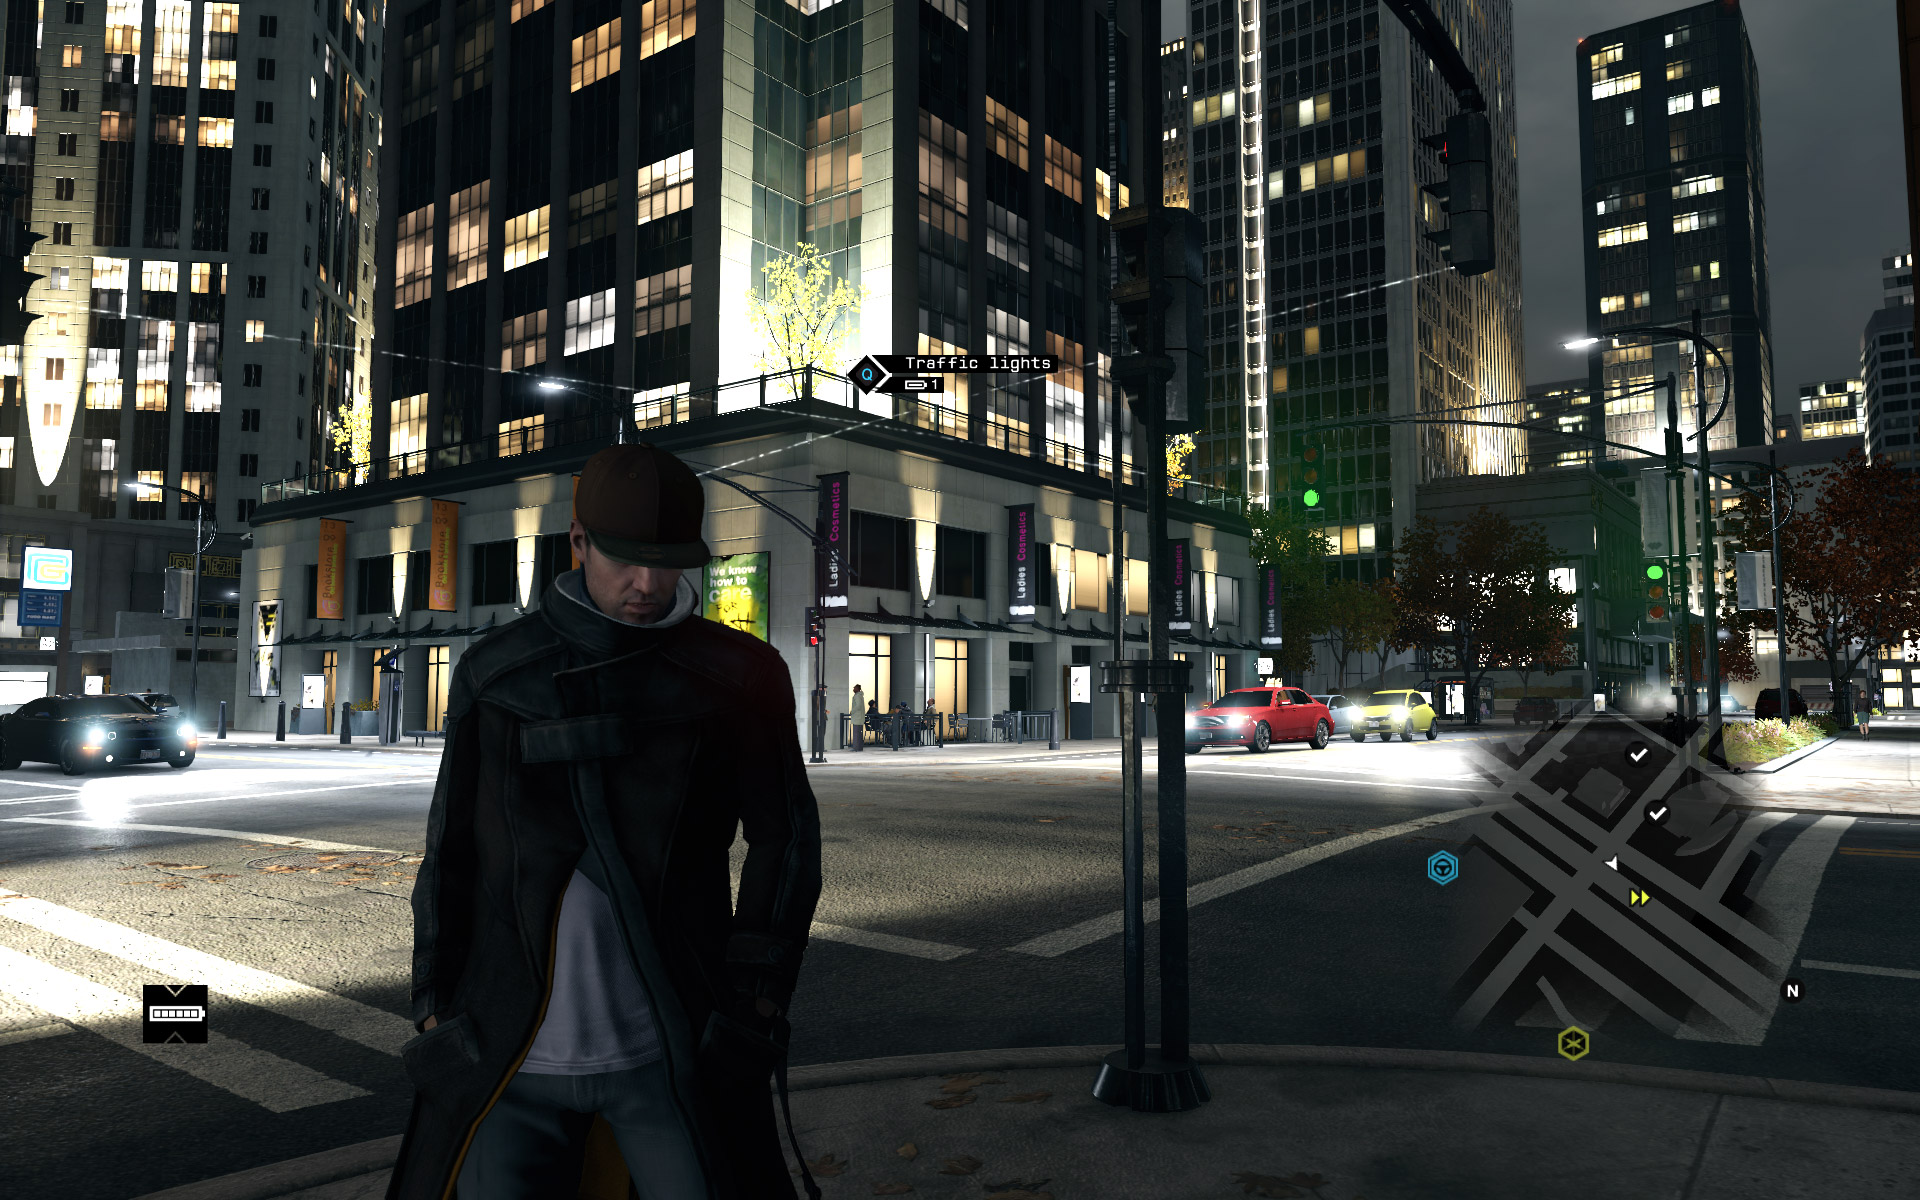
The screenshot comparison above once again shows that ReShade is clearly working to create a difference in visuals, in this case implementing obvious light bloom on most of the light sources in the scene.
There are of course plenty more ReShade settings to play around with. Remember that once you're done editing the SweetFX_settings.txt file, save the changes and launch the game as normal - your ReShade settings are automatically applied, and you can toggle them on or off at any time during the game by pressing the Scroll Lock (SCRLK) key by default. You can change this keybinding, along with enabling/disabling some of ReShade's other general features, by editing the Global_settings.txt file found in the same directory as SweetFX_settings.txt. Lastly, as with the original SweetFX, ReShade effects are not applied if a program which creates an on-screen display (overlay) is running. If ReShade effects aren't being applied, the likely cause is a conflict with one of your background programs, so disable them.
SweetFX/ReShade is well worth experimenting with to see if it can enhance your favorite games. Most of the effects have a negligible performance impact as they're post-processing based and don't require any complex GPU-intensive changes to the rendering chain.
Nvidia Inspector
Possibly the most popular and comprehensive GPU tweaking utility at the moment, Nvidia Inspector is a free tool which exposes a large number of the settings contained in the GeForce driver for user customization. While many of the settings can already be altered using the Nvidia Control Panel, as covered earlier in this guide, some of the settings and options are not available in the NVCP, and it is these which we will focus on here.
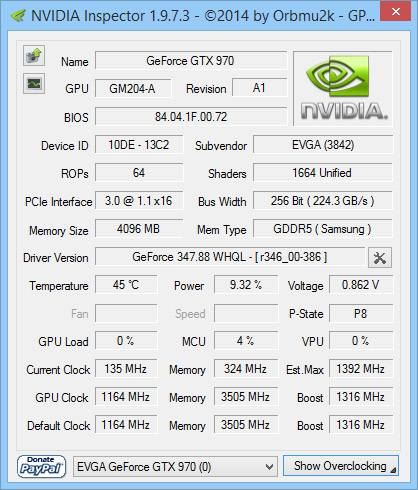
Nvidia Inspector does not require installation - simply extract the files from the downloaded archive and launch the nvidiainspector.exe file. The informational interface which opens looks similar to the GPU-Z utility we examined earlier in the guide. From here you can access Nvidia Inspector's three most useful features: overclocking controls, by clicking the Show Overclocking button at the bottom right; hardware monitoring, by clicking the small Sensor Monitoring (graph icon) button at the top left; and driver settings, by clicking the small Driver Profile Settings (crossed screwdriver and wrench icon) button at the far right of the Driver Version field. We examine this last feature in detail, as the other two are similar to the features of other utilities we covered earlier.
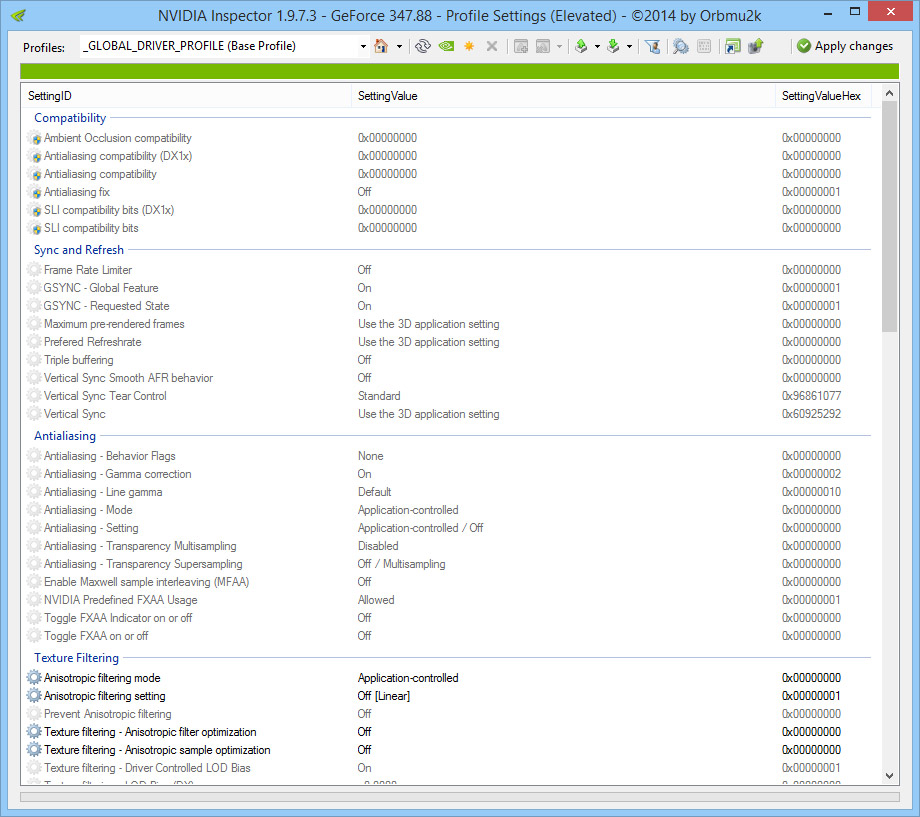
Once you click the Driver Profile Settings button, a new window launches, and after a moment loads up your current Global driver settings, as set in the Nvidia Control Panel. Keep in mind that Nvidia Inspector is completely reliant on the GeForce driver to provide its data and functionality. The extra settings in Nvidia Inspector are simply existing GeForce driver features that are hidden in the standard NVCP. In any case, as you can see there are many settings here - most are covered in the Nvidia Control Panel section of this guide. There are too many additional settings and options for this guide to cover in detail, so we'll look at several of the most useful new settings and options below.
Before changing any settings using Nvidia Inspector, first select a profile to which the alterations will apply. This is done using the Profiles drop-down box at the top left. Similar to the NVCP, you can choose to apply a change globally (_GLOBAL_DRIVER_PROFILE), or only to a particular game (type the game's name in the box, or scroll through the list to find the game). The best way for me to explain and demonstrate Nvidia Inspector's main features is to run through an example of modifying a specific game profile with the utility.
In this example, I'll use the older game Dishonored, as in my experience it benefits from several of Nvidia Inspector's settings. So first we'll select Dishonored in the Profiles box at the top.
Frame Rate Limiter: Since Dishonored is an older and not particularly strenuous game, it typically runs at very high framerates, even at maximum settings. For example it may reach over 130FPS on my system, and on my 60Hz monitor this simply leads to a lot of extra tearing, larger framerate fluctuations, extra power usage and thus higher GPU heat, and potentially higher fan noise or coil whine, for no real benefit. One option is to enable VSync, as covered under the Vertical Sync setting in the Nvidia Control Panel section, which will cap the FPS to the refresh rate, but VSync can also create noticeable input lag. Furthermore, in games where the FPS periodically drops below the refresh rate when VSync is on, it also generates large drops in framerates. If you don't mind a bit of tearing, one method of capping your maximum framerate without the drawbacks of VSync is to go to the Sync and Refresh section of Nvidia Inspector, click on the Frame Rate Limiter setting, and select an FPS value. In this example, on a 60Hz monitor I'll choose 60FPS. This means that while playing Dishonored, my FPS can never exceed around 60 frames per second, keeping my GPU cooler and less noisy, reducing tearing, and keeping my framerates more consistent.
Antialiasing: Like many games, both new and old, Dishonored has inadequate anti-aliasing settings. In Dishonored's case the only available in-game Antialiasing settings are MLAA and FXAA, both of which apply a basic shader-based form of AA which still leaves some jagged edges, and can also cause blurring. Fortunately, precisely because Dishonored is an older game, there is more than enough performance headroom available to force a much more effective form of AA using Nvidia Inspector. The process is as follows, and applies to most other games as well:
1. To successfully force AA on a game, the GeForce driver needs to know how to apply Antialiasing in a way that is compatible with the game's engine. By default the driver will use a pre-defined method, which frequently won't work. Nvidia Inspector allows user control over the process under its Compatibility section at the top. Select the Antialiasing Compatibility setting, and enter an appropriate ten digit compatibility Hex code, or select one from the list shown. In practice, you will need to do a web search to find the best code to use for each game based on user feedback, or refer to a list of codes like this one. For Dishonored, user feedback on the web indicates that it needs an Antialiasing Compatibility hex code of 0x000000C1 to work.
Under the Antialiasing section of Nvidia Inspector, I will have to alter several settings. Once again, the best way to find the correct settings to use is by doing a web search or checking a precompiled list. The general limitations of forcing AA via the GeForce drivers apply, as discussed under the Antialiasing settings under the Nvidia Control Panel section. The main benefit of using Nvidia Inspector is that it exposes additional AA methods, most notably the Supersampling-based methods, which have a greater chance of working in most games when combined with appropriate compatibility flags/codes.
2. The first AA-related setting I have to change is Antialiasing - Behavior Flags, which exists in the game profile to ensure that Antialiasing can't be applied in a way that may cause any problems. Typically it prevents forced AA from successfully being applied, and in the case of Dishonored, this is definitely the case; it needs to be changed to None.
3. The second AA-related setting I have to change is Antialiasing - Mode, which is described under the setting of the same name in the Nvidia Control Panel section. For forced AA to work in any game, this setting needs to either be set to Override Any Application Setting, or Enhance the Application Setting. In the case of Dishonored, I need to select Override Any Application Setting.
4. The third AA-related setting I have to change is Antialiasing - Setting, which is described under the setting of the same name in the Nvidia Control Panel section. For any level of full-scene forced Transparency Supersampling to work (see next step) in any game, an equivalent sample rate of MSAA needs to be implemented as well. So for this example, I need to select 4x [4x Multisampling] here to match the 4x SGSSAA I'm going to apply in Step 5 below.
5. The final AA-related setting I have to change is Antialiasing - Transparency Supersampling, which is described under the Antialiasing - Transparency setting in the Nvidia Control Panel section. In Nvidia Inspector, unlike the NVCP, I have access to Sparse Grid Supersampling AA (SGSSAA). This is a performance intensive form of AA which works in many games, and is a faster form of Supersampling than normal (Ordered Grid) Supersampling AA, but can result in some blurring. For Dishonored I'm using 4x Sparse Grid Supersampling.
6. One last step is necessary in order to address the SGSSAA blurring mentioned in Step 5: the use of Lod Bias, a feature that is described in detail under the Texture Filtering - Negative LOD Bias setting of the Nvidia Control Panel section. To manually adjust LOD Bias in Nvidia Inspector, the Texture Filtering - Driver Controlled LOD Bias setting must first be set to Off to disable the driver's automatic LOD Bias adjustment. Then, in this example, since Dishonored is a DirectX game, I'll use the Texture Filtering - LOD Bias (DX) setting. Negative values sharpen the image, positive values add blur. Since we're trying to reduce blur, we use a negative value, with the general rule being that if the base sample rate of Supersampling is 2x, a LOD Bias value of -0.5 offsets the blur; for 4x Supersampling, the value is -1.0; and for 8x Supersampling, it's -1.5. I'll use -1.0 for our example. Remember also that the Texture Filtering - Negative LOD Bias setting is effectively broken, so it cannot block negative LOD Bias values even if set to Clamp.
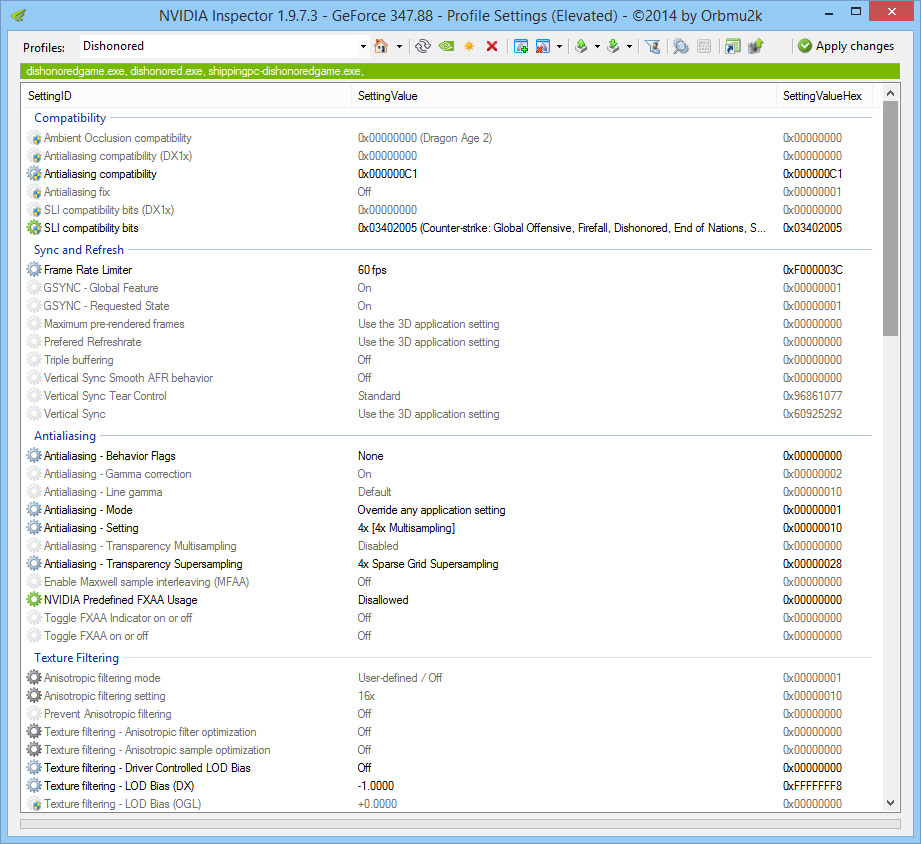
To save and implement these profile changes, the Apply Changes button must be pressed at the top right of the Nvidia Inspector window. To undo the changes and revert back to the profile's default settings, click the green Nvidia logo button at the center top. The final Nvidia Inspector settings for our Dishonored example are shown in the screenshot above.
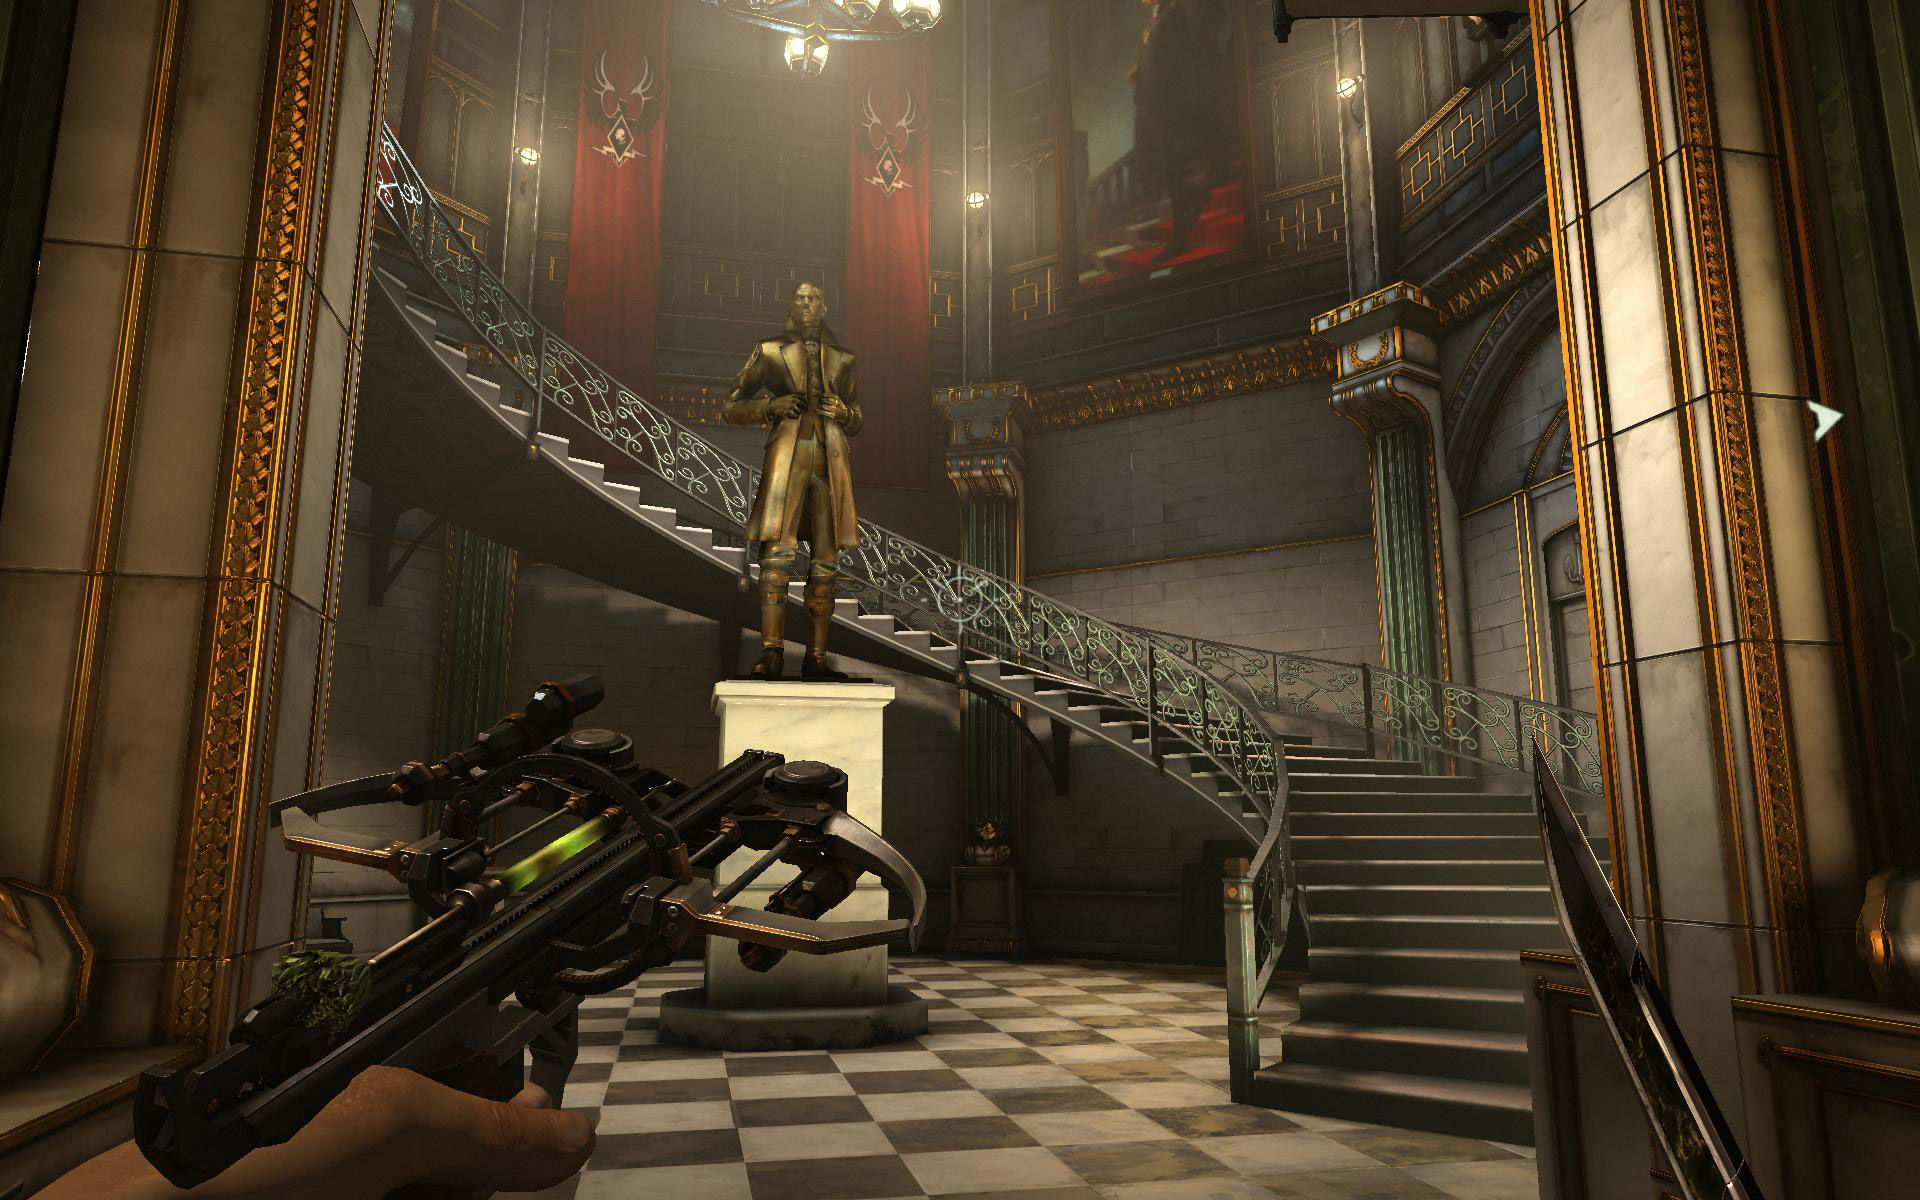
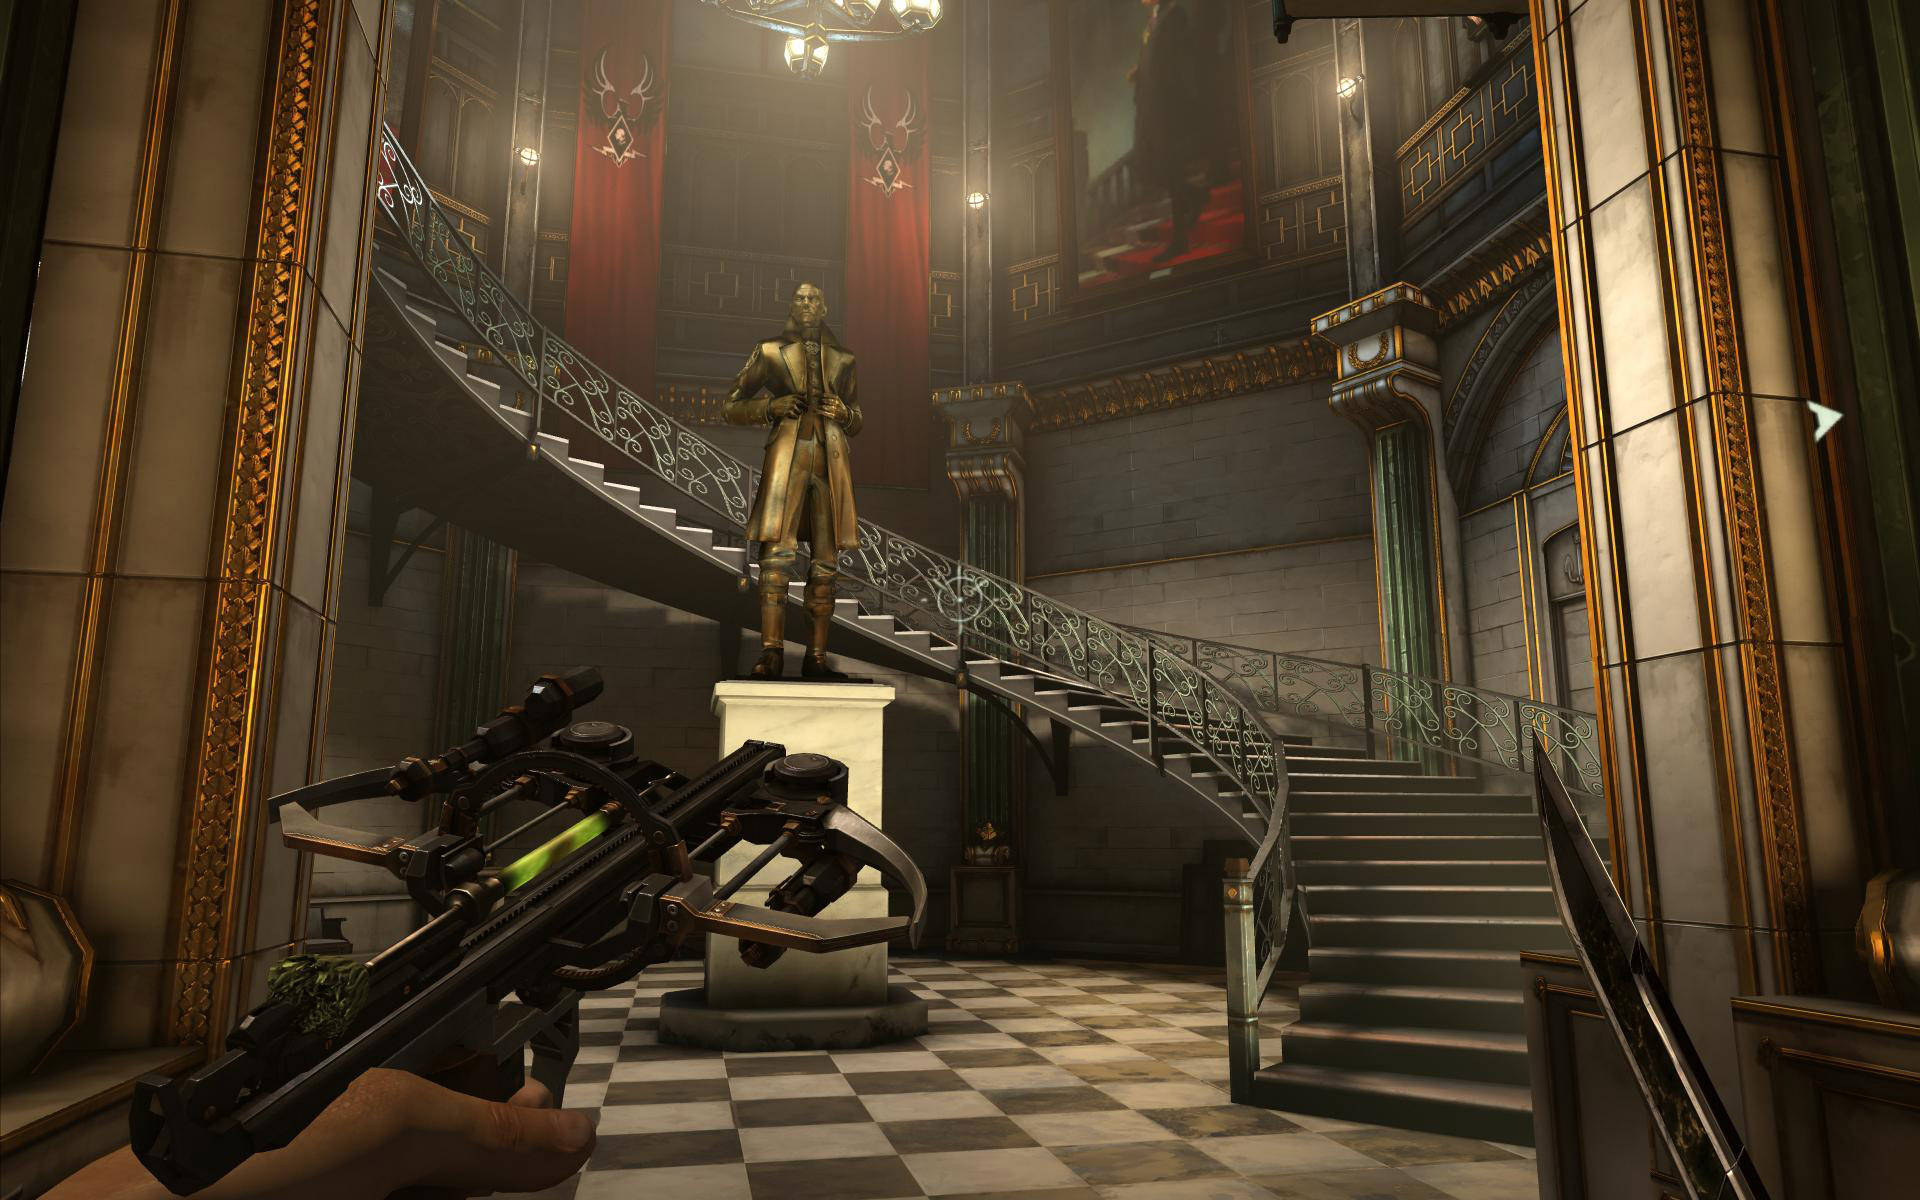
The result of these antialiasing changes is shown in the screenshots above. As you can see, the jaggedness has been almost entirely eliminated using 4x SGSSAA. Thanks to Nvidia Inspector we've been able to force high quality AA on a game which otherwise has only poor quality shader-based AA settings. The steps above will work in forcing AA on most games, as long as you do some research to uncover the correct values for your particular game. Bear in mind that Supersampling AA, while being the form of forced AA most likely to work, is also very performance intensive.
Ambient Occlusion: The Ambient Occlusion setting under the Nvidia Control Panel section of the guide covers what this feature does. The benefits of changing it in Nvidia Inspector are that firstly, the Ambient Occlusion Compatibility setting allows the use of custom compatibility flags to force AO on games that might otherwise not support it via the NVCP (see this list); and secondly, after setting Ambient Occlusion Usage to Enabled, you can access an additional High Quality option under Ambient Occlusion Setting. This provides a slightly richer AO at a higher performance cost than Quality mode. In most cases though, the minor increase in AO richness doesn't warrant the performance hit.
The remaining Nvidia Inspector settings are either exactly the same as those in the Nvidia Control Panel, hence described in detail earlier in the guide, or are too complex to cover here, and need to be applied only when required on a case-by-case basis after appropriate research. There's good reason for some of these settings being hidden in the regular NVCP - they're for genuinely advanced users. In most cases it's best just to use the settings that a more knowledgeable person has discovered work best in a particular game.
That wraps up the advanced tweaking. Though not in any way a comprehensive list of tools and tweaks, I've covered the fundamentals and hopefully given you plenty of ideas for experimentation.
Conclusion
I hope this guide has helped to clarify the mysteries of the Nvidia GeForce driver, and associated tweaking tools and methods, for you. If you have any productive feedback, please Email Me, but please note that I can't provide you with tech support of any kind.
Until next time, take care!
|
|