
Hardware Confusion 2019
[Page 10] Input, Audio & Optical Drive
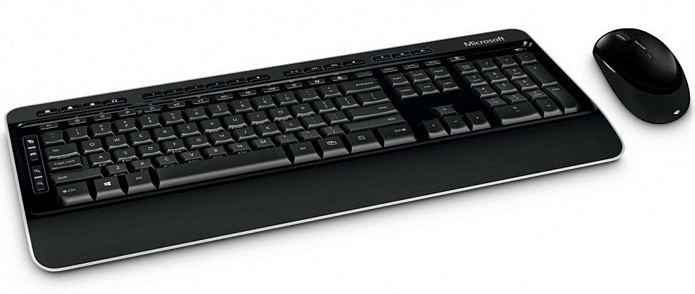
Keyboard & Mouse: MS Wireless Desktop 3050
The wireless keyboard and mouse set I use is a fairly standard, and quite comfortable, combination. I bought it three years ago, and I'm happy with it as it suits my needs and has a black, mature aesthetic which matches my preferred look for the new system. There are a couple of caveats though which you should consider if you want to use any wireless keyboard or mouse.
My set is based on 2.4GHz wireless technology, which presents several problems. The main one is that each Microsoft Wireless Mouse, Keyboard, or Mouse & Keyboard combo, that isn't Bluetooth based is uniquely paired with its USB transceiver at the factory. This is done for security purposes, so someone with a similar transceiver can't intercept your keystrokes for example. The downside of this security feature is that if you lose the transceiver, the associated keyboard or mouse is now useless, as the transceiver can't be replaced or the device reprogrammed to use another one.
I only discovered this issue when I recently purchased an identical replacement for the mouse in my wireless mouse and keyboard set, only to find that I need to use each device's own transceiver; the original keyboard and mouse transceiver will not connect to the new mouse, and the new mouse's transceiver won't connect to the keyboard. This is a major reason you should consider a Bluetooth wireless keyboard or mouse. With Bluetooth-based transceivers and devices you can pair them to a new device/transceiver.
Furthermore, the 2.4GHz wireless frequency is awful, suffering far more easily from interference, as covered in the Network section later. In this case, it's not so much the proliferation of surrounding 2.4Ghz Wi-Fi networks, moreso if you use 2.4GHz WiFi on your PC, or 2.4GHz wireless headphones, or any other 2.4GHz devices close to the keyboard/mouse transceiver(s), or if there's metal, glass, tiles or reflective surfaces of any kind between the transceiver and the device it connects to, then you will experience responsiveness issues. For example, if I plug the keyboard and mouse transceivers into the rear USB ports of my PC, aside from taking up two USB slots, it also results in my keyboard and/or mouse frequently becoming unresponsive or missing key strokes or mouse clicks. This is due largely to the metal case, the metal of my computer desk frame, and even the metal in my mouse pad, coming between the transceiver and its line of sight to my mouse and keyboard.
The solution I initially used was to plug the transceiver - at that time, I only needed one for both the keyboard and mouse - into a small USB extender I had spare from my TV, which looked similar to this one. I plugged the extender into a rear USB port on my system and moved its base out just right of the PC, where it had much better line of sight to the keyboard and mouse. Not perfect, but it worked. With my new system I figured this looked a bit goofy, so while the keyboard transceiver worked OK being plugged into the back of the system, the wireless mouse remained problematic. I plugged its transceiver into the USB 2.0 port in the front panel of the case. This worked, but it ruined the clean look of the new case.
The solution I now use is one that had been literally sitting in front of me all along: plug both of the transceivers into the USB hub of my old Samsung monitor. It's only 30cm away from my keyboard and mouse, there are zero obstructions, and it frees up a USB port on my PC to boot. I'd totally forgotten about the monitor's USB hub. Enabling it requires a special USB Type B to USB Type A cable that runs from the monitor to the back of the PC, like the one illustrated here. I wasn't sure if I had one. Luckily, Samsung had indeed provided one with my monitor, and as a neat freak, I'd carefully stored it, sealed in its original plastic bag, along with a range of other spare parts, in an old motherboard box.
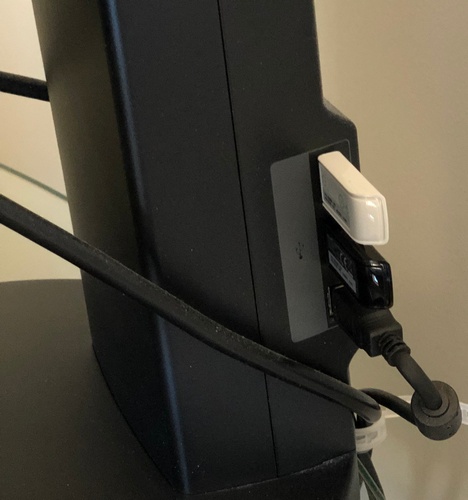
After connecting the monitor to the PC via USB, everything works perfectly. The two transceivers now sit unobtrusively plugged into the USB hub on the right rear of my monitor stand, no longer cluttering the front (or back) of my PC, and my keyboard and mouse are 100% responsive. To finish things off, I tidied up the newly added monitor-to-PC USB cable by zip-tying it to the main monitor cable for a cleaner look.
For best results, avoid all of the headaches above and consider only Bluetooth-based wireless products from now on, or if you're a gamer, used wired peripherals.
One last but important tip: you don't have to install the software that comes with your wireless keyboard or mouse, especially Microsoft wireless input peripherals. Windows is designed such that, with perhaps the exception of highly specialized devices such as gaming mice, or complex programmable keyboards, most common types of wireless keyboards and mice will work without any additional software. Even the special keys on my keyboard, such as the Mail, Browser Home, Calculator, Volume, Play/Pause buttons - which I frequently use - all work by default. See the Windows 10 Optimization section at the end of this article for reasons why you should minimize any software running in the background; it's not about reclaiming 2MB from my 32GB of RAM or improving bootup time by another millisecond.
Interlude: Save Your Spares
The story above regarding the use of a USB extender that came with my TV to overcome wireless mouse interference issues, as well as using a USB cable for my monitor which I'd kept, highlights an important point: save your spare parts. Virtually every piece of electronic equipment you buy these days comes with various cables and odds and ends. You pay for these parts when you buy your gear, so don't just casually throw them away, or let them get lost in a mess of stuff in the back of the cupboard.
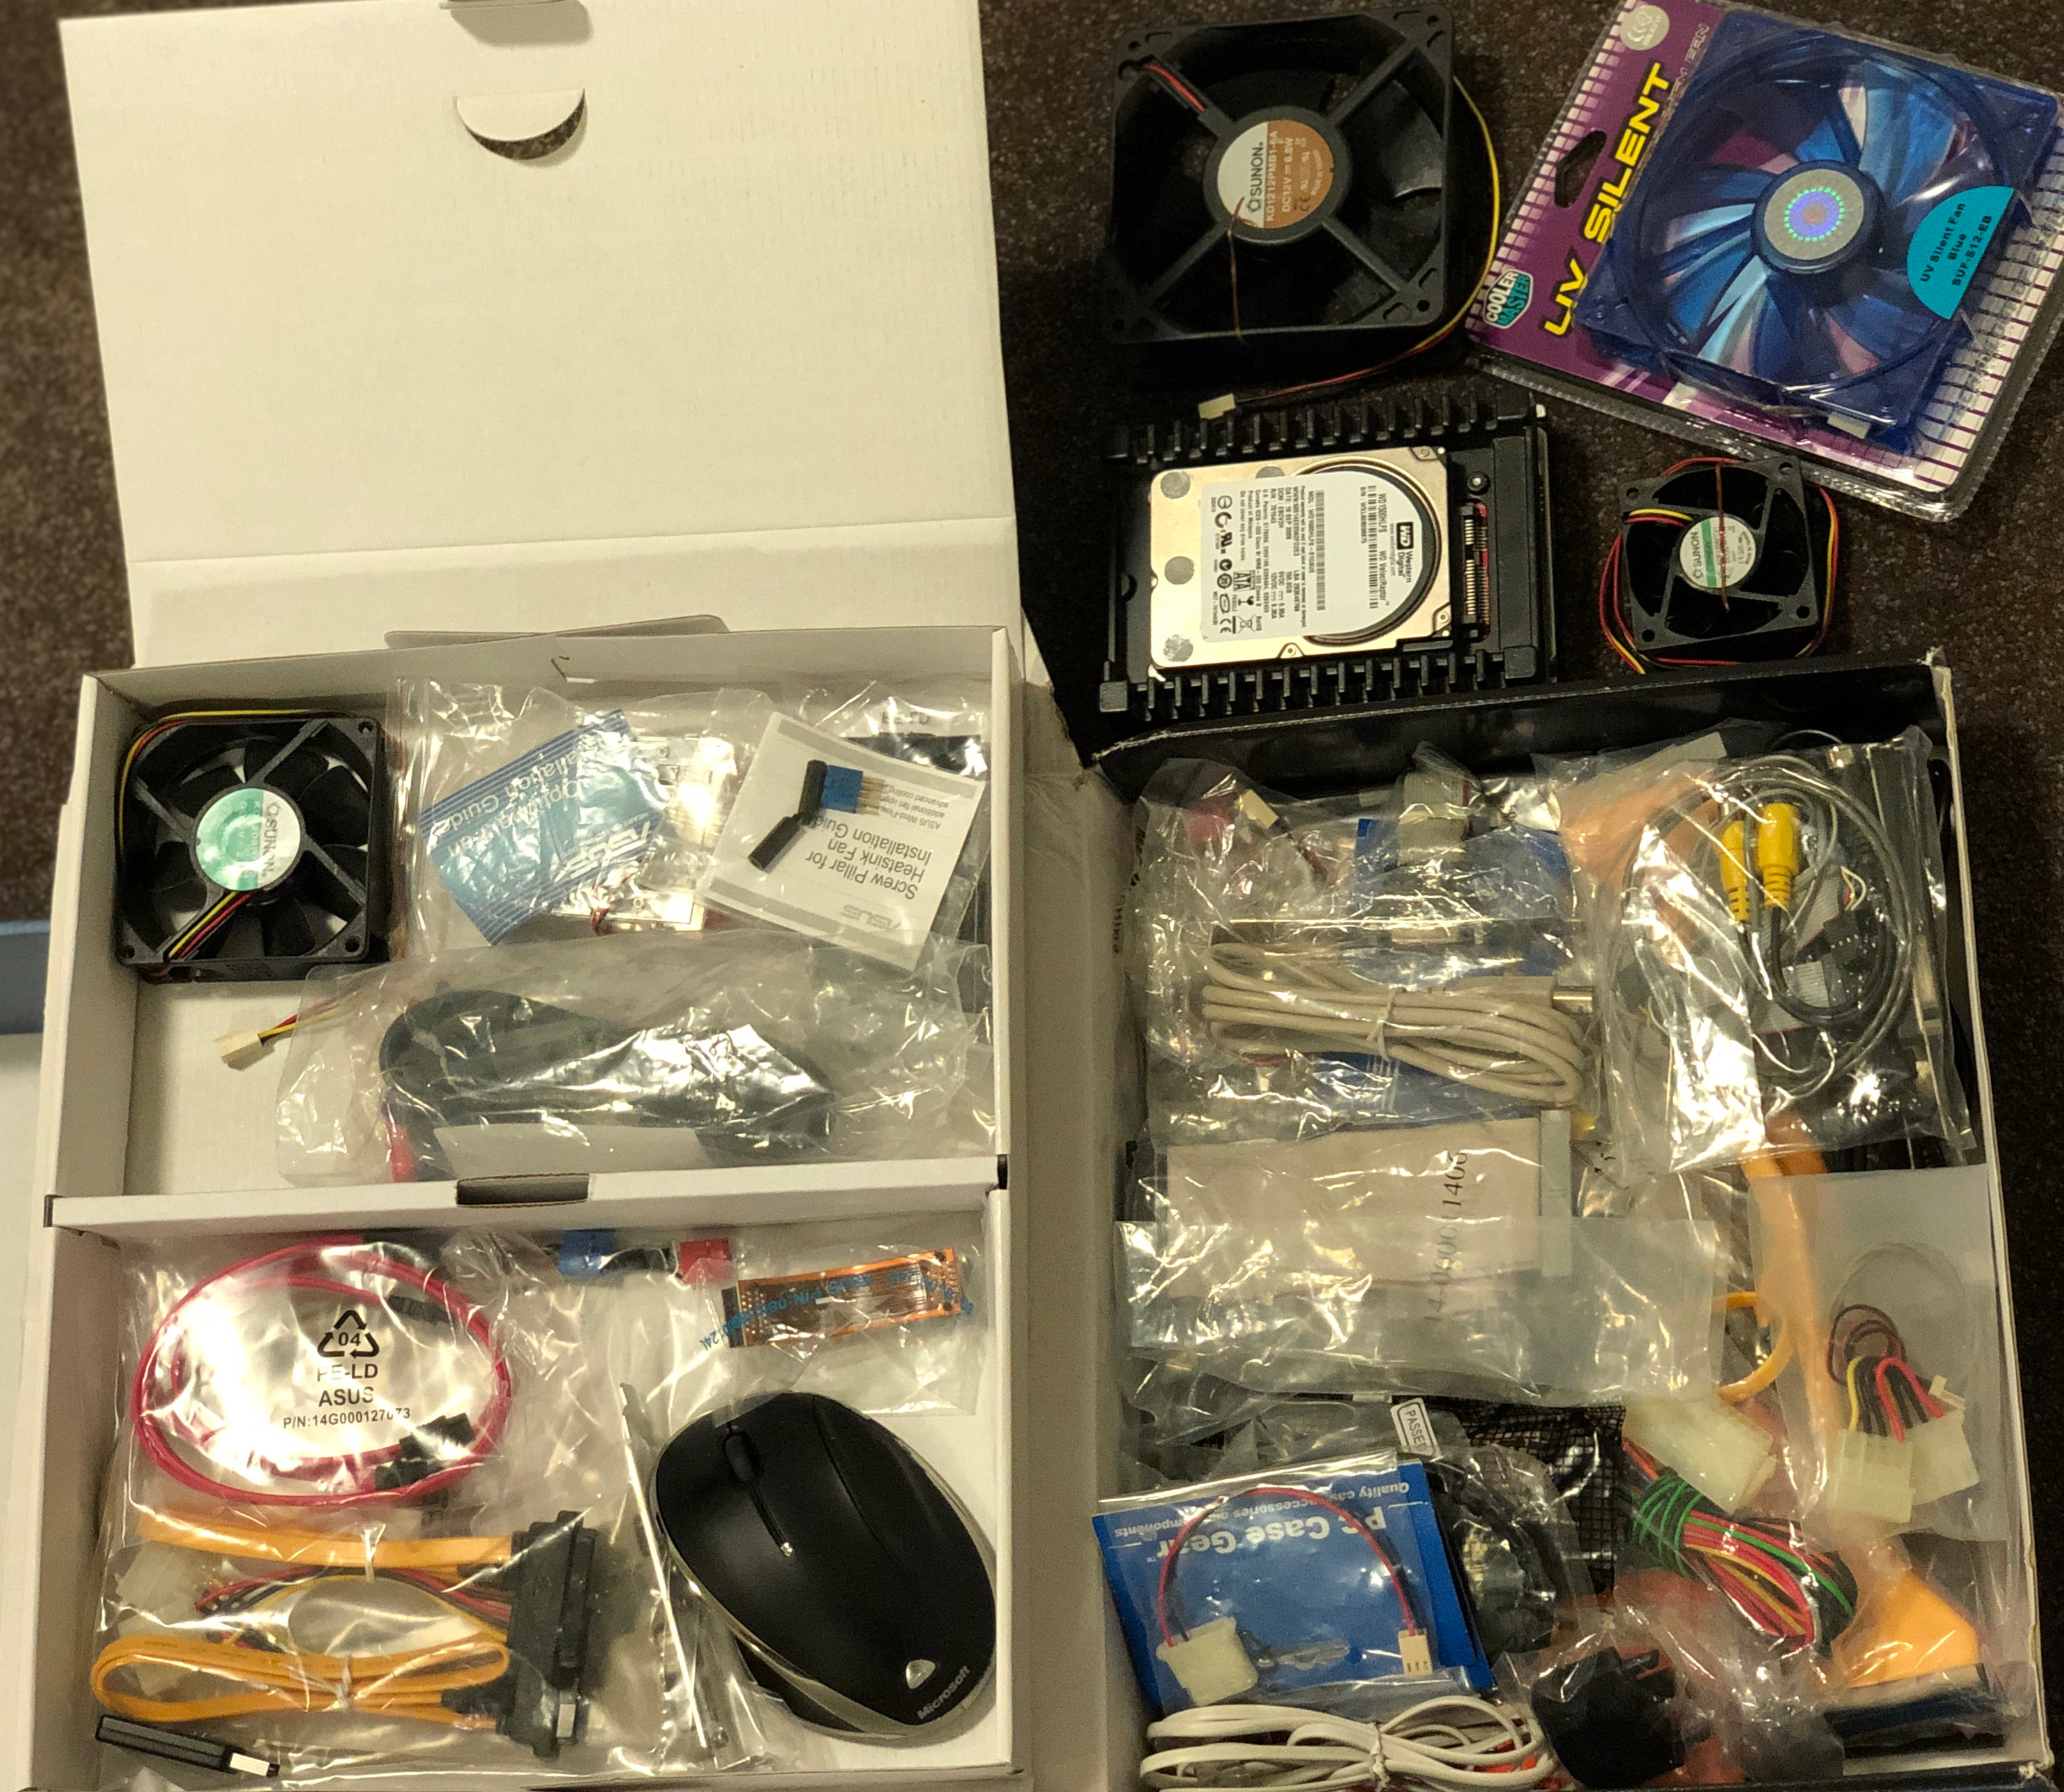
You never know when they may come in handy. I've kept most of the spare parts from all of my systems stretching back over the past 20 years, storing them all neatly in motherboard boxes. This also includes a few spare parts from major electronic components, such as several TVs, Blu-ray players, wireless headphones and the like. They can often be adapted to meet your needs. For example, several years ago I briefly used a USB Panasonic Wi-Fi adapter, designed only for TV use, on my PC by following these instructions, and it worked quite well. Various USB cables, adapters, video cables, spare HDMI cables, etc. have all come in handy.
For one thing, just because you don't need that special doohickey now, doesn't mean you won't need it if your circumstances change in some way. But equally, even though you can go down to a store, or better yet, order a part you need online, sometimes you really want to get something working straight away, and don't want to wait a couple of days, or even weeks, for the right part. Having spare equipment laying around that you can jury-rig to do the job right now provides both instant gratification, and a certain sense of satisfaction due to the efficiency of it all.
Sound
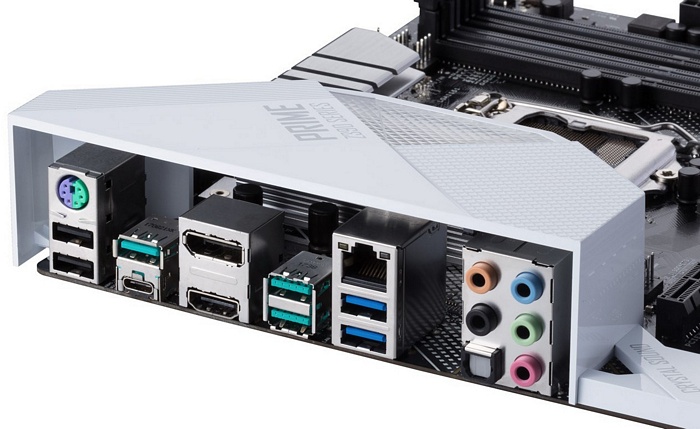
Sound: Onboard Realtek ALC S1220A HD
In 2009 I broke free of buying separate audio cards, and switched to using the onboard audio that came with my ASUS P6T-Deluxe motherboard. While it's extremely common now for people to use onboard audio, back then this was considered an odd choice, especially for gaming. The results, however, were fantastic, and I have absolutely no regrets. Unless you're an extreme audiophile, or you've purchased a very low-end motherboard, onboard audio can sound excellent with a bit of tweaking.
When it came time to buy a new motherboard, I was certain that a mid-end motherboard, like the ASUS Prime Z390-A I chose, would have an audio module that is at least as good as my last one. I was right, the new chip on this motherboard is the Realtek ALC S1220A 8-Channel High Definition Audio CODEC featuring Crystal Sound 3, about which I can find little in the way of any detailed information. However, from ASUS' specifications, and based on my own use of it, the key features are that it has a good Signal to Noise Ratio (SNR) of 120db for audio playback, which means no noticeable background hiss or distortion for example; it supports up to 32-Bit/192kHz playback; and comes with support for DTS Headphone:X. I have good hearing, and the audio sounds very powerful, yet clear to me. An ASUS moderator on the RoG forums also points out the difference between the S1220A and the S1220: "The 1220A lacks i2S output. The S1220 has i2S, and the ROG boards that feature this use the ESS Sabre DAC and headphone buffer to drive front panel audio output." Still, the front panel headphone output sounds quite good to me.
Of course audio quality is also highly dependent on what you use to listen to that audio. I don't have a high-end audio setup on my PC, I just use headphones, but they're fairly good quality. I have an old pair of Sennheiser HD 215 Pro wired headphones, and I recently added a Sennheiser HD 4.40 BT wireless Bluetooth pair as they're being sold at discounted prices. Truth be told, I don't need the old wired pair anymore; the wireless 4.40 BTs provide much greater versatility to connect quickly to my PC, iPhone, iPad or even my TV via an Apple TV and enjoy high-quality immersive sound. They fold up for convenience, can be quickly recharged via a USB cable and provide up to 12 hours on a single charge. The controls on the side also make it easy to control volume, and play/pause/skip tracks/chapters in music and movies, and there's even a built-in microphone for taking calls, or for gamers to shout accusations of cheating at each other.
Interlude: My Favorite Music Player App
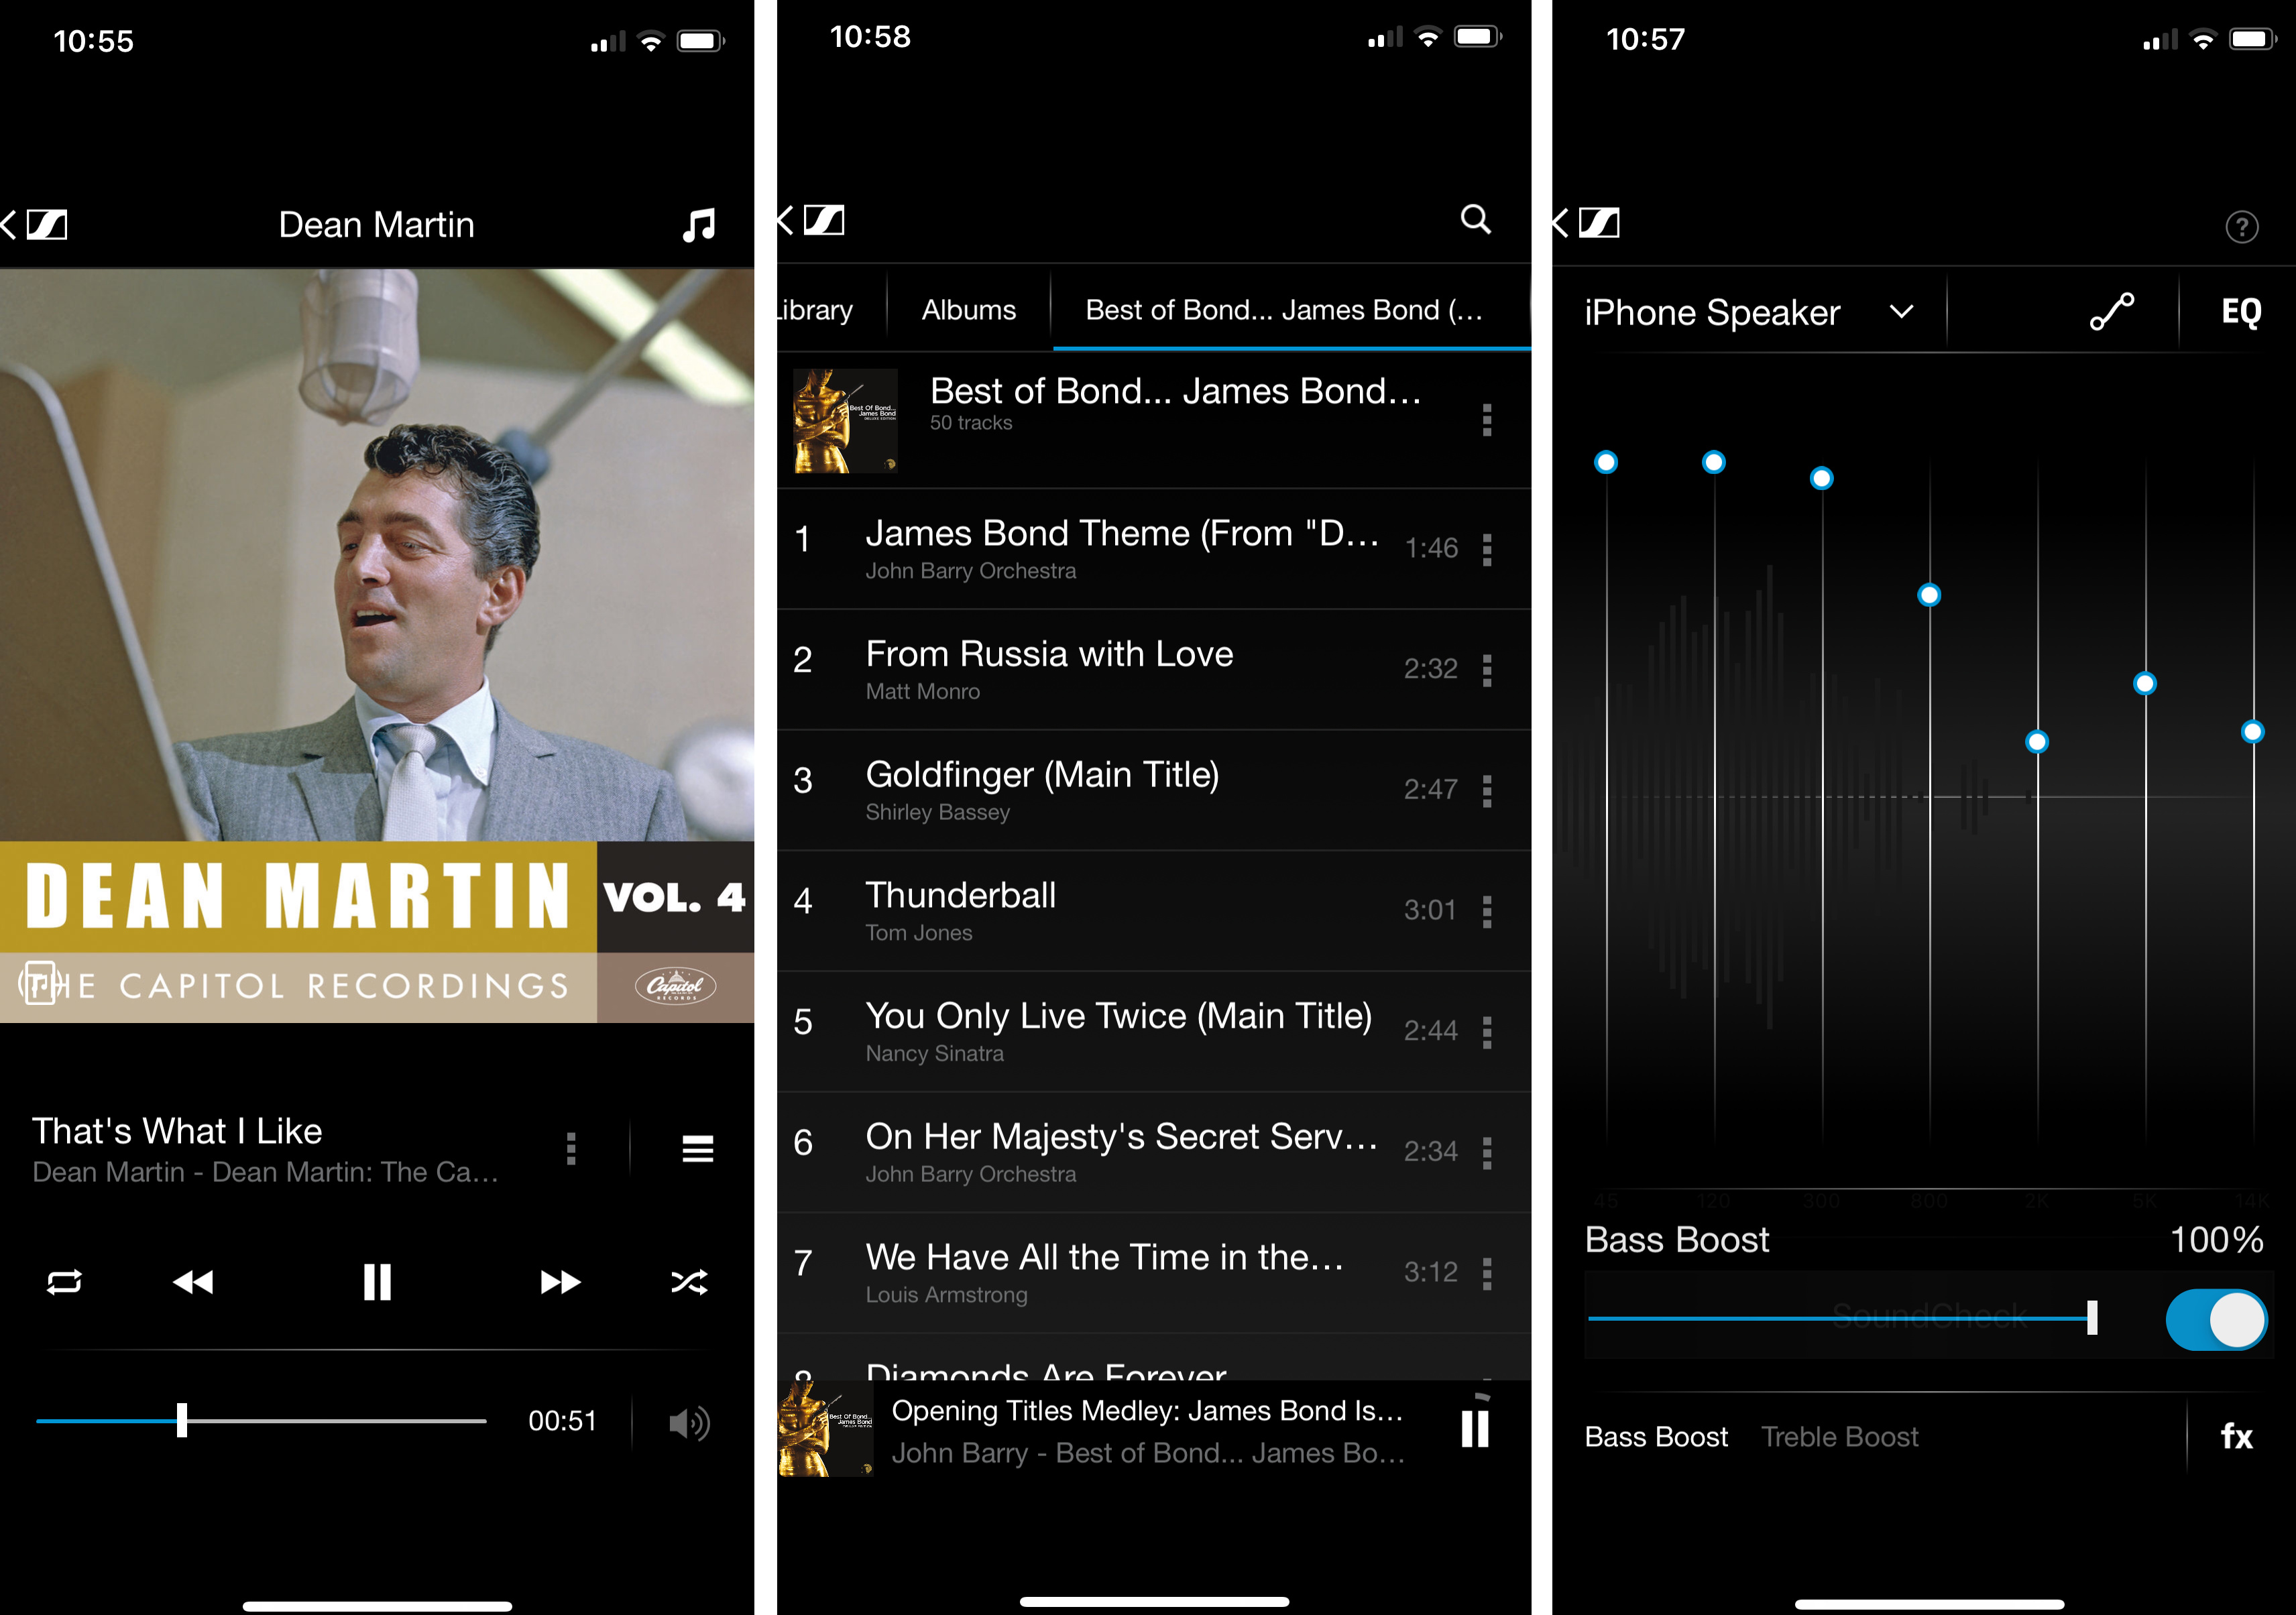
I can't resist giving an unpaid promo to my favorite music player app, which I discovered because I bought the wireless 4.40 BTs: CapTune by Sennheiser, available for both iOS and Android. After trying a dozen music player apps that either look or sound terrible and want you to subscribe, CapTune is completely free, no ads or in-app purchases, looks mature, and provides the right customization options to make music sound great. A 7 band equalizer, separate adjustable bass and treble boost, separate profiles for each output that automatically come into effect. The main issue with CapTune is that it only supports TIDAL and iTunes streaming; it's mainly designed for playing back locally stored music. The solution is to download the relevant tracks or albums to your device, and/or upload the files manually to your phone. It's worth the hassle, the sound quality is superb.
Realtek Audio Driver
The biggest issue with this onboard audio turns out to be the software which now comes in Universal Windows Drivers (UWD) form - see the Windows 10 Optimization section at the end of this article for details on UWD. ASUS provides a UWD driver package for its Realtek onboard audio on their support site. When it's downloaded and extracted, the AsusSetup.exe file in the base directory needs to be launched to install it. Modern drivers are installed automatically, and in this case, there are no choices presented as to what gets installed. Manual driver modification and installation of UWD drivers is not recommended by Microsoft. Once installation is complete, you need to reboot, and back in Windows onboard audio should now be detected correctly as 'Realtek(R) Audio' rather than any generic name, or Realtek High Definition Audio. The driver package also installs some new services, including the Realtek Audio Universal Service, whose name indicates that the correct Universal Windows Driver has been installed. The service is required to allow the Realtek Audio Console to open, and for its settings and special effects to function correctly.
Two new Modern apps called Realtek Audio Console and DTS Headphone X are installed as part of the audio driver package. These apps are independent of each other, so you can use either or both, or neither. If you uninstall them, or they didn't come with your driver package for some reason, you can (re)download the latest versions of each for free from the Windows Store - again, see the Windows 10 Optimization section at the end of this article.
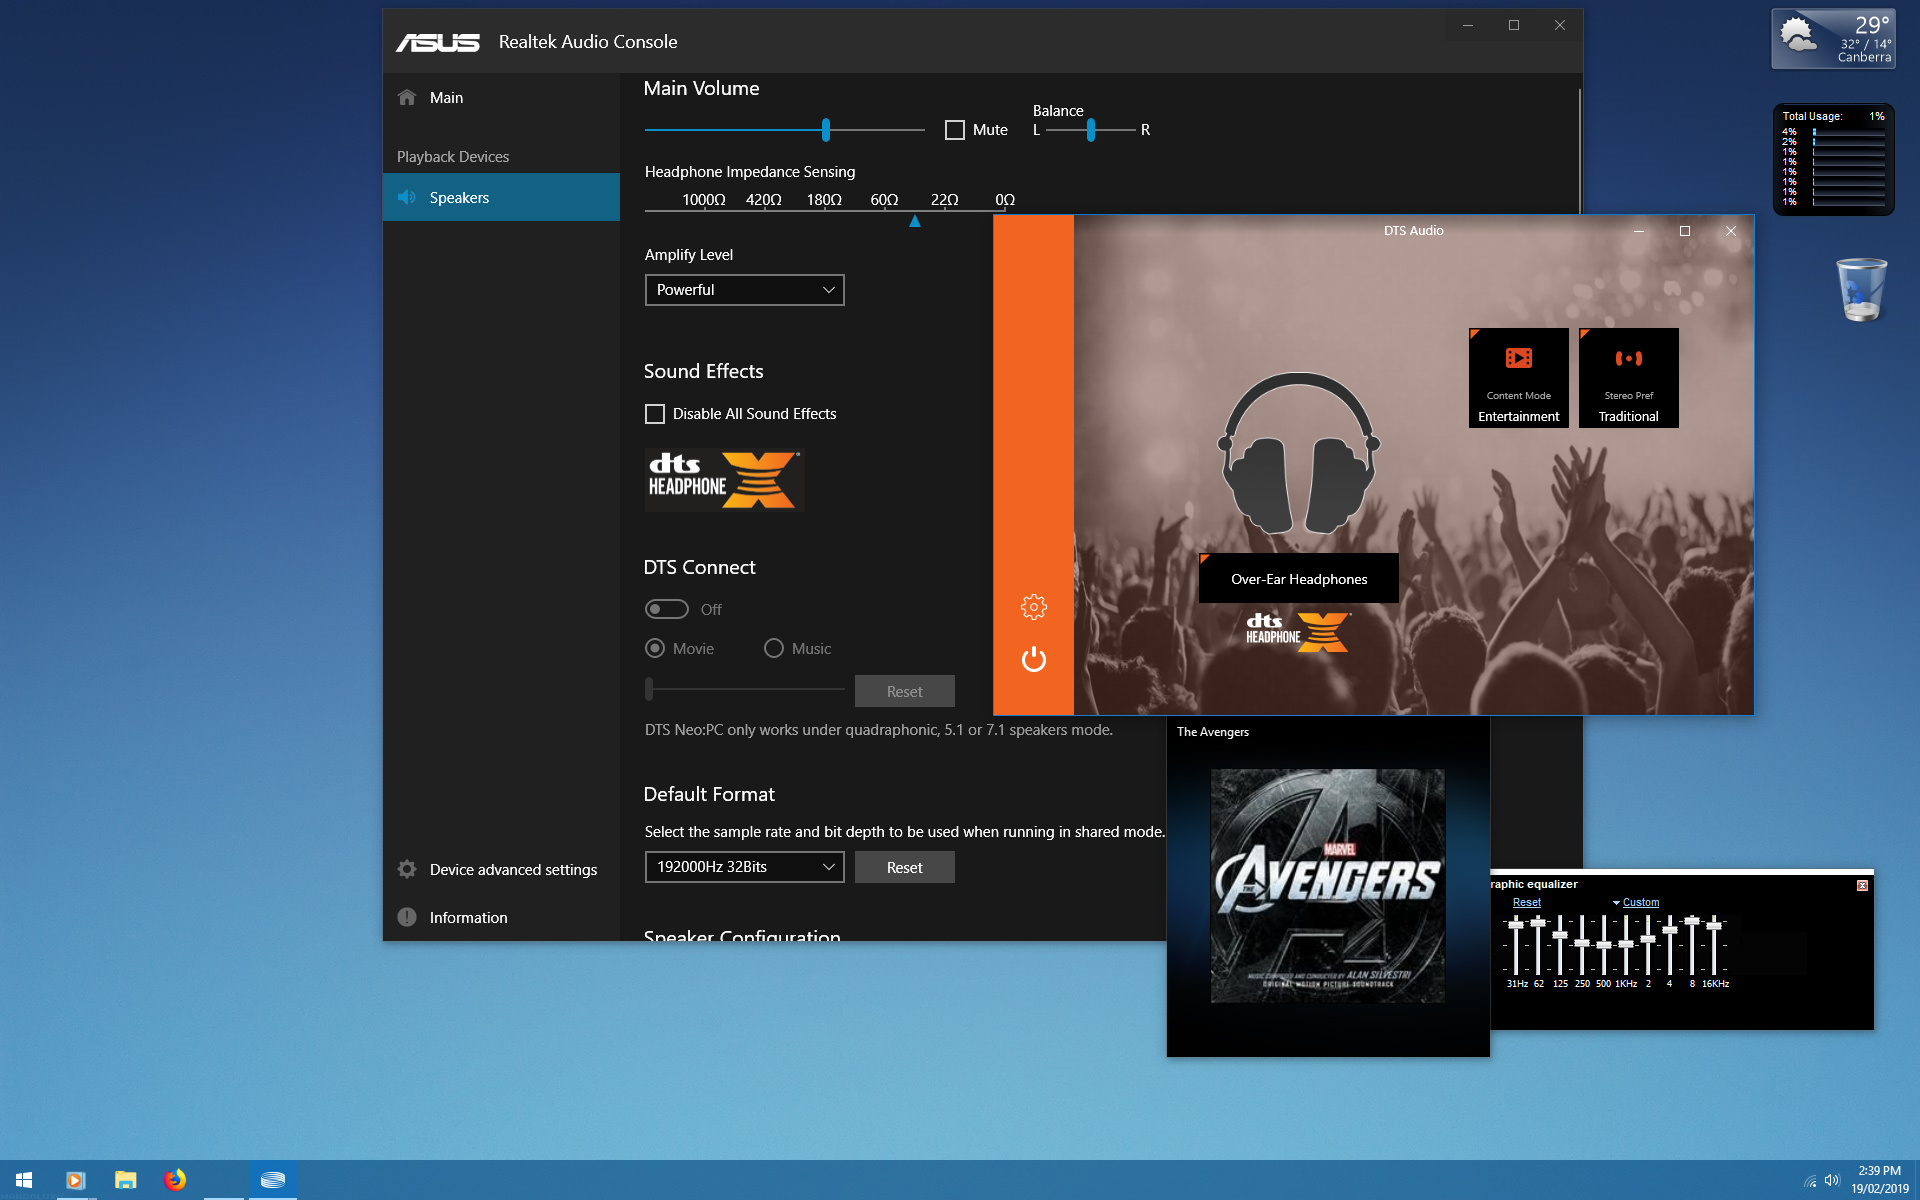
Within the Realtek Audio Console you can configure your output device(s) as listed on the left side, whether speaker or headphone, either plugged into the front panel audio jack or the front panel audio jack, or both. Experiment to find the combination of amplification, effects, sample rate and so forth that suits you. Be aware though that using these utilities doesn't automatically disable some of the default Windows audio enhancements if they've been enabled, so you need to manually disable those if you wish.
After experimenting with these features, I found them of dubious value. This is simply my subjective opinion, but audio became more distant, less powerful and consistent, and even the supposed spatial effects of the DTS app didn't please me. I got a background hiss, I could hear some crackling. At one point, the DTS service that supports these effects went into total meltdown, first maxing out one core of my CPU, then the entire screen started to show glitches that look like RAM was running low; once I rebooted and uninstalled DTS: Headphone:X, the problem was solved.
I still wasn't satisfied with audio quality, it was too low and muddy. Also, simple things like audio jack auto-detection wasn't working properly: plugging a headphone into the front port audio jack doesn't result in the Realtek Audio Console identifying the device correctly, when it did before. Having achieved my main goal of installing the latest Realtek core drivers, I uninstalled the Realtek Audio Console, then took the time to remove a range of unnecessary services and startup items that had been installed with it, as detailed in the Windows 10 Optimization section later.
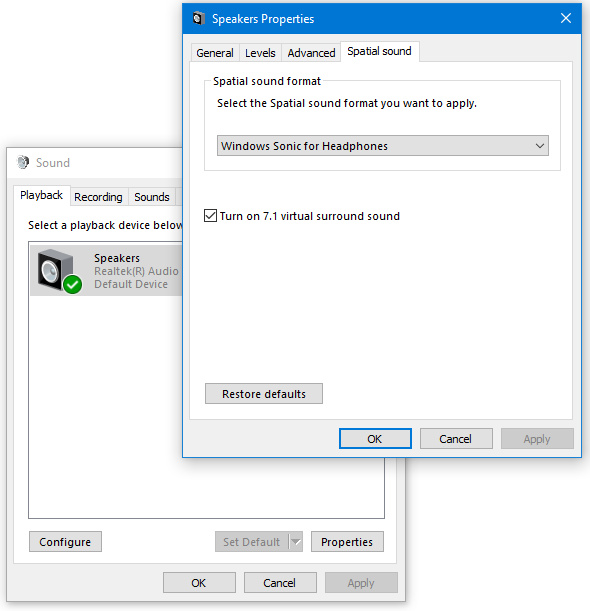
With just the core Realtek driver left installed, but the additional detritus removed, audio is once again crystal clear. In the standard Windows sound control panel, I disabled any unused audio outputs, and hid the disconnected ones. I enabled 'Windows Sonic for Headphones' and ticked the 'Turn on 7.1 virtual surround sound', and this actually gives me much cleaner and more natural spatialized audio than the somewhat gimmicky DTS implementation.
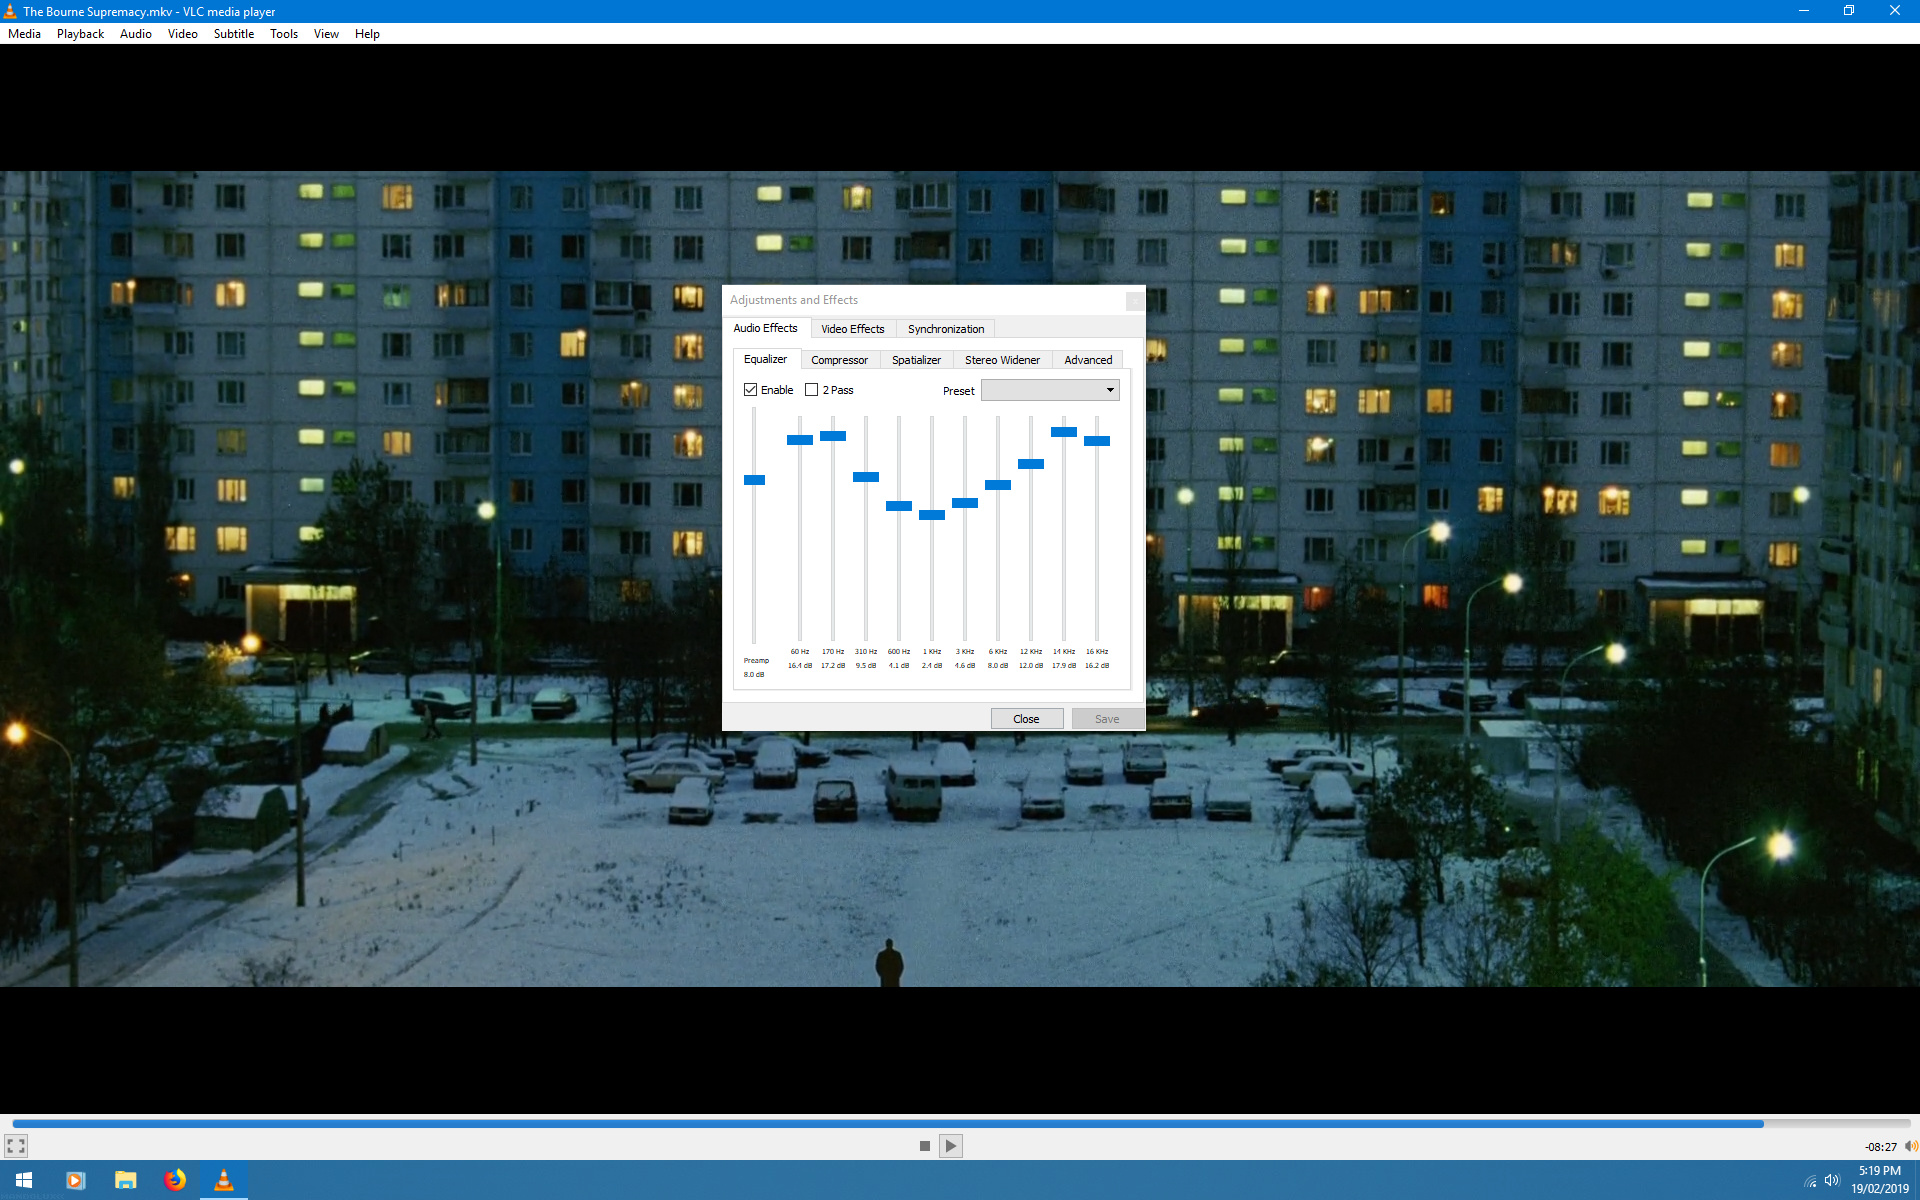
But the real trick to getting a substantial improvement in audio quality is to use a graphic equalizer. The equalizers in good multimedia applications can really make a difference. For example, in the free VLC media player, under Tools>Effects and Filters>Audio Effects, there's a built-in 10 band equalizer, with a Preamp, so you can really fine-tune the sound. This is a much better method than trying to use the equalizer in something like the Realtek Audio Console to suit all of your applications.
More importantly, after I installed the 1809 update for Windows 10 on my previous system, it completely crippled the equalizer and custom effects that my onboard audio's software was applying. I couldn't get it to work again. Using the method above, you're protected against the negative impact that arbitrary changes in the Windows audio platform bring, because the equalizer effects are per-program, not driver-based, and the spatialization is the default Microsoft method, so it should remain functional.
One last tip: if you're a content creator and need ASIO (Audio Stream Input/Output) drivers for greater control, you can use the free ASIO4ALL on this chipset.
Optical Drive
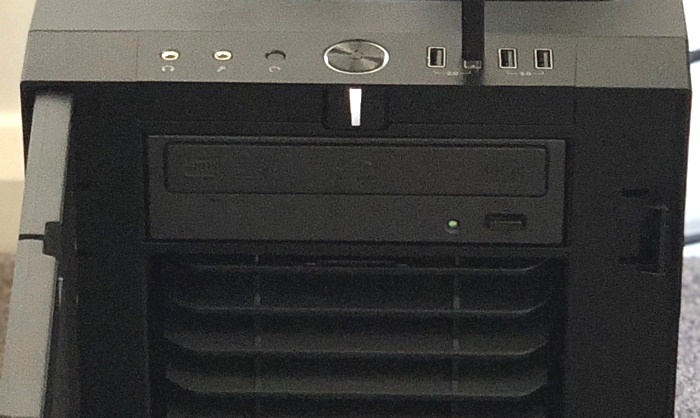
Optical Drive: Pioneer BDR-205 Blu-ray Writer SATA
Demand for disc-based media continues to decline rapidly, as digital download, and streaming in particular, take over. Even as some people cite the rising popularity of Vinyl records, as well as the recent introduction of the 4K UHD Blu-ray format, as being an indicator of a sustained resurgence in physical media, the reality is that this seems to be more of a transient phenomenon, often driven by nostalgia rather than facts. Physical formats account for a tiny proportion of overall industry revenue. In 2018, the music industry received 87% of its revenue from digital sources: primarily streaming (75%), along with digital downloads (12%), whereas physical sales accounted for only 10% of total revenue. Similarly, for broader home entertainment sales in 2018, sell-thru of physical entertainment media had fallen by 14.6% over the year, physical rental was down by 15.6%, while total digital sales rose by 24.3%.
On a personal level, I've invested quite a bit into buying many classic movies on Blu-ray media over the past ten years, the quality of which is still superior to most digital content, and most of which are not available via streaming. But even I realize that for most people, convenience, low price, and "good enough" quality will always beat anything else.
As physical media declines, so does the hardware it requires. Optical drives are rarely used in new computer systems, much the same way that, when I was building my previous system in 2009, 3.5" floppy drives were rapidly disappearing. The proof of this confronted me when I was trying to find a new case that also supported the Pioneer Blu-ray/DVD/CD writer I purchased back in 2010. This meant finding a case I liked that had a 5.25"-sized optical drive bay, and a front designed to allow ready access to the drive. Not as easy as it sounds, particularly for mid-tower sized cases.
The drive still works just fine, and I use it to infrequently watch movies from Blu-ray disc on my PC, and more often these days, to periodically and systematically rip my reasonably large collection of Blu-rays to the hard drives connected to my router (see the next section). The drive isn't essential, but I definitely prefer to keep it running. As it happens, the Fractal Design R6 case recommended to me, as covered in The Power Supply and Case section earlier, also very neatly provides for my Blu-ray drive, without compromising appearance or airflow in the process. So the drive gets to live on for a while longer and be useful, but is not obtrusive in any way.
Let's face it though, there really isn't much use for an optical drive on a PC these days, so if you have any optical media left (CD, DVD, BD), now's a good time to copy the content to your hard drive before the players start to vanish. For entertainment media such as movies or TV shows on disc, try the following completely free utilities to undertake this tedious but necessary task:
MakeMKV - can be used to rip Blu-ray and DVD movies to the popular MKV container format.
MKVToolNix - allows you to edit any MKV media files without re-encoding them, e.g. alter headers to change the default audio language or aspect ratio, or strip out unnecessary audio streams and subtitles to reduce file size.
MKValidator - a command line utility which checks MKV files to see if they contain any errors.
Handbrake - can re-encode media files to reduce their size and/or change them to a format more suited to particular devices.
Bonus tip: You can get VLC Media Player to play Blu-ray discs using these instructions. I could never get VLC to play Blu-rays before, but this time around it worked for me - and I don't have any other Blu-ray software on my drive. I played several of my store-bought Blu-ray movies on VLC and it had no problems. Basically, download the KEYDB.cfg and libaacs.dll files from the link above. Create a new directory under your \Windows\ProgramData directory, and call it aacs (i.e., \Windows\ProgramData \ aacs\) then put the KEYDB.cfg in the aacs directory. Then put libaacs.dll into your base VLC directory - for me that's C:\Program Files\VideoLAN\VLC - it's the same directory that has vlc.exe.
Even if you're not worried about optical drive availability or the decline of physical media, getting your content off disc and onto more accessible media can provides substantial benefit, as discussed under the Ghetto NAS topic in the next section.
|
|