
Hardware Confusion 2019
[Page 11] Network
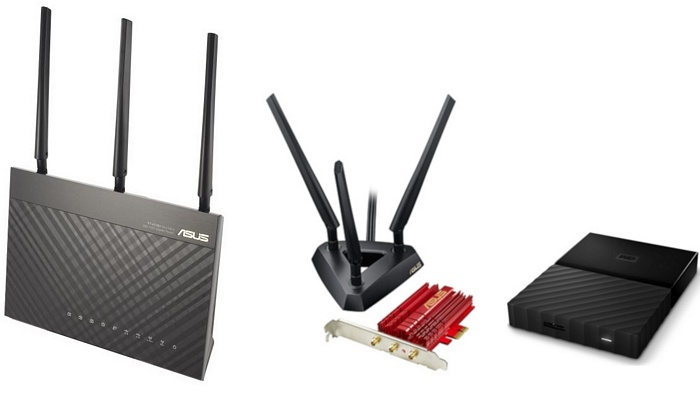
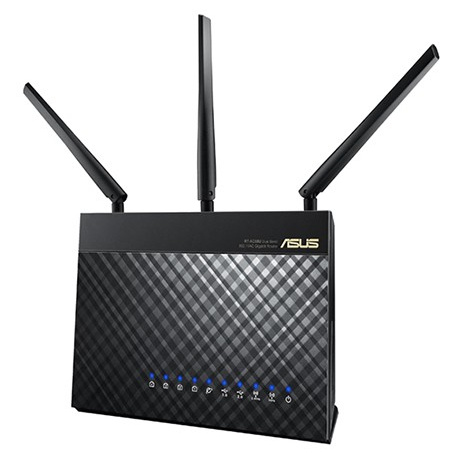
Router: ASUS RT-AC68U
WiFi Adapter: ASUS PCE-AC56 PCI-E
Network Drives: 8TB (2x2TB, 1x4TB) WD My Passport USB HDDs
In late 2015, I finally received a fibre to the premises Internet connection, as part of what is known as the National Broadband Network (NBN) in Australia. This meant that my ADSL Internet connection was going to be switched off, and the fibre connection I received would allow for maximum speeds reaching 100Mbps/40Mbps. But I had to purchase a new fibre-compatible router. This time I decided to splurge on a popular and full-featured model, the ASUS RT-AC68U. Buying a good quality router has turned out to be one of the best system purchasing decisions I've made. Why? Because a router has become an increasingly important part of any home as Internet-based services proliferate, and wireless capabilities improve.
Before we look at the various things a good router can do, and general network optimization tips and tricks, a quick refresher on terminology. MB/s refers to Megabytes per second, but typically, Internet speeds are referred to in Megabits per second (Mbps or Mbits/s). The conversion is simple: 8 bits = 1 byte, so any speed in MB/s can be multiplied by 8 to find the equivalent in Mbps, or the reverse for Mbps to MB/s.
Router Fundamentals
Modem is short for Modulator Demodulator, and applies to devices that alter (modulate) carrier signals, such as those found in telephone lines, to include data that can then be sent along the line, and de-modulated to reverse the process and extract the data. A modem is necessary for any home Internet service to work, but depending on your connection type, a separate modem may be required, or it may be built into the infrastructure installed with the connection.
A router is not a modem, although many routers include a modem, and many people mistakenly use the terms interchangeably. A router refers to any networking device that is used to split and route your Internet connection to multiple devices. Modern routers can do this via cabled connections, or more commonly via Wi-Fi, which uses radio waves to wirelessly transmit and receive data. Without a router of some kind, you could only connect one device to your Internet connection at any one time.
While some connections, like DSL, need both a modem and router, a pure Fibre to the Premises connections like mine requires just a router. If a faster connection like fibre is coming to your area soon, but you're still on DSL, then you can buy a combination modem-router, like the DSL-AC68U, which is essentially the same as my RT-AC68U version, but includes a DSL modem. This future-proofs the router so you can enjoy the benefits of having an excellent router straight away, and not have to change it when a new connection is installed. In Australia, these dual DSL-Fibre routers are even more useful because the NBN is installing a lot of hybrid broadband connections, like Fibre to the Node, which still require a modem as well as a router.
Let's examine how to get the most out of the router.
Merlin Firmware
There's a very good reason why I recommend the high-end ASUS models, and why they're so popular: ASUS has provided exceptional support by consistently releasing new firmware updates virtually every month, for over four years. Aside from fixing bugs and improving security, these updates have added a range of new and useful features. But there's something you can do to further improve on the work ASUS does with its firmware: use the free Asuswrt-Merlin modified version of the firmware.
Like many people, I'd heard of Merlin, but I'm hesitant to flash my hardware with custom firmware, as that usually spells trouble. Merlin (Eric Sauvageau) has a different approach to firmware customization: he specifically points out on his site that the aim is to enhance the regular ASUS firmware, without any radical changes. So when you first install the Merlin firmware on your router, you won't see any major changes in the router's firmware interface. But there are a range of enhancements that will come in handy. I highly recommend this custom firmware. Just be sure to do a full factory reset on the router after you've installed Merlin, and configure your settings from scratch - don't upload any saved configuration files; if necessary, take screenshots of your current settings so you can refer to them.
2.4GHz vs. 5GHz
An ongoing source of confusion and debate is which Wi-Fi frequency to use: 2.4GHz or 5Ghz. Over the last few years I've had experiences that provide a practical, and to my mind, definitive answer to this age-old question.
The standard theory regarding Wi-Fi, as covered in numerous articles like this one, is that 2.4GHz provides the farthest range but is more prone to interference, while the 5GHz frequency is far less prone to interference as it has a larger set of wider channels, providing more bandwidth, but at a far lower range. Some more Wi-Fi basics are briefly but succinctly covered here. My initial experiences with Wi-Fi tended to confirm this theory, especially prior to buying my ASUS router and PCI-e Wi-Fi card.
You could waste hours trying to test a range of scenarios to see which is the optimal channel to select on your router, based on how many 2.4GHz networks there are around you, on what particular channels and how close they are to you. You can spend even longer looking for tweaks and tips to smooth out the 2.4GHz frequency. I know because I've already done this; don't bother. No amount of tweaking is going to overcome the simple fact that the 2.4GHz band is now essentially rubbish in most urban areas due to massive interference issues. There are simply far too many people, with an excessive number of often incorrectly set up 2.4GHz devices, as well as numerous common household appliances that operate on the same frequency (cordless phones, microwaves, refrigerator compressors), all effectively jamming your Wi-Fi 24 hours a day.
When I first moved into my house a few years ago, I had to put the router near the entertainment unit in the living room, as that's where the fibre connection and its modem terminate. This means that I use Wi-Fi not only for my mobile devices, but also for my PC, which is roughly ten meters (33 feet) away behind tile, glass and brick wall obstructions. Again, the standard theory is that only 2.4GHz will work in this scenario, and I all-too-readily accepted that.
My fibre Internet connection's nominal speed is around 50Mbps download, 20Mbps upload (50/20); that's what I pay for. To consistently measure actual Internet speeds I use the free SpeedTest website and app, as well as typing speedtest into Google for its built-in tester. Initially, on the 2.4GHz frequency my results were: in the living room, near the router, I got around 48/19, close to my maximum as expected ; in the PC room ten meters away, I'd typically be closer to 30/14, which wasn't ideal, but sufficient and I thought quite reasonable given the distance and the various materials which the signal has to travel through - radio frequencies do not travel well through certain materials, particularly metal, reflective surfaces such as glass and tiles, as well dense material like brick and concrete; in my bedroom, at the farthest end of the house from the router, the connection still seemed to retain around 17/8 speeds.
Over time, I began noticing more and more problems with my Internet connection. Wi-Fi dropouts on my phone and tablet, Netflix video streams stuttering and pixelating. Variable download speeds. It came to a head when at one point, I found even small web pages, such as my own site, were taking 5-10 seconds to load, and then SSL pages would fail to load when I'd browse on a device in the bedroom. I ran a Speedtest again, and I got 4Mbps download/1Mbps upload in the bedroom. I retested various areas around the house and found all but the living room had dropped severely. The interference around me had become overwhelming, and 2.4GHz was no longer of any use.
I turned off the 2.4GHz radio on my router altogether, and switched all of my devices to the 5GHz frequency. I set about the house taking measurements again using my phone, as well as on my PC. I was stunned at the results. My PC consistently tested right near the maximum speed, at 47/18. In the worse room in the house, my bedroom, speeds were up to 43/12. I couldn't believe this. Why had 5GHz suddenly become so robust throughout my house, when my previous experiences had proven otherwise? The more I thought about it, the more it turns out to be a combination of factors: I'd accepted the "2.4GHz is better for range" mantra and focused all of my efforts on it; I'd paid too much attention to the Wi-Fi signal strength indicator, which had shown 5GHz reception to be weak in most places; any brief testing of the 5GHz frequency I'd done was in a smaller apartment environment where the difference wasn't significant; prior to 2015, I'd been using a mediocre router (the Billion 7800NL) combined with a repurposed Wi-Fi adapter on my PC - it wasn't until 2015 and 2016 that I bought the new router and a PCI-e Wi-Fi card. Possibly, firmware improvements on my router had also had an impact.
It's now been a year since I switched to 5GHz exclusively, and I haven't had a single problem. My speeds are consistently high. No dropouts or any other issues, ever. No need for any special tweaks or spending time trying to find the right channel. The only conclusion that can be drawn from this is that 5GHz is not the short-range option most people have been taught. Given a decent router, 5GHz can be substantially better than 2.4GHz even over longer distances of up to 15m (50 feet) or more, through multiple obstructions including indoor and outdoor walls, tiles, glass, metal and brick, and without using any enhancements such as repeaters, high-gain aerials, or even optimal router placement.
This isn't some magical tweak I've discovered or unique to my circumstances. As we'll see below, there's a perfectly logical reason for my findings based on the properties of a 5GHz 802.11ac network.
Wi-Fi's True Speed
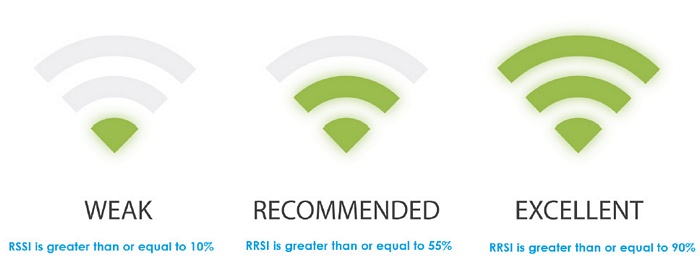
One of the biggest deterrents to using 5GHz was that whenever I looked at the Wi-Fi signal strength indicator on my PC or devices - that little symbol showing semi-circular bands radiating from a point - the 5GHz frequency always showed a very weak strength compared to 2.4GHz. The strength of a Wi-Fi signal is measured by what's known as the Received Signal Strength Indication (RSSI). The little Wi-Fi symbol is a graphical representation of that, but some utilities can provide a numerical figure, and it's in a confusing format: a negative number, with the closer to 0 the number your connection reads, the stronger the signal.
Once again, I don't recommend getting involved in the murky and time-wasting world of downloading custom utilities to measure RSSI and fussing over which channel to use. In Windows 10, you can get a sufficient indication of the signal strength and maximum bandwidth of your current connection by going to Control Panel>Network and Sharing Center and clicking the link for your Internet connection. The properties box that opens shows the signal quality, and the maximum speed based on this.
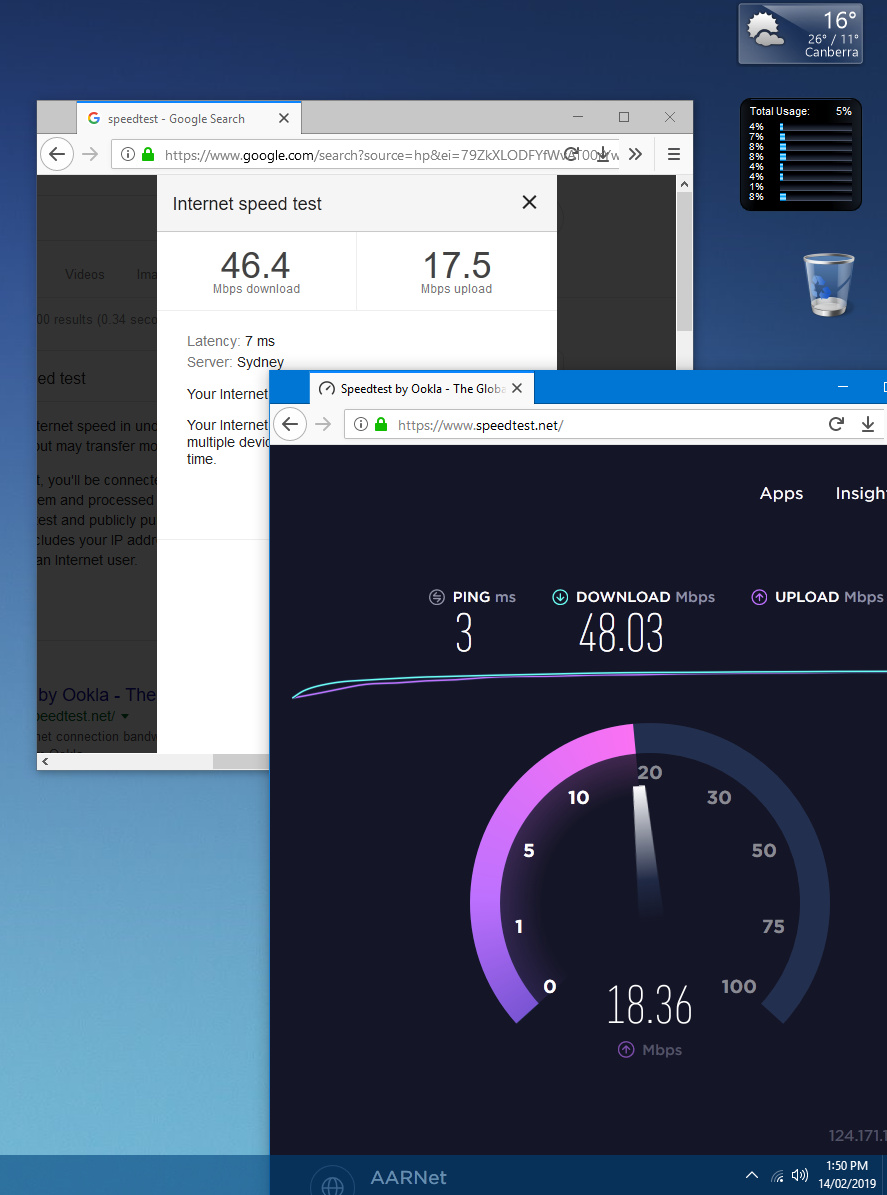
While this may be a reasonable indicator of your throughput compared to the theoretical maximum of the network you're on, it's not useful as a practical measure of your actual speeds. On my PC right now the Wi-Fi signal strength indicator in my Notification Area barely registers a reading and I get 2 bars out of 5 in the Signal Quality indicator for my device. Yet, in the screenshot above, you can see that while actively running a speed test at those poor signal levels, I get close to my maximum Internet download speed of 50Mbps, and the upload is near my maximum of 20Mbps, in both Ookla's Speedtest and Google's speedtest.
This brings us to the concept of measuring the throughput to your router, versus measuring Internet speeds. When using any Internet-based speed test, you're actually measuring two components: the speed at which data travels through your Internet connection to the router; and the speed at which that data is then sent to your PC or device via its wireless link with the router. To get a better idea of what's going on, these need to be measured separately.
To measure just the strength of the wireless connection with your router, which gives us a much better idea of the effect of interference and distance, we need to transfer data solely between the device and the router. The only real way to do this is to add storage capability to the router - see the Ghetto NAS discussion further below. This still creates a limitation, since storage is typically attached to a home router via USB, and in my case, my combination of drives limits me to real-world USB 2.0-restricted speeds of around 33MB/s, or 265Mbps. If I just plugged a single USB drive into the USB 3.0 port of my router, I could raise that maximum to around 110MB/s or 880Mbps.
Your hardware also has its own networking limitations depending on the version of Wi-Fi it supports. All wireless devices made in the past decade should support the ubiquitous 802.11n standard, giving a 2.4GHz a theoretical maximum of 400Mbps, and 5GHz a maximum throughput of up to 600Mbps. My router and the Wi-Fi card on my PC are both capable of using the newer 802.11ac networking standard which is further optimized for 5GHz. The theoretical maximum of this standard is 600Mbps for 2.4GHz, and for a 5GHz link it can supposedly reach 1300Mbps throughput. However, my Wi-Fi card is limited to 867Mbps maximum in 5GHz.

To test my throughput, I created a dummy test file, as covered in the Primary Drive section earlier, this time making it 3GB in size and calling it TestFile3GB.tst. I opened File Explorer and moved the dummy file to one of my networked drives. Once it was finished, I did the same in reverse, moving it from the networked drive back to my PC. The results, as you can see above, are reasonably smooth with no large spikes or major drops in throughput, because 5GHz is a frequency that's largely interference free. At around 22MB/s average download speed, and 16MB/s average upload speed, that gives me a raw throughput of approximately 176Mbps/128Mbps along the wireless connection between my router and PC. This is far greater than the maximum Internet speed I can get on my current plan of 50Mbps/20Mbps, but much less than my equipment's theoretical maximum throughput of 867Mbps.
Therefore the signal indicator is, strictly speaking, accurate in telling me that I'm only getting a fraction of the full strength of the signal from my router. Distance and obstructions are affecting me when using 5GHz, yet the sheer power of 5GHz 802.11ac means that even when significantly weakened, it still provides much more raw wireless bandwidth than the fastest consumer Internet connection available here in Australia (100/40). It also has sufficient bandwidth to allow me to transfer files to and from my networked drives at an unremarkable but not atrocious speed. Bear in mind that my PC is 10m away from the router, with the signal passing through furniture, two outer walls, a window, bathroom tiles, timber frames, metal studs, etc. to arrive at the Wi-Fi card's antennae located at the back of my PC. So all in all, this is a great result, and far better than anything I ever experienced using 2.4GHz.
Optimal router placement and antenna arrangement are another area where, after a great deal of testing and tweaking, I've come to the conclusion that it's generally not worth excessive effort.
For example, ASUS recommends that my router have its antennae arranged as shown above. This doesn't work best for me, nor I suspect, for most people, for a simple reason: a Wi-Fi signal emanates from your router in a doughnut shape, with the antennae in the center of the hole. If I arrange the antennae as recommended, I'm splitting the doughnut into three, with the doughnuts now tilted left, right and flat. ASUS probably recommends this arrangement because it provides the broadest possible Wi-Fi coverage in a range of scenarios, such as multi-storey homes. But in my case, I get the highest wireless throughput with all three antennae aligned straight up.
Note that the same logic applies to any antenna(e) on your Wi-Fi card or receiving devices - point them upward so they align in parallel with the router's antennae. Don't point them at the router.
The common advice for optimal router placement includes putting it slightly higher than the devices it connects with, away from walls and other major obstructions, towards the center of your home, and not too close to other electronics. This advice is correct, but in many cases, people don't have too many options since the cable or fibre port, or an available telephone jack, as well as a power socket, are not in convenient locations, and I, like many others, don't want to rewire my house, add repeaters or additional routers, or have the router sitting somewhere that's too prominent. If you follow the Ghetto NAS method I cover further below, you'll also need room to store any drive(s) you've added and keep them relatively cool.
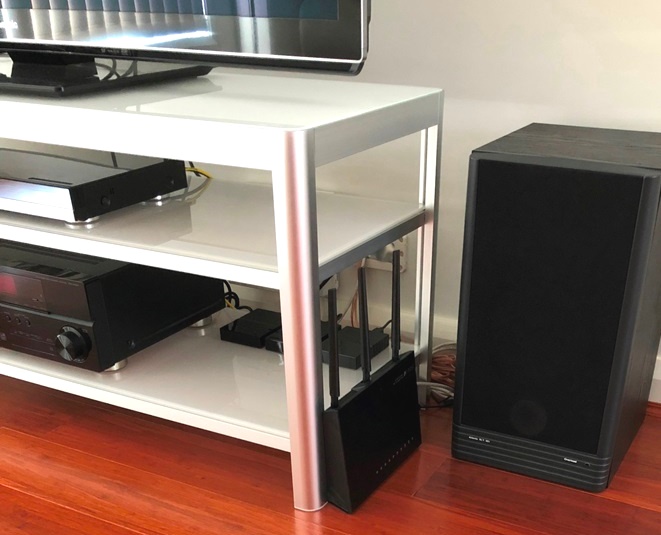
Everyone has different circumstances, so I can't provide any specific advice. But take heart based on my experience. My router sits on the floor of my living room, up against a glass and metal entertainment unit that holds several electronics-laden components, near a wall, next to a speaker, in a sunken area, at the far end of the house from the other rooms - half of my signal goes into the street. I'm fairly sure you can't beat that for poor router placement unless you really try. So as long as you have the same or similar quality router, speeds equal to or in excess of mine should be possible for you on the 5GHz frequency throughout most of your home. Just be sure never to put your router anywhere that gets too hot; remember, it's like a small PC, and it can easily overheat and start constantly rebooting.
Ghetto NAS
As a tech enthusiast, I'm often surprisingly slow to adapt to change. So when I heard more and more talk regarding Network Attached Storage (NAS) setups, I basically ignored it. From what I understood, outside of enterprise needs, a NAS was mainly used to serve media files via a home network. This seemed irrelevant to me, because (a) I didn't consider myself as having a "home network"; and (b) I didn't feel it was worth the time and effort, given my main entertainment consumption source was the ever-reliable and high quality Blu-ray disc. A dedicated NAS also means that you need a NAS enclosure, an additional source of power, a place to set up this server, and it typically requires high quality drives and more of them in order to establish some form of RAID setup, because data redundancy is a key feature of a NAS.
Around a year ago, a series of events made me realise that now is the perfect time to put together a form of network-attached storage for myself. But not a fancy, expensive, server-like dedicated NAS; think of this as a cheap alternative, a "ghetto NAS". It does the same basic job as any real NAS, for a fraction of the price, and I've even worked out a better way of dealing with the redundancy issue. The fundamental requirement for this setup is a reasonable quality router that also allows you to plug in external storage.
The first step is to prep one or more USB external hard drive(s) to connect to the router. I recommend the Western Digital My Passport drives as I've used them for years. They've proven relatively fast, highly durable, and can be found most anywhere at a reasonable price per Terabyte. You may already have one or more USB external drives lying around, so you can use those instead, no matter how slow they may be, as long as they have a reasonable amount of storage - preferably at least 2TB (2,000GB).
Large hard drives typically need to be partitioned using GPT, and I recommend a single partition that takes up all available space to prevent any issues. Format each drive in NTFS, and Importantly, create a single new folder on each drive. You can name this folder anything you wish, but for convenience I recommend that the name reflect its intended content, such as Movies, and the name should also have no spaces in it. You can then create as many subdirectories under that folder as you wish. Just make sure to have at least one folder on your USB drive, and make sure you copy any files you want to share via your network into that directory, not into the root directory.
Next, connect the drive(s) to the router. If it's a single drive, this is fairly straightforward. In my case, I started off with three 2TB USB drives as I had them spare, and I wanted as much available networked storage as possible. My router has two USB ports, but I found a solution that should work for other routers as well. I purchased a 4 port USB 3.0 Hub and plugged the three hard drives into it. When connected to the USB 3.0 port on my router, it wasn't detected, but when plugged into the USB 2.0 port, all three drives were recognized. One of the reasons for this is that USB 3.0 has a higher maximum power requirement than USB 2.0 (900mA vs. 500mA), even if you plug a USB 2.0 device into a USB 3.0 port. Therefore three USB drives in a 3.0 port may be too much for the router to power, so I recommend sticking with the USB 2.0 port just to be safe regardless. Remember, USB 2.0 operates at a real-world maximum of around 33MB/s to 40MB/s, which is 264Mbps - 320Mbps, much, much faster than even the highest bitrate 4K Blu-ray disc (128 Mbps), so unless you have multiple people attempting to access extremely high bitrate material, or download large files, from the same drive at the same time, it will meet your needs.
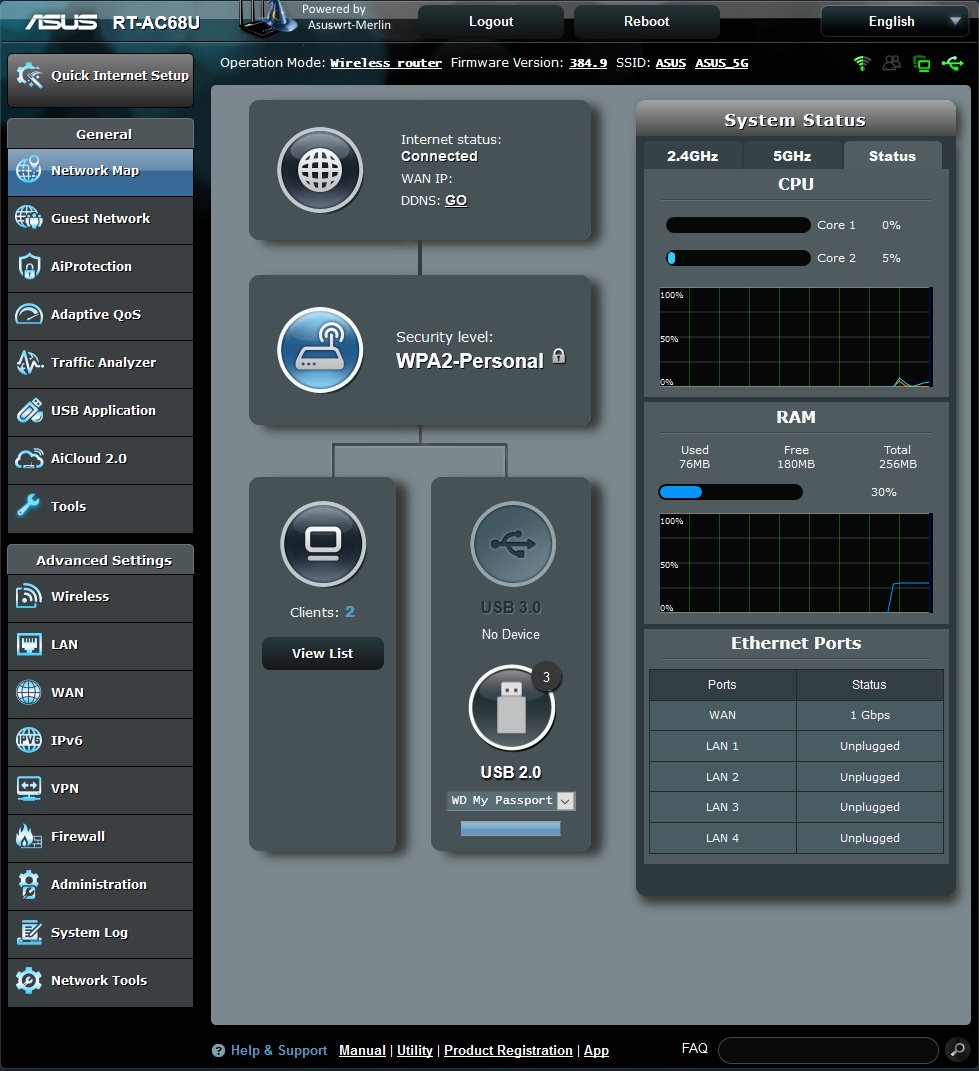
To access your router's graphical user interface, check your router manual. In my case, the ASUS RT-AC68U control panel is accessed by entering https://192.168.1.1 as the address in a web browser, and by default, the username is admin, and the password is admin. You should change these to something unique and complex. I'm using the Merlin firmware, which is very similar to the default ASUS firmware. Regardless of which you choose, make sure you update your router's firmware to the latest version before continuing. As I noted earlier, it's also a good idea to do a full factory reset and reconfigure all of the settings.
Once you log into your router, you should be able to see your drive(s) as being connected. On my router, this is fairly easy to do because the drives are displayed on the bottom right side of the main page, as the screenshot at the top of this page shows. They're clearly indicated as being USB 2.0 drives, the 3 badge shows that the router can see all three of them, and the drop-down box lets me see each one.
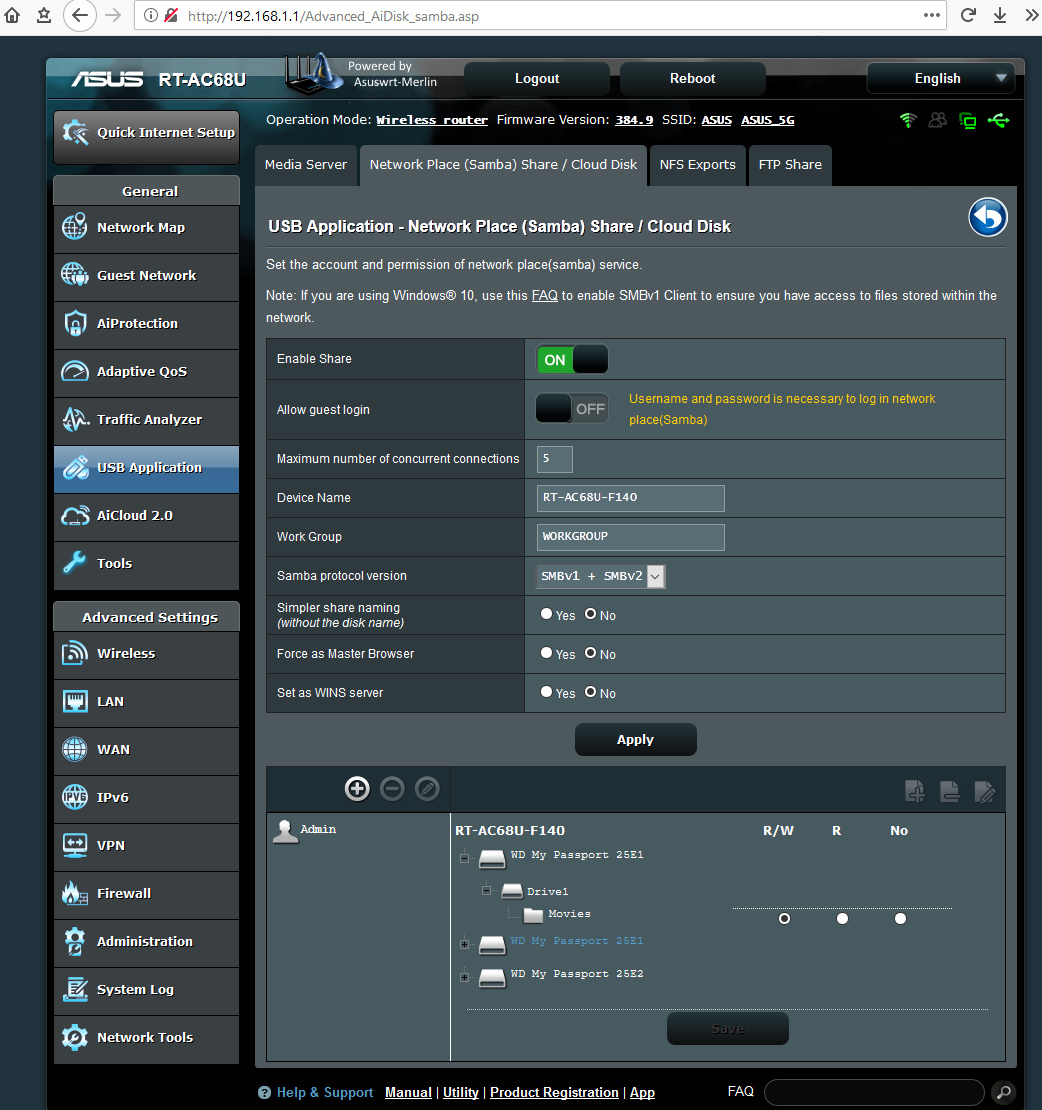
The next step is to go to a relevant area in your router's settings for media or file sharing; in my case, this is the Media Services and Servers section, under USB Applications. There I can select the 'Network Place (Samba) Share / Disk' tab. The goal here is to enable a file sharing protocol on the router, so that other devices and PCs on your home network can see and access the content of the connected drives. If your router, like mine, has Samba (SMB file sharing) then it's the best choice. We don't need something more complex, like DLNA. You may also have to set a username and password for these folders, so be sure to record what you assign to them as it will have to be entered when configuring any other device to access the contents of these folders.
The last step can be tricky, depending on the device you're configuring to access these shared drives.
In Windows 10, Microsoft has made things more difficult by removing SMB1 support, which in turn removes the ability to simply browse your network and find the shared folders. Fortunately, ASUS has provided a FAQ that details how to re-enable SMB1. However, because SMB1 is a security risk (which is why MS removed it from Windows 10) I recommend that you first attempt to access the shared drives without enabling it. Microsoft has provided instructions, but I suggest using the much simpler method below, which neither requires re-enabling SMB1, nor specifying who has access:
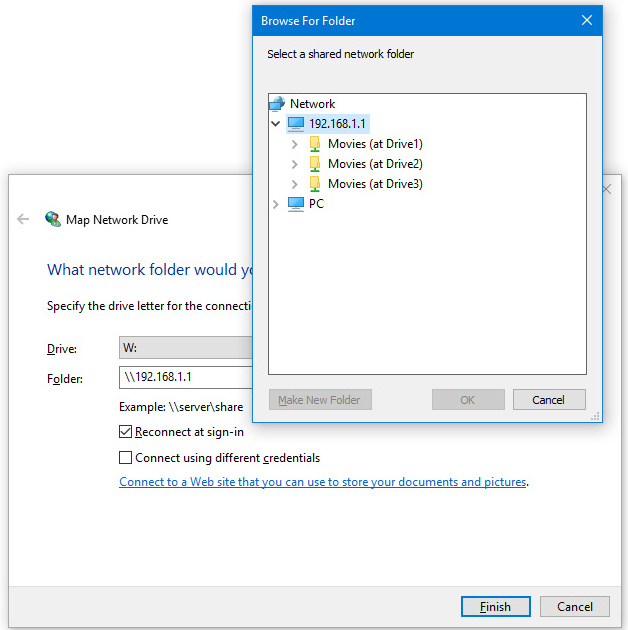
1. Open File Explorer.
2. Right click on This PC and select 'Map Network Drive'.
3. Select a drive letter to assign to the networked drive you'll be adding - each drive connected to your router requires a separate letter. I suggest a drive letter that's never been used, such as X:, Y: and Z.
4. In the Folder box, enter the direct network address to your router. This is the same IP address you used to access your router GUI earlier. In my case, that's 192.168.1.1. Add a double backslash \\ to the start of the address so Windows knows it's a network resource, the end result looking like this: \\192.168.1.1
5. Press Enter or click Browse, and you should now see the dialog box shown on the left above. Basically, Windows has connected to your router via its direct address on your network, and in looking for network share folders, can see the folder(s) you created in the root directory of each drive.
6. Select the relevant folder, in this case Movies, and click OK. That folder, and everything within it, is now being shared on your home network, accessible by anyone who has the correct password to join your Wi-Fi hotspot, as well as the correct username and password for the share.
The new network drive(s) should appear at the bottom of the navigation pane on the left side of File Explorer. Right-click on a drive, select Rename, and name it whatever you wish. Windows automatically adds the drive letter in brackets at the end. My three drives are show on the right above.

If you're having trouble with the steps above, then enable SMB 1.0 and try again. The process of adding shared drives to other programs, such as Kodi, is similar to the steps shown above. In Kodi 18 for example, refer to Section 5 of this Kodi Wiki. Once again, the key here is to know the direct IP address or device name for your router. That allows a program to link to it directly in your network, and once the correct credentials are entered, log in and access the shared folder(s). If you add multiple folders with the same name - in my case, each drive has a Movies folder - then most popular media programs such as Kodi, Infuse, and VLC are smart enough to display the contents of these separate folders as though they're on a single drive, similar to the way Windows Libraries work.
On my Apple TV and iPad for example, the Infuse app merges all of the movies and TV shows I've stored on each drive under the Movies and TV folders I have on all three drives. It doesn't separate them in any way when listing the library; it's as though I have a single 8TB drive. All of the TV show seasons shown in the screenshot above are spread over the three drives.

Setting up a networked storage system in this manner means you can store any content you wish on these drives. For example, I also have a large number of comics in PDF format - I was lucky enough to buy a couple of the GitCorp Marvel Digital Collection DVDs before the prices went insane (they're now something like 20x what I paid for mine - if you see one for cheap, grab it!). I've uploaded these into a Comics sub-folder under the Movies directory. I can read these on my iPad anywhere in the house, but they would never all fit onto the iPad's 16GB local storage. I also often temporarily upload backup copies of documents I'm working on to one of the drives as a safety precaution, though I strongly recommend that you don't use this "ghetto NAS" arrangement as your main backup option.
On my ASUS router, there's even a built-in download manager called ASUS Download Master, which allows the router to manage the downloading of torrents directly to its connected drives while your PC is off. However, be aware that if Download Master is enabled, even when it's not in use, it will keep your hard drives spinning all the time. The Merlin firmware, in the Administration section, under the System tab, provides an option called 'Enable HDD Hibernation' that you should set to Yes, and the default Time Period of 300 seconds (5 minutes) is recommended. This allows your connected hard drive(s) to spin down into idle mode properly when they're not being accessed, which reduces wear and tear and heat buildup.
The end result is that you basically have the equivalent of any NAS in terms of serving media and whatever else you wish to a reasonable number of devices in your home, for a fraction of the price. By utilizing your router, which already has to be on all the time, rather than having to purchase, find a place to set up, and power, a separate NAS server for the same purpose, you save money, space, electricity and noise.
Hardcore NAS aficionados will no doubt quickly point out that this isn't at all like a NAS, because there's no data redundancy. That means if a drive fails, or any file(s) are corrupted, you lose the data. On a NAS, there are additional drive(s) that can automatically rebuild corrupt data or recover from drive failure. But I contend that I have a better solution in that regard too: If you want redundancy on a setup like the one shown above, purchase additional drives to match the storage you're using, then copy all of your files across to these drives. Now, you can use the drives to set up a similar configuration at a friend or relative's house. So rather than wasting money on storage drives that act as a rarely-used insurance policy, you've got a backup that's being actively utilised, and if ever your copy or their copy of a file is corrupted, you can replace it on their drive, or they can replace it on yours, since the chances of both of you having the same sort of failure at the same time is next to none.
The method above gives you cheap networked storage for anything you want to do. At this point, I'll add the usual legal disclaimers: the above is presented for information purposes only; you are responsible for making sure that you have the legal right to store, stream or share your files in this manner.
Even if you have no interest in a NAS of any kind, I hope this section has piqued your interest in terms of the things a good router is capable of doing. I strongly recommend buying a decent router, as it's a great investment that will only become more important over time. Note: the ASUS RT-AC68U I've mentioned in this section is still a good router, but its internals are getting a bit long in the tooth. I recommend the newer RT-AC86U if you need a router, or the equivalent DSL-AC88U for those who need a modem + router.
Note: Just as I was finishing this article, I opted to buy an ASUS PCE-AC58BT PCI-e adapter to replace my ASUS PCE-AC56 unit, primarily because I want to add proper low-latency Bluetooth capability to my PC, rather than using a cheap Bluetooth USB dongle. The PCE-AC58BT provides both higher potential 5GHz speeds in the future, as well as Bluetooth 5.0. Initially, it seemed to perform poorly compared to my old Wi-Fi card, but after I installed the latest drivers (it uses these Intel Wi-FI and Intel BlueTooth drivers) and rebooted my router, it works at least as fast now. I also found its stubby non-magnetic antenna to be sub-par, so I replaced it with the PCE-AC56 antenna I was using before, and surprisingly, I get a full Wi-Fi signal now, with the Adapter properties showing that it has risen to 468Mbps throughput to my router. Its Bluetooth capability seems excellent too: no latency or audio quality issues with my wireless BT headphones. So if you're shopping for a Wi-Fi card, I recommend getting a good Wi-Fi + BT combo.
In the next section, hell freezes over as I provide a Windows 10 Tweak Guide of sorts, something I said I'd never do.
|
|