
Call of Juarez Tweak Guide
[Page 5] In-Game Settings
In this section of the guide I provide detailed descriptions, and where possible recommendations, for all the in-game settings to allow you to achieve a good balance between image quality and performance. It is virtually impossible to provide a specific measure of the performance impact of any particular setting, as it varies significantly based on different types of hardware and their level of support for shader effects for example, or your chosen resolution and the interaction of various other settings. However a general indication of the impact is given for all settings which affect performance. Also see the Conclusion section of this guide for a general discussion about the CoJ game engine.
To access the in-game settings, start Call of Juarez and click on the Options item in the main menu, or press ESC during a game and click the Options item. Each section of the in-game settings is covered in greater detail below:
Video
Resolution: This setting controls the number of horizontal pixels by vertical pixels the game will display on screen. The higher the resolution, the greater the number of pixels, and hence the clearer the game's image appears but the more work your graphics card has to do to draw it all. I cover Resolution in detail in my Gamer's Graphics & Display Settings Guide. If altering the resolution doesn't impact significantly on your FPS, it is likely that your CPU is the bottleneck. Note that you can set a custom resolution if you can't find one to suit your needs here - see the Advanced Tweaking section.
Max Refresh Rate: This setting controls the maximum refresh rate used by Call of Juarez at your chosen resolution. For more details of refresh rate and what it does, see my Gamer's Graphics & Display Settings Guide. You should not set a refresh rate higher than your monitor can physically support at the resolution you have chosen, as this will lead to a black screen. If in doubt, leave this set to 60Hz to start with, as this will work on all monitors. Ideally you should set the highest rate supported by your monitor, but since this setting doesn't necessarily appear to detect that maximum rate correctly, and allows you to set rates higher than supported, do not alter it until you are sure that your monitor can support it. If you do set a refresh rate which is too high and can't get back into the game to change it, you can manually alter the refresh rate in your Video.scr file - see the Advanced Tweaking section.
Full Screen: This setting determines whether the game will take up the entire screen when running (On), or only run in a window on your Desktop (Off). In general, for maximum stability, Windows memory management works best when a game is running in full screen mode. However if you want to try to gain some FPS, or want to run a non-standard resolution (See Advanced Tweaking section), you can run the game in windowed mode. If using windowed mode, make sure your CoJ Resolution setting is equal to or lower than your Windows Desktop resolution otherwise portions of the game screen will not be visible on your display.
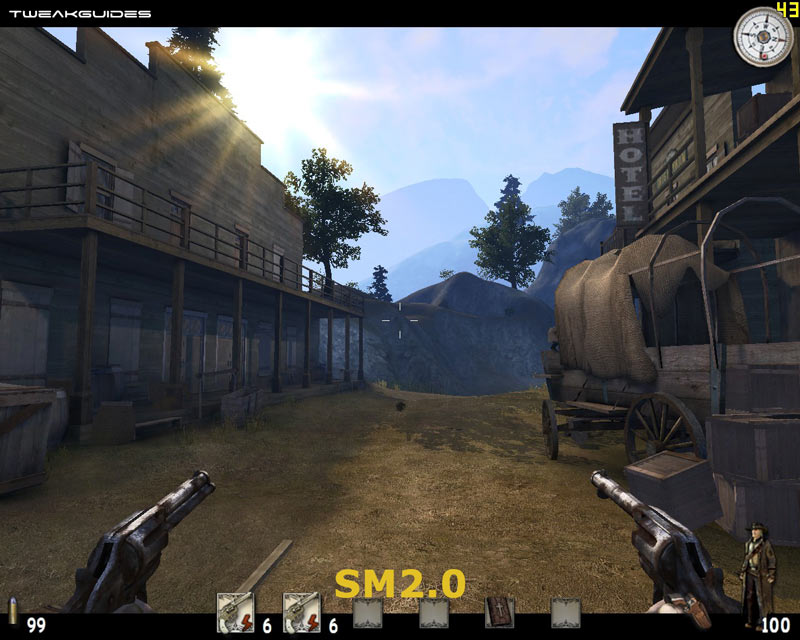
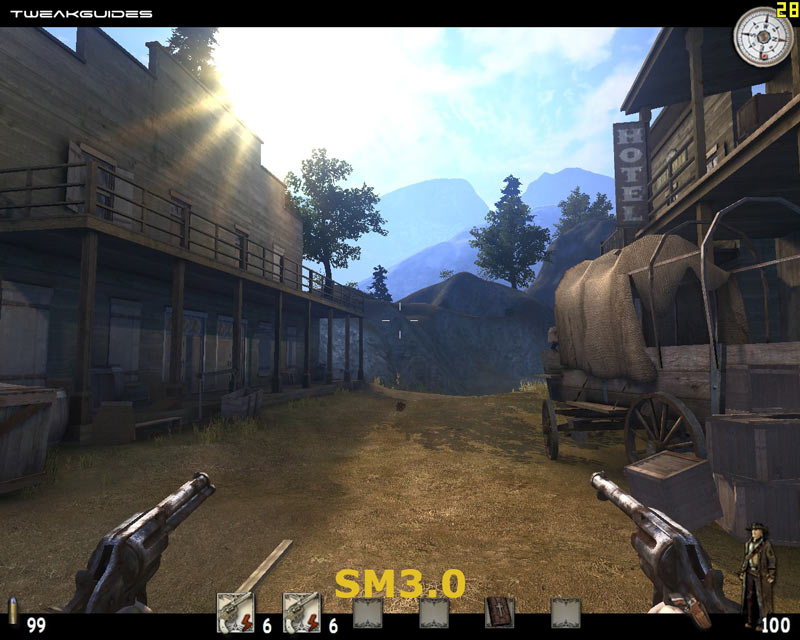
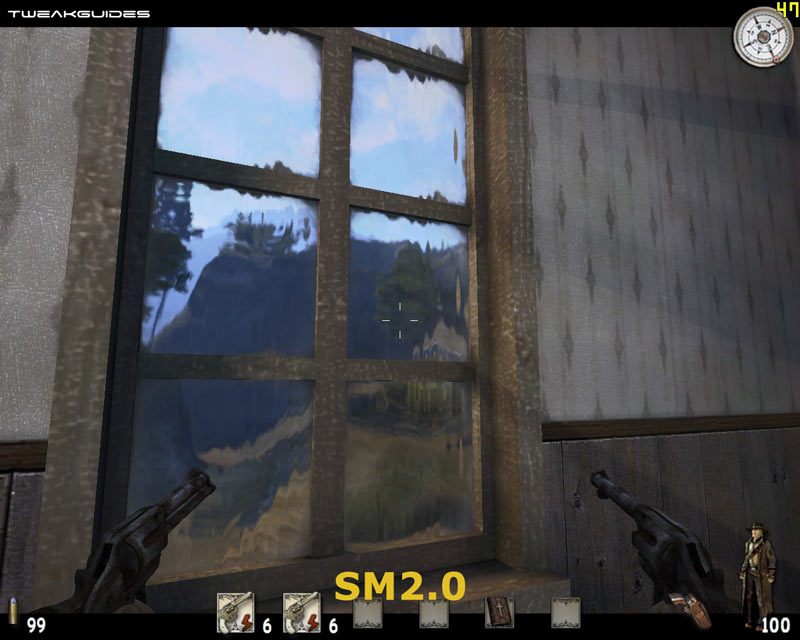
Shader Model: This setting shows the current Shader Model (SM) used for many of the special effects in the game. A Shader is an effect applied to objects in a 3D game world to give them additional properties, like shiny or warped surfaces for example, or provide more realistic lighting effects. See the Graphics Process section of my Gamer's Graphics & Display Settings Guide for more details of how a shader is commonly used. The bottom line with this setting is that typically, if you are using a graphics card with SM3.0 hardware support, such as the ATI X1000 series or newer, or the Nvidia GeForce 6600 series or above, then you should excellent image quality and performance by setting this option to SM3.0. If your graphics card does not support SM3.0, you will not be able to choose anything other than SM2.0. You may also prefer to run SM2.0 on an SM3.0 card for potential performance improvements and your personal preference for the type of lighting used. Several screenshot comparisons of the same scenes using SM2.0 vs. SM3.0 are provided below (note my personal FPS figures in the top right corner). Examine the difference in glass, lighting and surface effects in these screenshots:
Note: The DX10 version of the game will automatically run only in SM4.0 mode when launched from the CoJ_DX10.exe file. This provides the best possible visuals - see the previous page for more details and screenshots of SM3.0 DX9 vs. SM4.0 DX10.
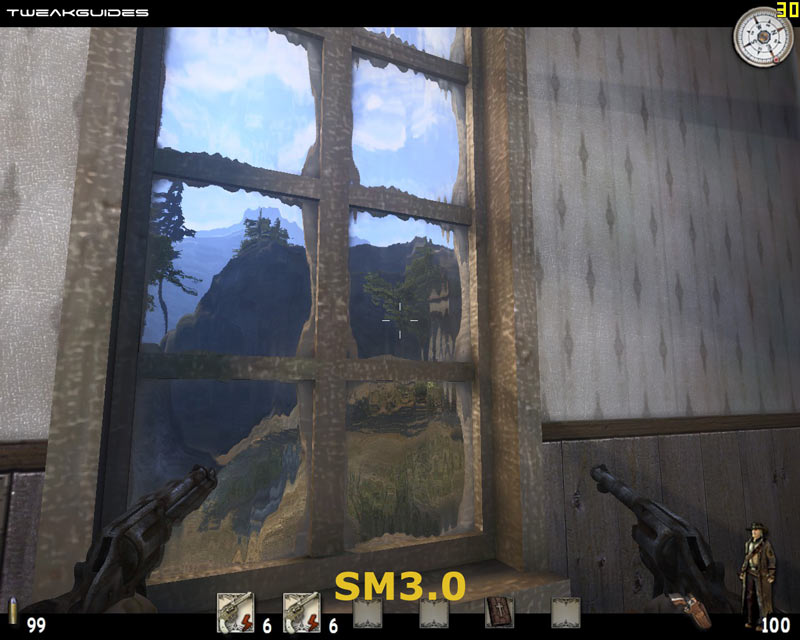

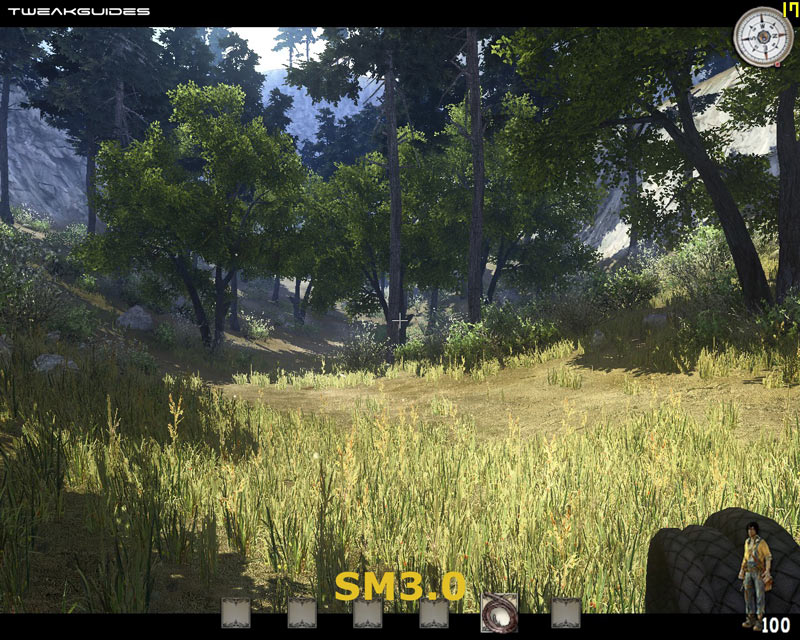
Selecting SM3.0 or above also automatically enables High Dynamic Range (HDR) lighting, which gives the scene a glow, and also allows light to react dynamically - and some would say more realistically - depending on the environment and circumstances in which it is being viewed. However HDR lighting brings with it a performance hit, so on some systems which support SM3.0, enabling SM3.0 may give you less FPS than using SM2.0. Also note that the Depth of Field effect (see further below) can only be enabled when SM3.0 is used. In general you will have to experiment to see which you prefer overall. Also see the PostProcess setting under the Advanced Tweaking section as this provides you with even more options for altering shader effects. Note that changing the Shader Model version requires a restart of CoJ to implement.
Important: The first time you load up a level after changing the Shader version, or after changing settings like Material Quality, Shadows or Shadow Map Size, you will get noticeably longer loading times. This is because the game has to create or update a large number of custom shader files (around 2,700 - 8,000 small files) which are held in your shader cache. See the Troubleshooting Tips section for more details of the location of the shader cache and how to resolve any problems with it and optimize it, but note that this is one of the reasons why CoJ sometimes has longer loading times, especially on hard drives with slower seek times and/or which aren't defragmented often.
The next page continues the In-Game Settings descriptions.
|
|