
The Gamer's Graphics & Display Settings Guide
[Page 2] The Graphics Process
The Graphics Process
To get a good understanding of what the various display settings covered later in this guide actually do, we must first understand how a graphics card works in conjunction with the rest of your system to produce the images displayed on your monitor. This is extremely important and will help you see more clearly why certain graphics settings have the impact that they do, and will also help you find ways of improving your overall performance and image quality with some smart changes or upgrades.
However I'm fairly sure that just like me, most of you don't like wading through pages and pages of highly technical discussions and diagrams to understand the underlying process, so this section is an attempt to put everything in simple-to-understand language. This is by no means a definitive look at computer graphics; rather the aim is to give you an overview at what goes on 'under the hood' of your PC when you're playing a game. Again, it's a must to actually understand the fundamentals.
If any of the computing terms in this guide are new to you, refer to the Basic PC Terminology chapter of the TweakGuides Tweaking Companion for clear explanations. In fact if you haven't used the Tweaking Companion yet, I strongly recommend that you set aside some time to go through it, as it has a wealth of information on all manner of PC and Windows-related topics.
I have also provided links throughout this guide to a range of Wikipedia articles which explain particular settings further. These were not my primary sources for researching this guide (See the Further Reading section), however Wikipedia is a readily available, relatively simple and (at least for non-controversial tech articles) reasonably accurate source to link to, so I have used it as a ready resource throughout the guide. Remember that for more specific graphics optimization advice, check the relevant game tweak guide, as well as the ATI Catalyst Tweak Guide or the Nvidia Forceware Tweak Guide. I won't be repeating all the information in those guides here for obvious reasons.
The following steps show the entire process of running a game, from clicking the game icon, to the point where a 3D image appears on the screen. Note that it assumes the use of a fairly recent graphics card, not an integrated (onboard) graphics solution.
Step 1 - The Game is Launched
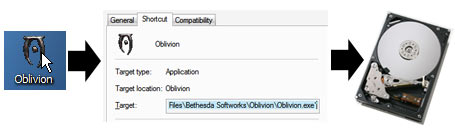
When you double-click on the icon for a game, this tells the Operating System (OS) to find and start the relevant game executable (.exe) file on your drive. This executable file has the game's specific programmed instructions on where to find and load up the relevant additional resources it needs to start the game.
Performance Tip: Defragmenting a hard drive speeds up the loading process, as all the different fragments of the files your game executable is looking for will be physically arranged on your drive in such a way as to be more rapidly found and read. Defragging also reduces in-game stuttering (see next step) - see the Drive Optimization chapter of the TweakGuides Tweaking Companion.
Step 2 - The Data Loads into RAM
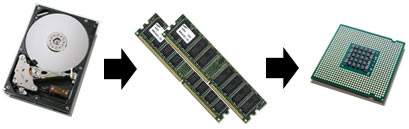
The game executable and the files it needs to start the game commence loading from your drive into your system's Random Access Memory (RAM), coordinated by Windows. The reason for this is that RAM is many times faster than any drive, and for your Central Processing Unit (CPU) to be able to use all this information to perform complex calculations at optimal speeds, it needs it to be stored in RAM first. From there, the CPU uses additional forms of memory storage, such as its own onboard L1, L2 and L3 CPU Caches, to ensure that it doesn't run out of information to process. The bottom line is that at any time if a CPU can't get enough data to process, it will simply sit and wait for the next piece of data it needs to load up. Clearly this can result in reduced or sporadic performance.
It's important to note that not all the information for a game can be completely loaded into RAM - only the portions needed immediately are usually loaded. Most games are far too large to fit into RAM, and furthermore remember that some RAM is also being used by your Operating System and other applications. There is no way to force all of a game program to sit in RAM - even if you set a 0 Pagefile (which is not recommended). Even if a game could comfortably fit entirely into your RAM (e.g. a game with 1GB of data on a system with 2GB of RAM), the Operating System in conjunction with the game program determine how much will be loaded into RAM, and when, and regularly swap information between your drive and RAM. The only way to alter this behavior is if the game specifically has configuration commands for this purpose (usually in .cfg/.ini files) - which if available, I provide in my relevant game tweak guides.
Performance Tip: This step firstly highlights the effect of adding more RAM to your system: it won't increase FPS as such, but it will smooth out your FPS, because the more data can be held in RAM, the less often your CPU has to wait for it to load from your drive. Removing unnecessary background programs and processes from RAM can help increase the possibility of more information being loaded into RAM (See the Startup Programs and Services chapters of the TweakGuides Tweaking Companion). This step also highlights the importance of the Hard Drive, something which is often ignored: the higher your graphics settings and the faster your system, the greater the demand this places on your hard drive to supply new information to keep up this performance. The slower your hard drive - especially when combined with less RAM - the more loading pauses you will get as the CPU waits for data to load from the hard drive into RAM before it can use it. These pauses are commonly referred to as 'stuttering'. Defragmenting your hard drive can help a great deal in reducing stuttering during games, but you may have to consider upgrading your hard drive to a faster model, or switch to a Solid State Drive (SSD) to truly reduce loading times and stuttering in more complex games.
Step 3 - The CPU Processes the Data
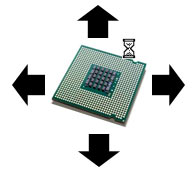
RAM is merely a temporary storage area for information that the CPU needs to constantly access. The CPU is the heart of your machine, and everything goes through it. Game data does not travel directly from your drive or RAM to the graphics card; it must first be processed and allocated by the CPU. Your CPU is constantly reading from and writing to RAM, directing information and receiving input from all the devices on your system, all of this occurring through the information pathways on your motherboard.
However systems with a plugin graphics card greatly reduce the CPU workload, since the CPU can immediately offload a large amount of complex graphics calculations directly to the graphics card. A CPU can still process basic graphics information if required, however it does so far less efficiently than a dedicated graphics card which is purpose-built for this type of work. Attempting to run a 3D game without a graphics card (or without even an integrated graphics chipset) - even if possible - would result in a low resolution slideshow at best, not to mention the fact that graphics cards have hardware support for a range of complex special effects which cannot be performed by the CPU in real-time.
Performance Tip: This step highlights an important fact: your graphics card can only work as fast as your CPU can allocate it information. So a fast graphics card will typically perform better on a system with a faster CPU. In fact many high-end graphics cards are artificially bottlenecked because they are on a system with a CPU that is not fast enough to allocate data to them. At the same time, the higher the resolution and graphics settings for a game, the less important the CPU becomes as the bulk of the work will be done by the graphics card.
|
|