
Call of Juarez Tweak Guide
[Page 6] In-Game Settings (Pt.2)
Antialiasing: The available options are Off, 2x, 4x and 8x, with the higher the sample rate, the smoother jagged lines will appear, but the lower your FPS. More details of precisely what Antialiasing does can be found on this page of the Gamer's Graphics & Display Settings Guide. Note that you may not be able to enable Antialiasing unless you're running a GeForce 8 or ATI X1000 series card or newer. You can definitely enable AA under Windows Vista in DX10 (SM4.0) mode as all DX10-capable cards can support it combined with the other effects in CoJ.
Texture Filtering: Texture filtering affects how crisp and clear the game textures - the surfaces of all 3D objects in the game - appear, particularly when viewed at an angle and as they recede into the distance. The available options are Bilinear, Trilinear, and Anisotropic, and these are explained in more detail on this page of the Gamer's Graphics & Display Settings Guide. Note that when Anisotropic is chosen here, the sample rate applied is not specified but appears to be 8x. If you want to set a specific level of AF, set this option to Bilinear or Trilinear, and then set Anisotropic Filtering in your graphics card's control panel. Higher levels of texture filtering will reduce FPS, though the performance hit is relatively minor on newer graphics cards.
Brightness: This setting allows you to change the brightness of the game image. It has no performance impact, so set to suit your tastes. The level of brightness chosen can have a significant impact on the image quality in Call of Juarez, as too low or too high a brightness can make the western setting of the game appear unnatural. It also depends on the Shader Model and Post Processing effects you are using (See Advanced Tweaking section) as to the specific level you personally need to change this to.
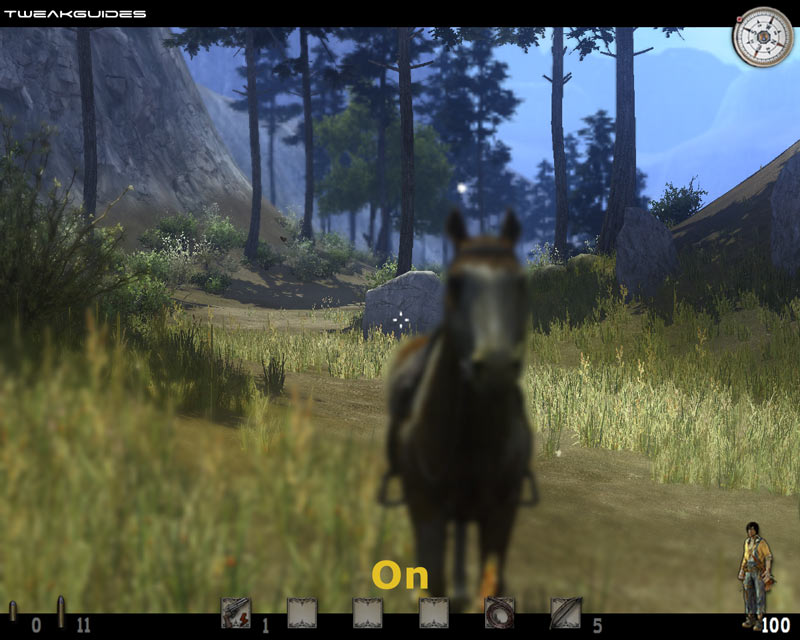
Shadows: This setting appears to have the greatest single impact on framerate in Call of Juarez. The setting controls the level of detail of the shadows cast by objects and characters in the game, and the available options here are Off, Low, Medium, and High. See an animated screenshot comparison of the different shadow settings (using both 1024 and 2048 Shadow Map Size) by clicking this link: CoJ_Shadows.gif (1.1MB). Look closely at the outlines of the shadow and how smooth/jagged they appear at each setting. The difference is more pronounced during actual animated gameplay.
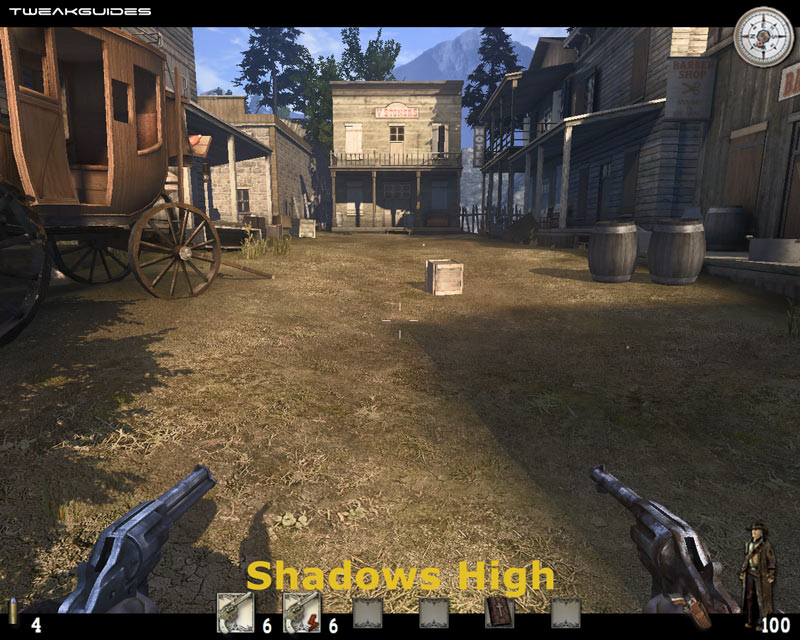
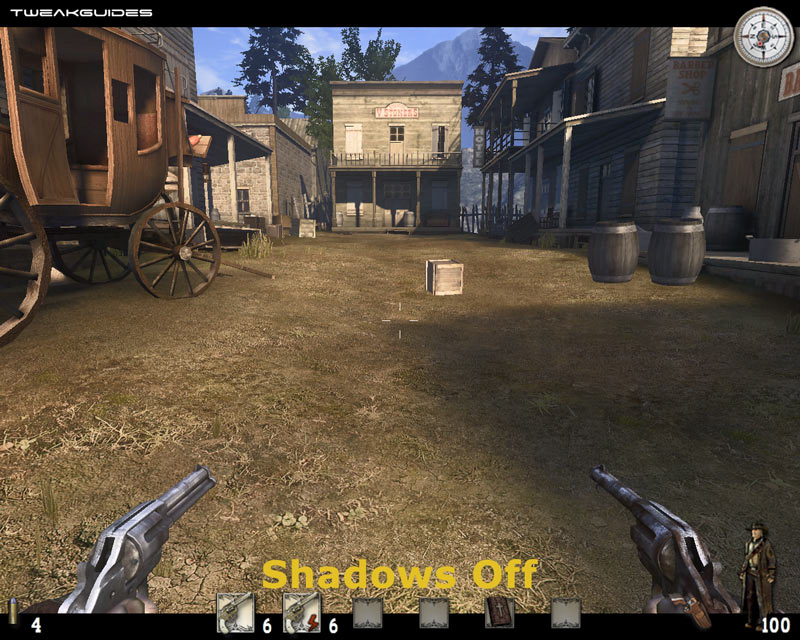
At High, shadows actually have a form of soft shadow effect applied to them, giving their outlines a less jagged, smoother, blurrier appearance. While this may look more realistic, it can noticeably reduce performance, and also makes certain shadows (e.g. tree leaf shadows) look slightly less distinct. At Medium the soft shadow effect is removed, thus the edges of shadows can appear a bit more jagged (the degree to which depends on the Shadow Map Size setting), however performance is improved. The image quality difference between Medium and Low is not significant, however Low provides slightly more FPS as expected. Finally, when shadows are turned Off altogether, animated objects such as your own character, and trees/foliage, will not cast a shadow. However a range of inanimate objects such as buildings will still have some appropriate static shadows to maintain realism. For a direct comparison of a scene using High shadows versus the same scene with shadows set to Off, look at the screenshots below:
Since shadows are quite complex, they require a lot of processing power, so if you find your FPS is not sufficient to maintain smooth gameplay, reduce or turn off the Shadow setting. For most people, the Low setting should be a good balance of performance and image quality. Note that a great deal of the image quality of shadows, and to a degree their performance hit, comes from whether you set a 1024 or 2048 resolution Shadow Map Size, which is covered in the setting below.
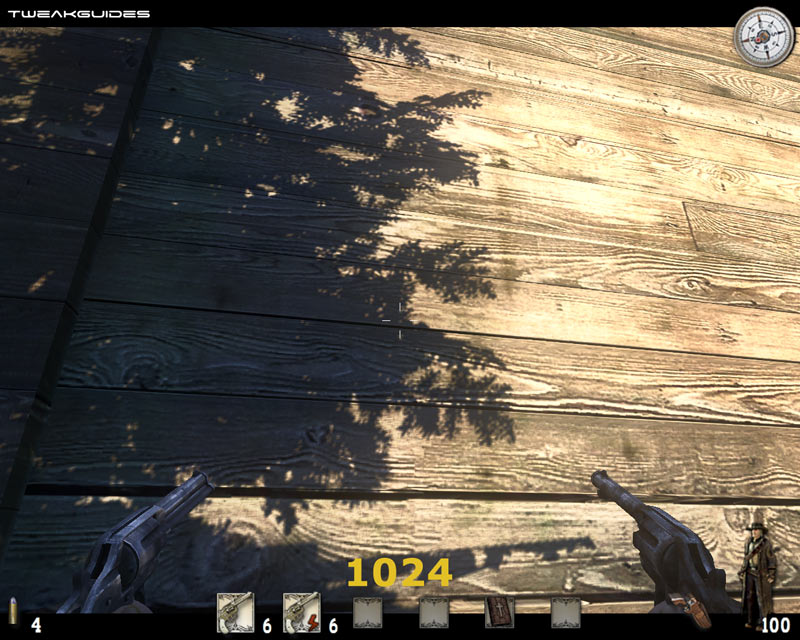
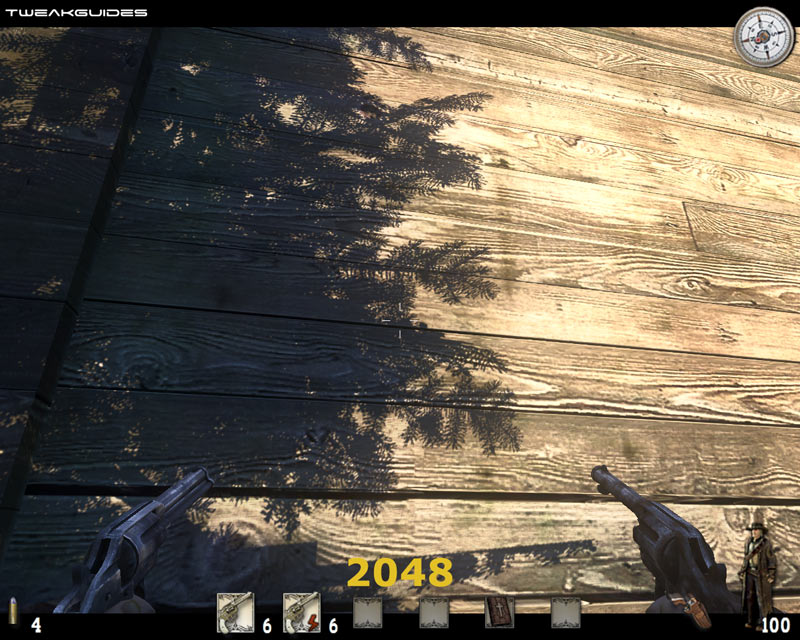
Shadow Map Size: This setting controls the resolution of the Shadow Maps used in to create the shadow effects in Call of Juarez. The available options (resolutions) are 1024 (1024x1024) and 2048 (2048x2048), and aside from the animated comparison provided in the Shadows setting further above, a more detailed screenshot comparison of the difference between 1024 and 2048 is provided above. As you can see, the higher resolution shadow map provides much sharper shadows, such that you can see the individual pine needles. However firstly your FPS may be reduced by using the 2048 option, and secondly, because higher resolution shadow maps take up more Video Memory, you may experience longer loading times and greater hitching/pauses during gameplay, especially if running on a graphics card with less than 256MB of Video RAM. Therefore in general I would recommend 1024 Shadow Map Size for most people.

Depth of Field: This effect is only available if the Shader Model option is set to 3.0 or higher, which means this effect requires a graphics card with SM3.0 or better support. When enabled, this setting simulates the way in which a human eye will sharpen an object which is in focus and generally blur any surrounding objects. A screenshot comparison of the effect is shown above. This effect is used as part of the Concentration Mode and Zoom functions in Call of Juarez. The FPS impact of this option only occurs when zoom or concentration mode are used, and for the most part the impact should be negligible. The zoom function itself does reduce FPS, but this occurs regardless of whether depth of field is enabled or disabled.
Quick Body Disappear: With this option set to On, dead bodies will disappear more quickly. If set to Off, corpses will still disappear, but it takes longer. By itself this option does not affect performance under normal circumstances, however since character models are very complex in Call of Juarez, the more characters (dead or alive) are visible on screen, the lower your performance will be. By enabling this option, you can prevent major slowdowns in larger gunfights by having dead bodies removed even more rapidly from view.
Material Quality: This setting controls some of the additional effects applied to objects in the game world to make them look more realistic, such as bump and displacement mapping and distortion effects. The available options are Very Low, Low, Medium, and High. See an animated screenshot comparison of the different material quality settings by clicking this link: CoJ_MatQuality.gif (647KB). The most obvious difference is the effect applied to the window glass, but also look closely at the window frame itself, as well as the surface of the wood on the walls and floor. Between High and Medium, some of the grain and shine to the wood is lost; between Medium and Low the window glass loses much of its warped appearance and there is additional loss in wood grain/depth. At Very Low although the image quality is quite good, all special surface effects have been removed and surfaces throughout the game world will appear very flat. The improvement in FPS from lowering this setting will depend greatly on your graphics card's level of shader support and also whether you've chosen SM2.0 or SM3.0. In general, older graphics cards will gain more FPS from reducing this setting, and newer cards running in SM3.0 will notice less of a difference in FPS.
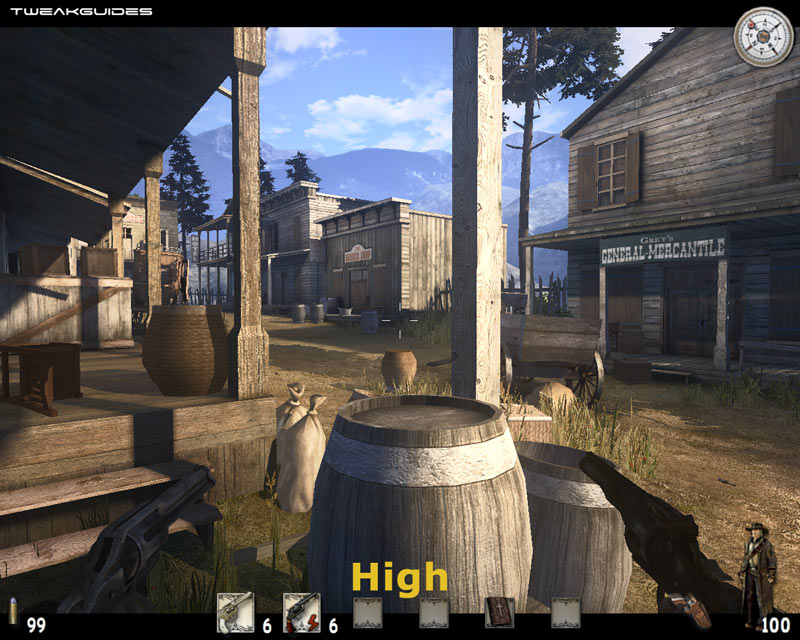
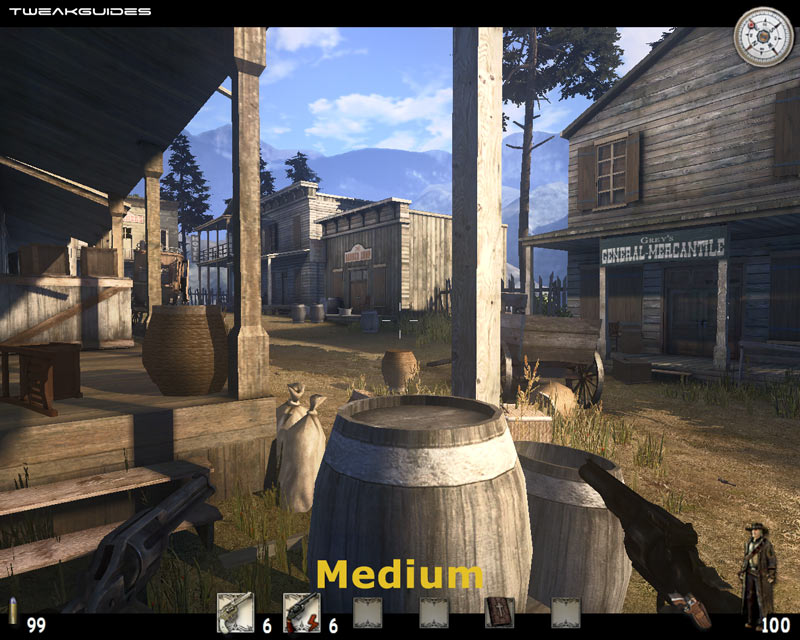
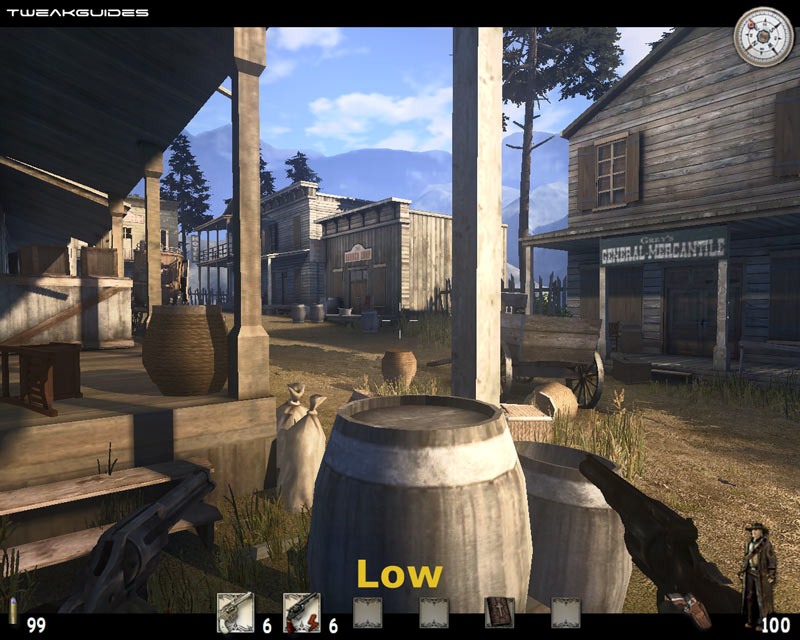
Texture Quality: This setting controls the level of detail of the textures - the 2D images applied to create the surfaces of 3D objects in the game. The available options are Low, Normal, and High. A screenshot comparison of the texture quality differences is provided above - at lower texture quality objects such as the barrel, the basket, the wooden crates and the wooden poles become much blurrier and show much less detail. Lowering the texture quality can improve performance, especially on graphics cards with less Video RAM.
The next page concludes the In-Game Settings descriptions.
|
|