
Halo Tweak Guide
[Page 10] Console Commands
There are several useful commands which can be accessed through Halos built in console. To open the console in Halo, you have to do the following:
1. Use the "-console" switch after Halo.exe (see the Command Prompt Arguments section above for a detailed explanation).
2. Run Halo and then press the ~ (tilde) key. A small pink "Halo(" text prompt will open on the bottom left of the screen.
3. You can now enter a console command at this prompt. Pressing ~ closes the prompt and returns you to the game.
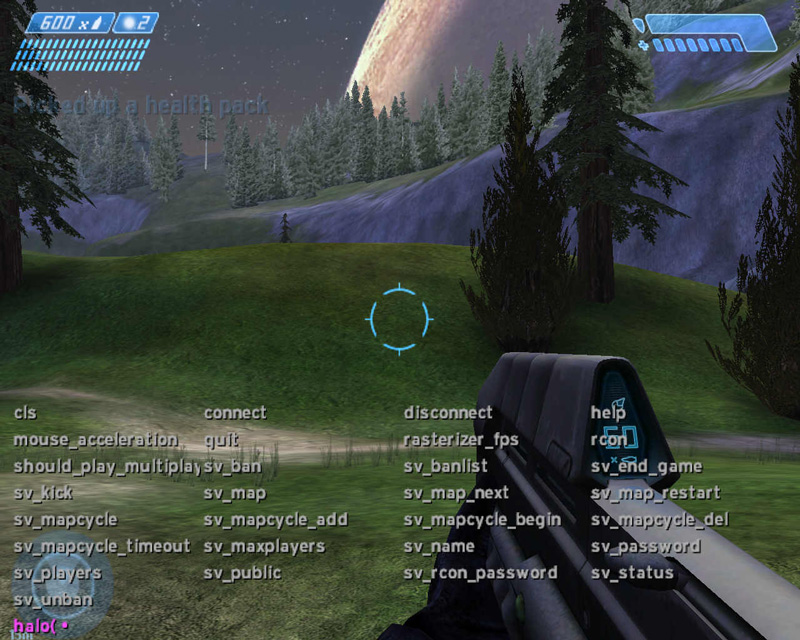
A full list of Console commands is provided below with a brief explanation.
General Commands
TAB - Shows the list of available console commands.
Help [command] - Enter the name of a console command after Help and it will display information about its function (e.g. Help Cls). Some commands have no help.
Cls - Clears any console text from the screen.
Rasterizer_fps [1/0] - Shows the number of average and actual frames per second (fps) being displayed. Rasterizer_fps 1 enables the display, Rasterizer_fps 0 turns it off again.
Mouse_acceleration [value] - Sets the degree to which your mouse movements accelerate the cursor on screen. The higher the number, the faster the mouse responds to rapid movements. See the Advanced Tweaking section for more details on how to use this value.
Quit - Closes Halo and exits to your desktop.

Multiplayer Only Commands
Connect [IP:Port] [Password] - Attempt to connect to a server with the IP:Port address and Password specified.
Disconnect - Disconnects from the current server.
Rcon - Reconnects to the last connected server.
sv_ban [player name or index] - Ban the player with the given name or index. However, this doesn't kick them out of the game however.
sv_banlist - Show the list of banned players.
sc_end_game - End the currently running game. This will proceed to the next game in the map cycling game entries list.
sv_kick [player index or name] - Kick the player with the given name or index out of the game.
sv_map [map name] [game variant] - Start a game with the indicated map and game variant. When the game is over, this game will restart itself. This command supersedes any map cycle the server has.
sv_mapcycle - Show game list.
sv_mapcycle_add [map name] [game variant] - Append this game entry (map name and game type) to the end of the game list.
sv_mapcycle_begin - Start the map cycling with the specified game entries.
sv_mapcycle_del [index] - Delete the game entry from the map cycling game list (use sv_mapcycle to get game IDs).
sv_mapcycle_timeout n - Time in seconds to restart the next game in the game list after game is finished (this determines how long clients are sitting at the post carnage report screen).
sv_map_next - End the current game and skip to the next game in the map cycling game entries list.
sv_map_restart - Restart the game.
sv_maxplayers n (Default value is 16) - Set the maximum number players. This should be done in the init.txt file, before map cycling begins.
sv_name [string] (Default value is "Halo") - Set the server name (15 characters max). This should be done in the init.txt file, before map cycling begins.
sv_password [string] - Set password for server. This should be done in the init.txt file, before map cycling begins.
sv_players - List the players and their indices for reference in banning and kicking players from the dedicated server.
sv_public [true, false] (Default value is true) - Determine if the server will be listed in the GameSpy Master Server list (true) or not (false). This should be done in the init.txt file, before map cycling begins. Note: setting this to false is equivalent to hosting a LAN game.
sv_rcon_password [string] - Set the RCon password. To remove the password, thus disabling RCon, specify an empty string "" as the password.
sv_status [true, false] - Used to continually show the status of the dedicated server in the console.
sv_unban [player name] - Allow the player with the given name to join the server again.
The next page concludes the guide.
|
|