
Crysis 3 Tweak Guide
[Page 12] Advanced Tweaking
The in-game settings in Crysis 3 already allow a great deal of scope for customizing the way the game looks and performs. There are times though when you may wish to enable or disable selected effects without raising or lowering entire settings. For example, you may wish to lower your in-game settings to Medium, then enable only a couple of the most prominent effects from Very High. Alternatively, you might want to run at Very High, but disable certain effects that are bothering you, or that you consider not worth the performance hit. In such cases, we can turn to more advanced methods of fine tuning the graphics and gameplay options in Crysis 3, as covered in this section.
The primary method of implementing advanced tweaks in Crysis 3 is through Command Variables (cvars). Using these commands, you can directly instruct the game engine to make particular changes. There are a huge number of cvars available for Crysis 3's game engine, but many are locked, and can't be easily implemented. We'll examine some of the most useful working cvars on the next few pages. First we need to look at how to properly use commands. There are three different ways in which you can pass a command variable onto the engine:
Command Console
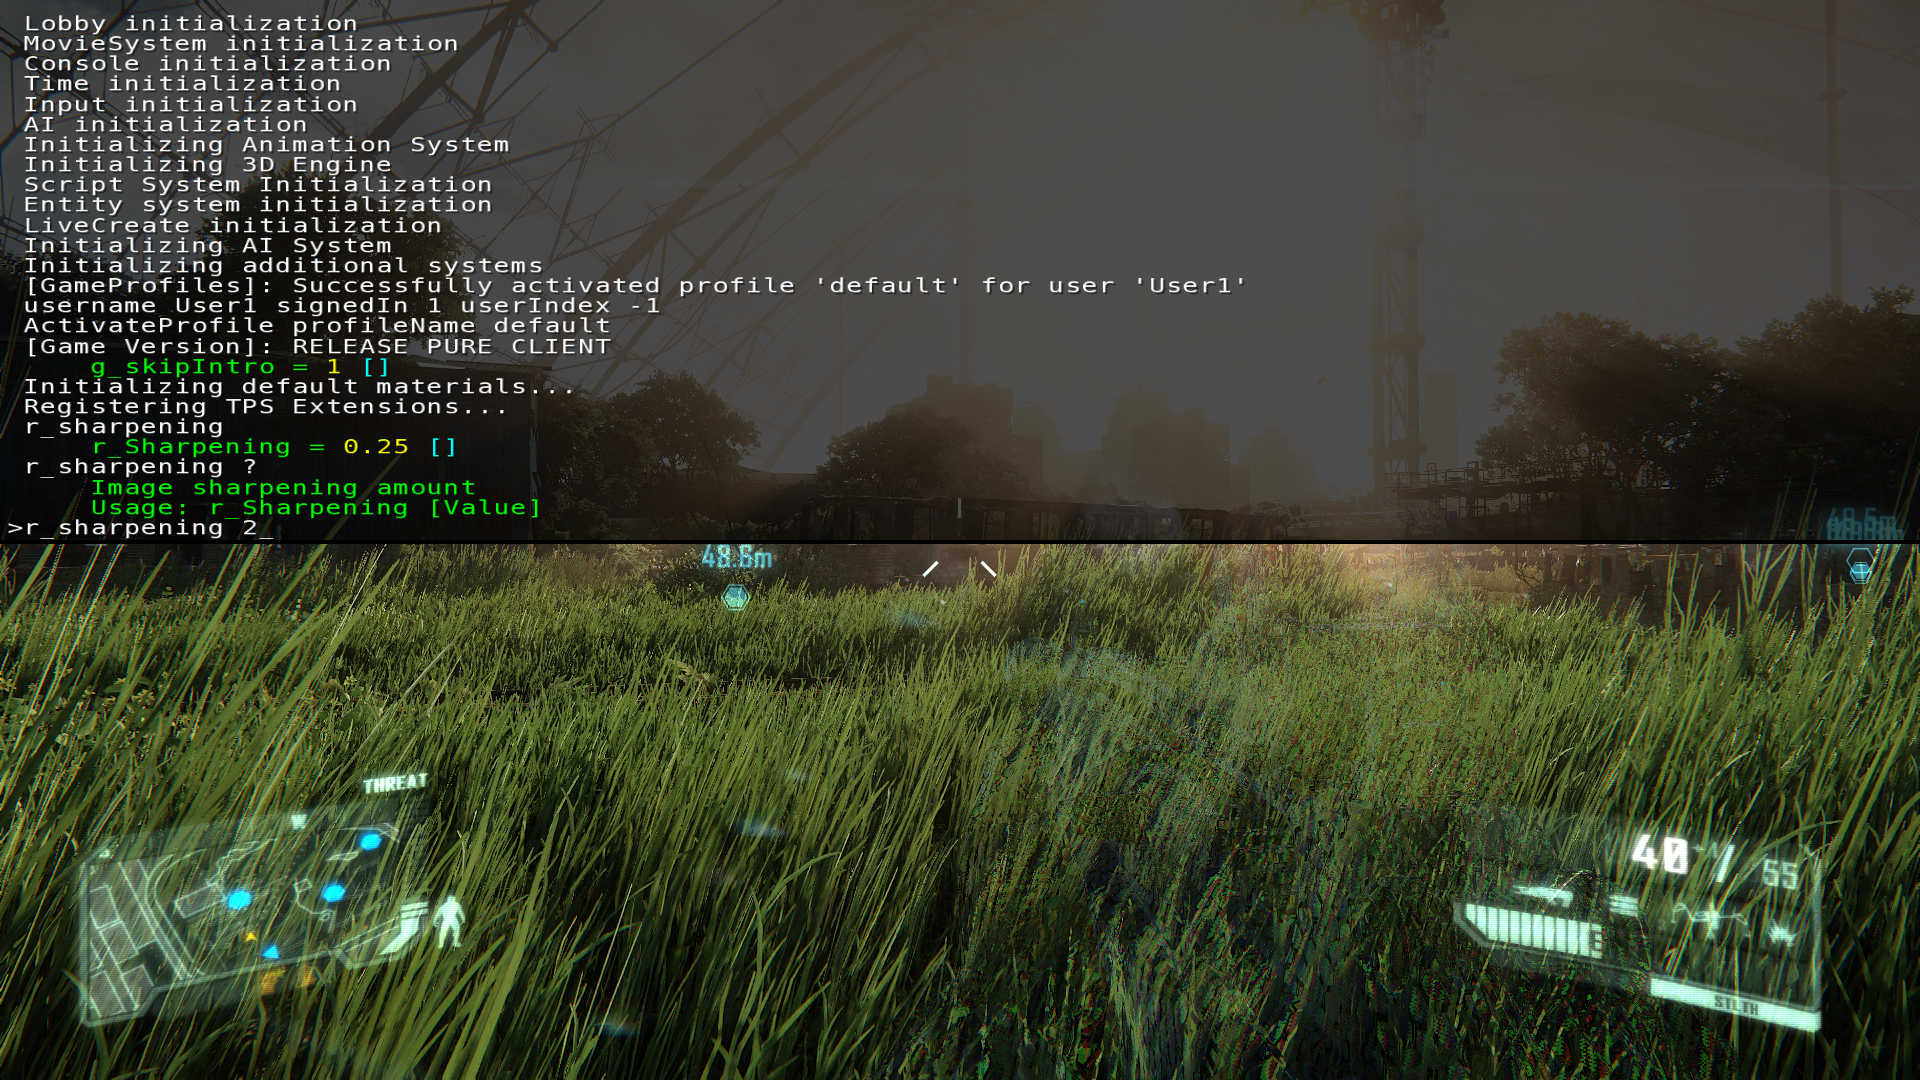
The command console can be opened and closed at any time during the game by pressing the ~ (tilde) key, which is typically next to the 1 key and above the TAB key on most keyboards. When open, you can enter command variables by typing into the console. Let's look at an example. The r_Sharpening command controls a post-process effect that will artificially sharpen the image to the degree you specify. So open the console and try typing the following commands, pressing Enter after each:
r_Sharpening - Entering the name of the command by itself will show you its current value on your system.
r_Sharpening ? - This will provide a brief description of the command.
r_Sharpening 2 - This will increase sharpening, and you should see a very noticeable change on the game's graphics as a result. Experiment with various other values.
You can also see commands by simply typing the first few letters of a command, such as r_ and then pressing the TAB key, and the console will display all working commands starting with those letters.
Any changes made to command variables via the console are not permanent, and will be undone if the game is exited, or in some cases, when a new level loads up or a saved game reloads. So the main use for the console is to test values for a command before committing it to a configuration file.
Configuration Files
Configuration (cfg) files store command variables, and automatically pass them on to the game engine each time the game starts. The two config files we can edit in Crysis 3 are System.cfg, found under the \Program Files (x86)\Origin Games\Crysis 3 directory, and Autoexec.cfg, which doesn't exist by default. To create Autoexec.cfg, create a new text file by right-clicking in Windows Explorer and selecting New>Text Document, then rename it to Autoexec.cfg (not Autoexec.cfg.txt) and make sure it's placed under the same directory as System.cfg. You can edit the contents of a config file using any text editor, such as Windows Notepad.
Now here's the tricky part. Firstly, while most cvars are best placed in Autoexec.cfg, some cvars will only function if placed in System.cfg. Secondly, most cvars are locked, and can't be changed regardless of which cfg file they're placed in, nor will they work in the console. Finally, you should use the following form when entering any command in a config file:
command variable name = value
e.g.: r_sharpening = 2
In the example above, note that first the command variable is specified, then there is a space before and after an equals sign, then an assigned value is provided. You can enter multiple commands in a cfg file, typically placing each command on a separate line.
CVar Configurator
In an effort to make the editing of the configuration files simpler, a Crytek employee has created a special CVar Configurator utility. I don't usually recommend automated configuration utilities, as they tend to encourage the user to not fully understand the changes that are being made to their system, and hence can cause more problems than they resolve. However in this case the utility is by one of the team who worked on the Crysis 3 game engine, and simply provides a graphical user interface that lets you select which cvars to enable or disable. When you click the 'Apply Settings' button, it automatically writes the relevant command variables to the Autoexec.cfg and/or System.cfg files as appropriate.
Some things to note regarding the CVar Configurator:
If you want to undo all of the changes made by the Configurator, open Autoexec.cfg and System.cfg, and delete all the lines including and after the AUTOGENERATED CONFIGURATION BELOW HERE text.
These three methods of advanced tweaking may cause some confusion as to which is the best way. In this guide, the generally recommended method is as follows:
1. Make sure to first read the entire list provided on the following pages, along with the in-game settings descriptions provided earlier in this guide.
2. Change your in-game settings to arrive at the best mix of performance and image quality possible. If you want to use advanced tweaking to add certain effects, then leave some performance headroom by choosing slightly lower in-game settings that give you more FPS than you really need. Conversely, if you want to use advanced tweaking to remove particular effects, select a higher mix of in-game settings that may be barely playable, and you can then boost performance to achieve a smoother framerate by stripping away less desirable effects one by one.
3. Test each one of your desired command variables in the command console to see their performance and visual quality impact.
4. When you're satisfied with the commands and values you want to use, manually add them to the bottom of Autoexec.cfg and/or System.cfg as specified in the descriptions.
It is not recommended that you use anyone else's cfg files, or copy and paste large portions of commands that you've found posted online, nor implement wide ranging changes via automated utilities, unless you understand what each and every command variable that is being changed actually does.
This is the cleanest, safest way of tweaking, allowing you to stay in full control over the contents of your cfg files, and preventing strange problems or undesirable changes from occurring. There are no magic tweaks for making Crysis 3 run faster without some sort of tradeoff in visual quality, and the best person to decide which particular tradeoffs to make is you.
On the next page we start the list of the most useful working command variables.
|
|