
BioShock Tweak Guide
[Page 5] In-Game Settings
This section contains full descriptions and recommendations for BioShock's in-game settings. You can use these details to get a good balance between image quality and performance on your machine, however I can't give you specific instructions on what to turn on or off. It all depends on your particular hardware combination, and more importantly your personal taste for the trade-off between performance and image quality.
To access the in-game settings, click the Options link in the main menu, then refer to the relevant sections below. Make sure to click the Apply button each time you change any settings, and note that some settings require a restart of the game (where noted) to be applied properly.
Graphics Options
Resolution: This setting allows you to select the resolution of the game image, measured in pixels wide by pixels high. The higher the resolution, the more detailed the image on screen, and also the less jagged lines there will be (See Antaliasing below), but the lower your performance. For more details see the Resolution section of my Gamer's Graphics & Display Settings Guide. The number of resolutions available here are limited by what both your graphics card and monitor can handle.
Note: Widescreen users will find that although they can select widescreen resolutions here, the image displayed will be cropped at the top and bottom to fit your screen due to the field of view being held constant. If you want to correct this, you can use this Widescreen Fix.
Update: As of the 1.1 Patch, there is now a 'Horizontal FOV Lock' option under Graphics Options which you can switch On or Off to control the Horizontal Field of View. If using a widescreen resolution, try changing this option to Off first to see if it resolve any FOV issues.
Antialiasing Support: By default BioShock does not support any Antialiasing (AA) to smooth out jagged lines. The reason the game doesn't support AA natively is because it uses a form of rendering called Deferred Lighting, which is supposed to be incompatible with Antialiasing in DX9. It may be possible to allow AA under DX10 according to the developers of the Unreal Engine 3, but this will likely require a patch and if this occurs I will update this section accordingly. In any case If these 'jaggies' bother you, you can attempt to force AA to be applied in Bioshock, though note that you will experience a decrease in performance, and you may experience graphical glitches. The procedure is not completely straightforward, so read the following to determine how to do it for your system:
"E:\Program Files\2K Games\BioShock\Builds\Release\R6Vegas_Game.exe" -dx9
Anisotropic Filtering: By default BioShock applies 4x Anisotropic Filtering - see the bottom of this page for details of what AF does. This helps to make the surfaces of objects clearer, especially as they recede into the distance. However this can also lower performance, so if you wish to disable this, or if you wish to alter or raise the level of Anisotropic Filtering in the game, see the LevelofAnisotropy setting in the Advanced Tweaking section.
Windowed Mode: If set to On, the game will run in a window rather than in fullscreen mode. In general for stability and performance I always recommend full screen mode, as there can be memory and resource management issues when a game is run in windowed mode.
Vertical Sync: Vertical Synchronization (VSync) is the synchronization of your graphics card and monitors' abilities to redraw an image on the screen a number of times each second, measured in Hz. It is explained clearly on this page of my Gamer's Graphics & Display Settings Guide. When VSync is enabled your maximum FPS will be capped at your monitor's maximum refresh rate at your chosen resolution, and more importantly in some areas your FPS may drop by as much as 50% or more if the graphics card has to wait to display a whole frame. Thus setting VSync to On can have a major negative performance impact, though you can counter the performance drop by enabling Triple Buffering - see this page for details of how to enable it.
Note that since VSync relies on the Refresh Rate used in the game, if you do leave VSync on you should set the correct refresh rate by altering the DesiredRefreshRate variable in the Bioshock.inii file - see the Advanced Tweaking section for details. Finally, VSync can be a major contributor to mouse lag, so disable it if that's the case, and see further below for more details.
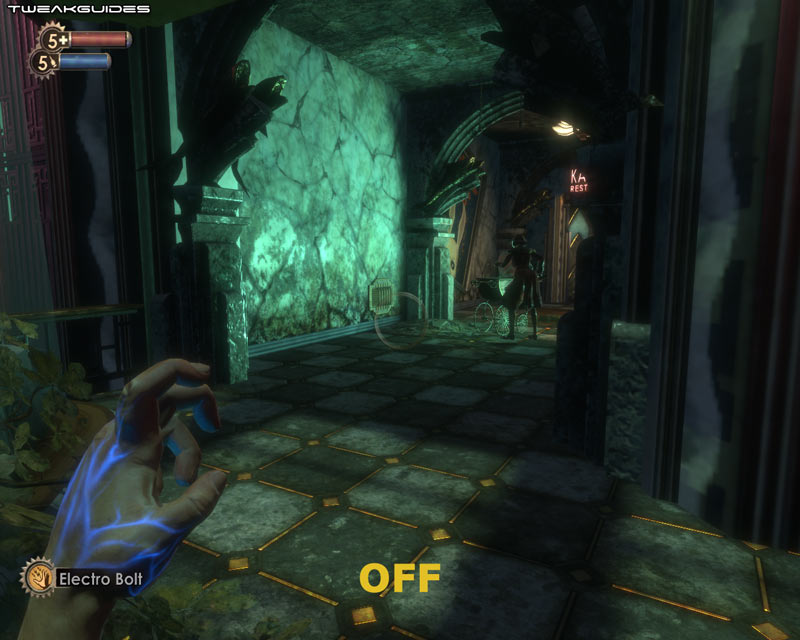
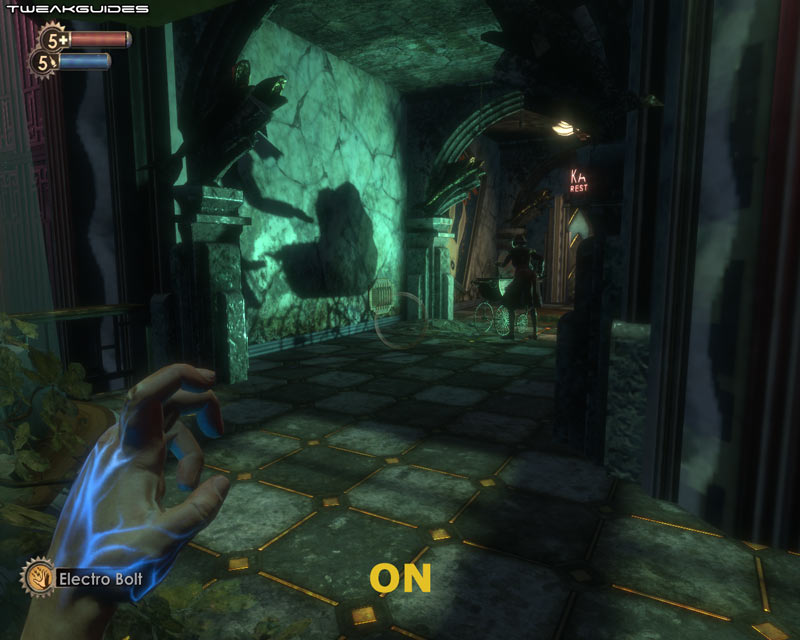
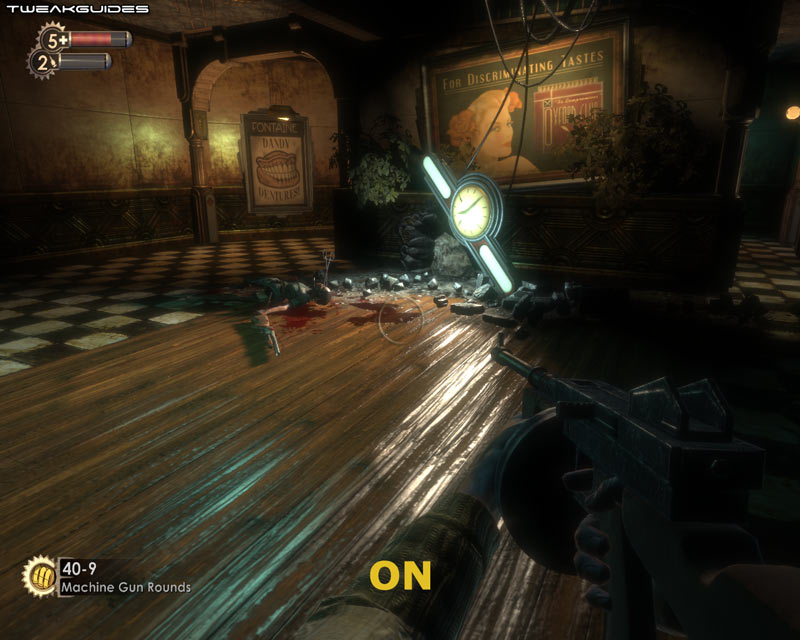
Shadow Maps: When this option is set to On, all objects which can be moved, as well as characters, will cast realistic shadows. These shadows will react dynamically to the light sources in the environment. A screenshot comparison is shown above, and note that with Shadow Maps disabled on the left, the main dynamic objects in this scene - the lady and the pram - do not cast any shadows, while shadows from static objects like walls remain. Enabling this option can greatly increase realism, but it can also significantly reduce framerates, particularly when there are multiple objects/characters and multiple light sources in a scene.
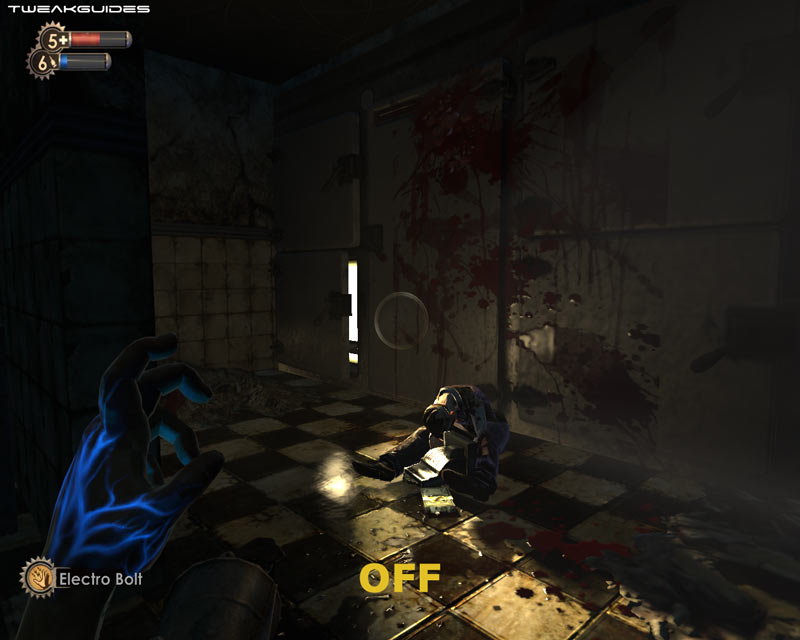
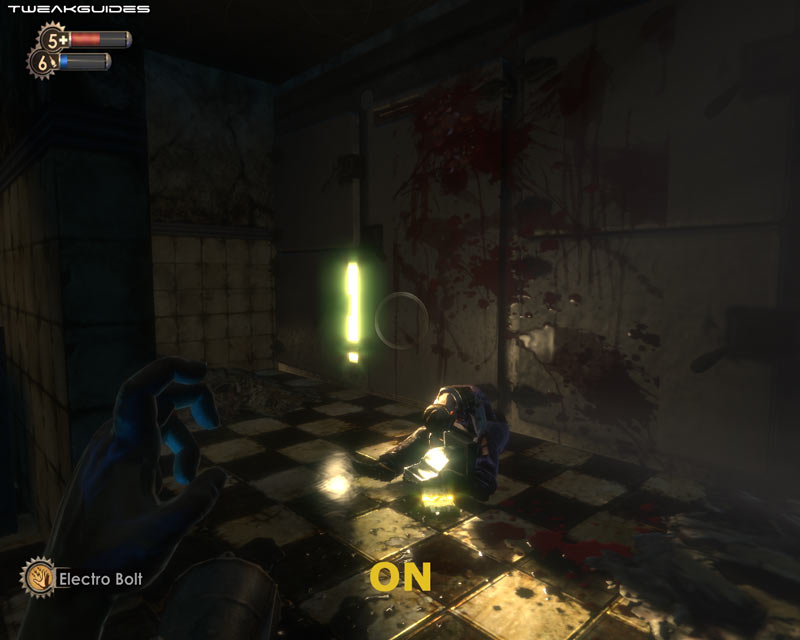
High Detail Post Processing: When set to On, this option enables a range of Bloom/HDR effects which makes lights and lit objects appear brighter, slightly hazier and much more atmospheric at the cost of some FPS. A screenshot comparison is provided above, with the difference quite noticeable between the two scenes.

High Detail Shaders: One of the most noticeable features of the BioShock game world is the extensive use of shaders to provide detailed reflective surfaces almost everywhere you look. These effects are due to this setting, and the screenshot comparison above shows the impact of disabling it - the wooden floor, the poster in the background and the furthest walls all shine realistically due to the lighting when this option is enabled. But when it is disabled the environment becomes quite flat and bland. Although it does have an impact on performance, I would generally recommend leaving this option enabled if possible as disabling it detracts quite a bit from the realism of the game.
Real Time Reflection: When set to On, certain reflective surfaces such as calm pools of water will dynamically reflect exactly what is in their surroundings. When disabled, some basic reflections will still remain but will be done through a trick called Cube Mapping. In general the difference is not very noticeable in most areas, but as the screenshot comparison above shows, in some areas where the water is reflective, the visual and FPS difference is very noticeable. Disable this option if you notice significant slowdowns in water areas.
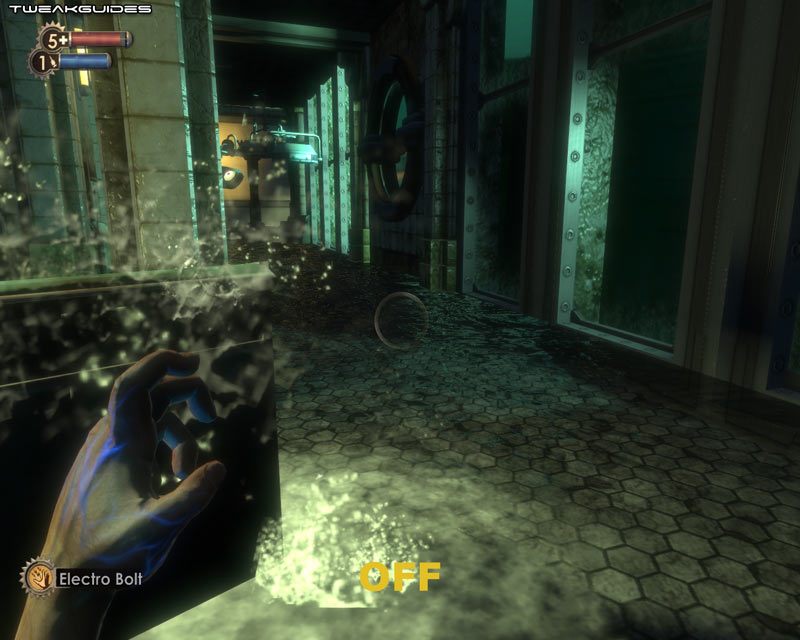
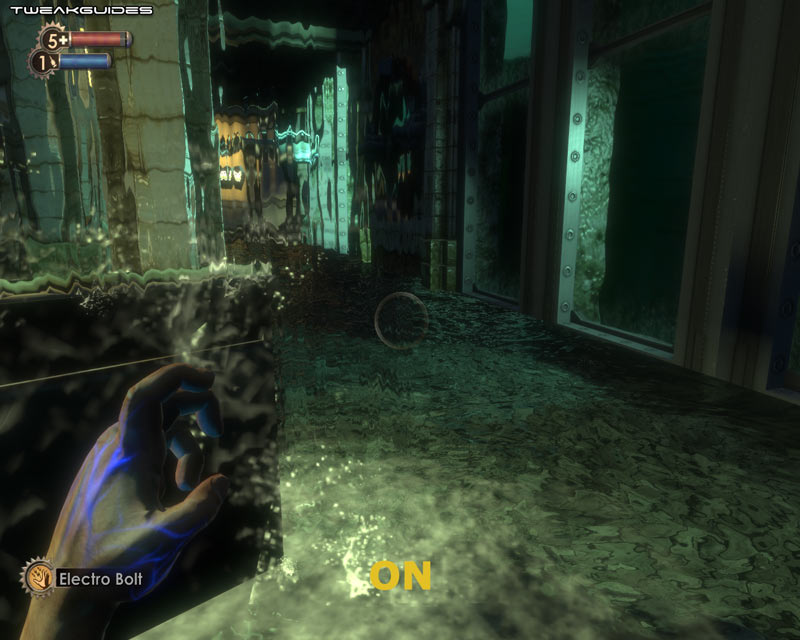
Distortion: When set to On, this option allows translucent material such as thick glass or water to accurately distort the images seen through them. It also affects heat distortion in the air surrounding fires. The screenshot comparison above illustrates water distortion - on the left with Distortion Off the wall of water is virtually invisible, and the water on the ground doesn't distort the tiles beneath it; on the right the water is correctly distorting all objects behind and beneath it. Enabling this option will reduce performance in areas with water, of which Rapture has quite a few. It will also reduce your FPS when you have the Incinerate plasmid visible on your left hand for example.
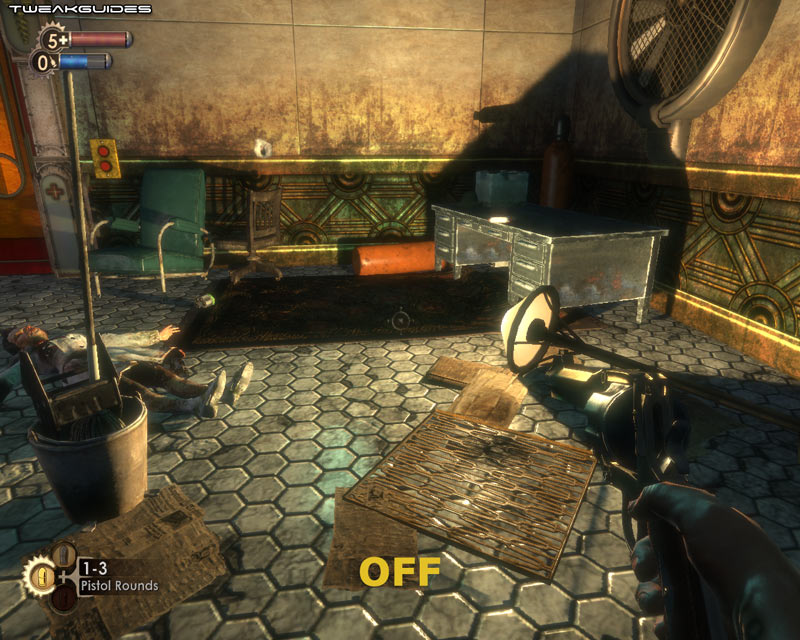
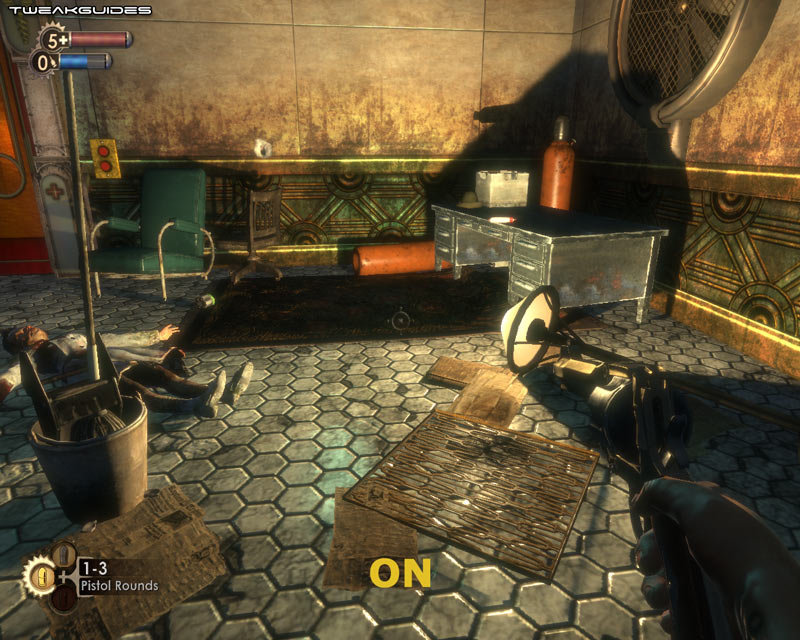
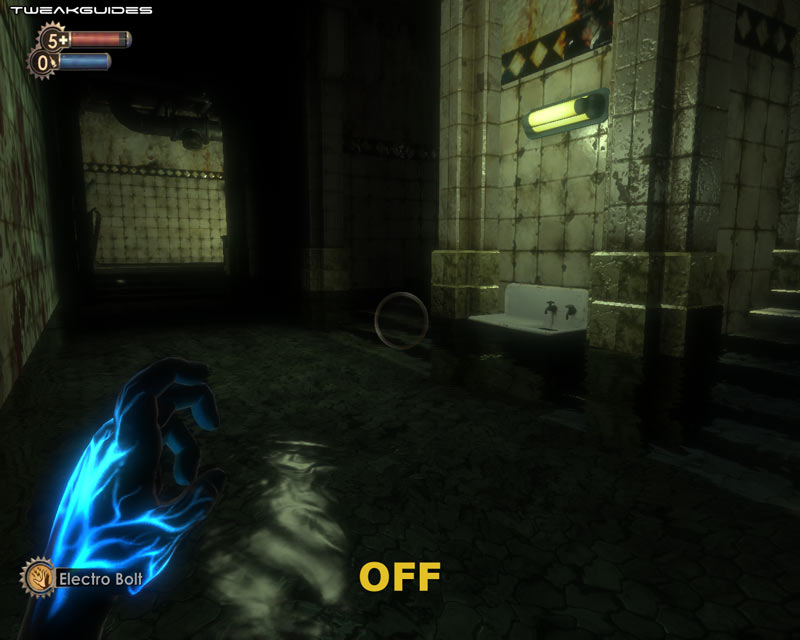
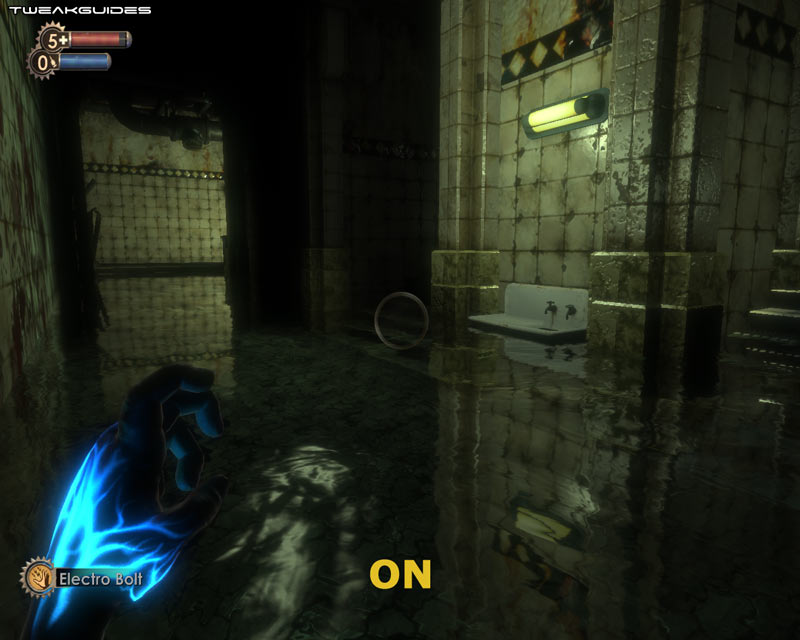
Force Global Lighting: When set to On, this option enables a less accurate form of lighting which can improve performance. The screenshot comparison above shows that when enabled, the use of Global Lighting causes numerous inaccuracies in the scene. Notice for example the orange gas cylinder in the top right is incorrectly lit up when it should actually be dark due to the desk's shadow thrown by the lamp on the ground; the shadows on the body of the nurse are also harsher and less realistic; the shadows in the inside of the bucket on the bottom left are missing, etc. In general though it doesn't reduce image quality noticeably while playing, so if you're struggling for FPS - particularly in heavy combat scenes - then you should enable this option.
Update: The following option has been added as of the 1.1 Patch:
Horizontal FOV Lock: This setting is related to your Resolution setting, and is specifically for widescreen users. It appears to control whether the Horizontal Field of View (FOV) is locked, thus affecting the overall aspect ratio of the image. See the Resolution section above for more details.
The next page continues our look at BioShock's in-game settings.
|
|