
Hardware Confusion 2009
[Page 8] My Choices (Pt.5)
Drives
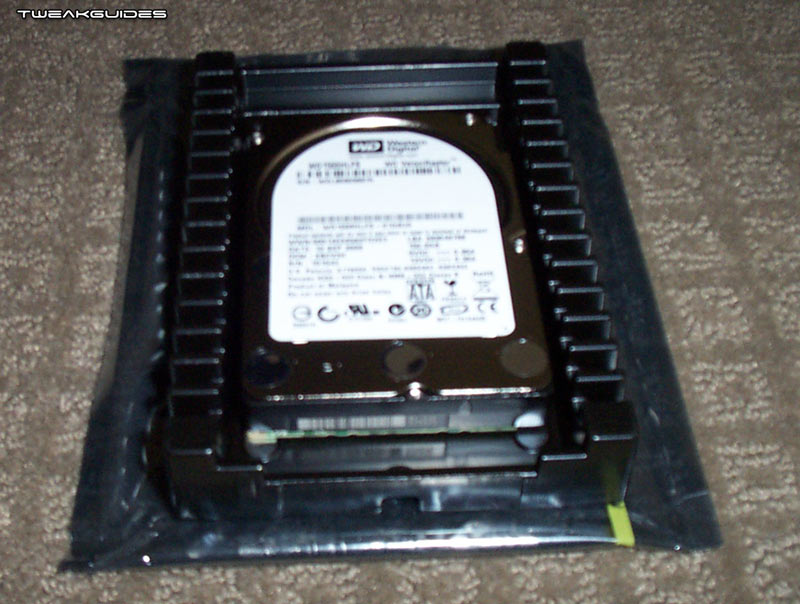
Hard Drive - My Choice: Western Digital WD1500HLFS 150GB VelociRaptor 10,000RPM 16MB Cache SATA 2
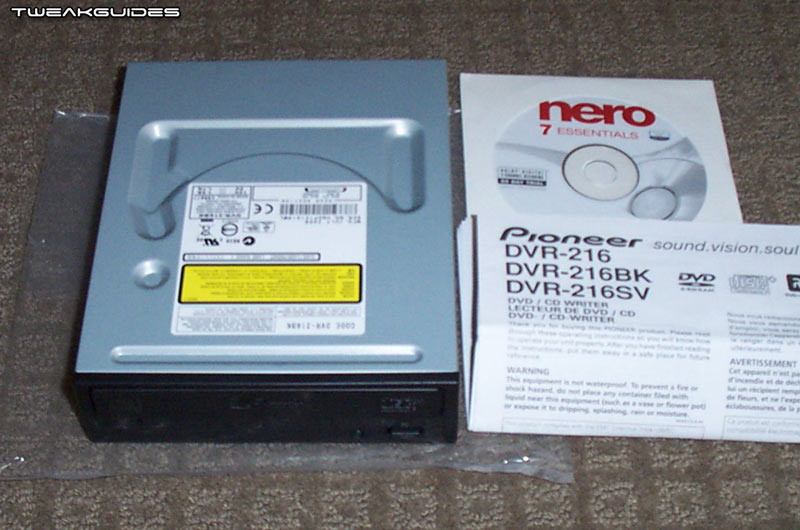
Optical Drive - My Choice: Pioneer DVD-RW 216BK 20x SATA
Storage technology is in a state of flux at the moment. In my last Hardware Confusion article I stressed the importance of hard drives given they are usually the slowest component in any build. Your entire system has to wait for the drive to deliver new information to it at various times, and the resulting slowdowns and stuttering can be incredibly annoying, especially in graphically intensive games. Well it seems that things are changing for the better, because in the past year or two, Solid State Drive (SSD) technology has been developing apace. Since it contains no moving parts, an SSD based on memory chip technology can theoretically run rings around a traditional mechanical hard drive, much the same as the RAM in your system is many times faster than your drives. In practice however SSD products have had performance issues, and can cost an absolute fortune for reasonably-sized storage capacities. The king of the SSDs right now is the Intel X25-E SATA, as benchmarks like these show. In most tests it can truly embarrass most any other drive. However it only comes in 32GB capacity, or its slightly slower X25-M cousin can be had in 80GB flavor. Even if the small sizes don't discourage you, consider the price: the drives are around up to 5 - 10 times the price of a decent-sized mechanical hard drive.
Not all SSDs are as outrageously expensive as the Intel X25 series however. A standard 32GB - 60GB SSD can be had for the price of a large high-end mechanical hard drive, depending on the brand and its specifications. Cost aside, the primary issue to consider is that these cheaper SSDs have a major drawback: slow write speeds. For example this OCZ 120GB SATA2 SSD notes that it can do up to 230GB/s read, but only up to 160GB/s write speeds. That may sound like a lot regardless, but as this review shows, the OCZ SSD while approaching the speeds of the Intel SSD, can often be beaten by a traditional Western Digital 300GB VelociRaptor in many tests, at a fraction of the price, with twice the storage and none of the write stutter afflicting many SSDs. SSDs also have a limited number of write cycles before they wear out and no longer function correctly. Depending on the drive, the OS, the uses to which it's put and the methods it uses to spread its write/erase cycles, the life of the drive will vary. However several sources have calculated that even with heavy usage this still theoretically gives an SSD many, many years of operation, so it's not as alarming as it may first appear.
In short, while SSDs definitely have their benefits, they also have their drawbacks. I still don't believe this is quite the right time to be investing in an SSD unless you've got a lot of money to spend. When cheap mechanical 7200RPM hard drives like the Samsung Spinpoint F1 can combine excellent performance and very large amounts of storage at very low prices, it will take a fair while for SSDs to filter down into mainstream and even enthusiast setups. As a compromise some people are opting to buy a cheap 32GB or 60GB SSD and use it as their main OS/boot drive, resulting in faster Windows bootup and quicker application load times. I didn't consider this route myself as the cheaper drives are more prone to pauses and stuttering, and more to the point, I don't want to spend extra money on what I consider an unnecessary luxury.
In my previous system I relied on three 74GB Western Digital Raptor 10,000RPM hard drives, with two of them paired up in a RAID 0 formation as my main drive for Windows XP. I used this setup for over two years, before adding the third standalone Raptor to run Vista for an additional year. While the 74GB Raptor is no longer one of the fastest drives around, I did learn several lessons from using these drives: I saw first-hand how effective a fast hard drive can be in greatly reducing or removing stuttering from games, even games renowned for being stutter-prone - for an example, see this stutter-free Oblivion video I made almost three years ago, something of a rarity at that time; I saw how much more responsive even basic desktop tasks can feel simply from having a fast hard drive; and I also learned that while RAID 0 has its benefits, it doesn't actually have as big an impact as I thought it did - my general gaming performance and smoothness on the single Raptor was practically identical to that of the RAID 0 Raptors before it.
Taking these lessons into my new build, I committed myself to once again seeing if I could obtain the fastest affordable hard drive available, and I had a hunch it would be the new version of the Raptor drive. Sure enough, checking a range of reviews showed me that the very latest VelociRaptor drives from Western Digital have taken over as top dog, and were much faster than the original Raptors thanks to a complete redesign. It may get a little confusing as there are now several versions of the Raptor/Raptor X/VelociRaptor hard drives, so it's important to pay close attention to the fact that the very latest (and fastest) revisions carry the VelociRaptor name and the HLFS suffix on the model number. That is, the latest 74GB version is denoted by WD740HLFS, the 150GB is WD1500HLFS, and the 300GB is WD3000HLFS. These new VelociRaptors are all native SATA 2 (3GB/s) drives with NCQ support, and have 16MB of onboard cache. Aside from being touted as almost 40% faster than the previous generation Raptors, they're also notably quieter, use less power, and come in 2.5" form with a detachable 3.5" 'Icepack' frame to keep them cool.
Not only are they pretty much the fastest mechanical hard drives you can get, the VelociRaptors are actually reasonably affordable, and in my experience are extremely reliable. The three Raptors from my old system are still going strong, a quick check of their internal health using a drive monitoring utility shows no faults even after almost four years of strenuous regular usage. If price is a major constraint, you can opt for other drives which are almost as fast; a Samsung Spinpoint F1 or Seagate Barracuda 7200.11 will approach the performance of a VelociRaptor in some respects. However what really sets the VelociRaptor apart is its unbeaten Access Time of around 7ms, a full millisecond faster than the previous Raptor, and one of the reasons why this drive can reduce stuttering so much in games.
I decided to purchase a single 150GB VelociRaptor to act as my main drive, and added one of my old 74GB Raptors to my new system, serving as a backup/storage drive where I can install Windows 7 for test purposes. For those who are curious why I didn't opt for the 300GB VelociRaptor instead, well firstly as noted I have an additional 74GB of space for general storage on the old Raptor, and secondly in my previous system even with all my applications, games, OS, archives and so forth I didn't come close to maxing out 150GB of space. It's worth mentioning that I personally don't recommend using a hard drive as a permanent storage/backup location, because when the drive inevitably dies you lose everything. I store all my important and irreplaceable data on a few DVD-RWs - a spindle of 10 rewriteable DVDs for example holds almost 50GB of data for only a few dollars, and aside from being a lot more portable, stands little chance of being corrupted or suffering mechanical failure, unlike a hard drive. I genuinely struggle to understand not only how people can possibly fill up something like a 1TB hard drive (unless of course it's with "backed up" movies and games), but more importantly why they would entrust that much data to a hard drive, given drives can die with little warning.
While I can't provide any comparisons between a range of drives and the VelociRaptor, I can provide my benchmark figures using the free HD Tune drive utility. You can then download the utility and run your own benchmarks and compare the results with mine. The reason I'm providing benchmarks as opposed to just directing you to review benchmarks is because as I discuss shortly, I'm running the drives in AHCI mode, and most reviews I've seen use standard IDE mode. Furthermore, since I installed my old 74GB Raptor, I can provide a direct apples-to-apples comparison of the current vs. the previous generation of Raptor on the exact same system and hence see precisely how much of an improvement there has been between the generations. On the left is the 150GB VelociRaptor, on the right the 74GB Raptor:
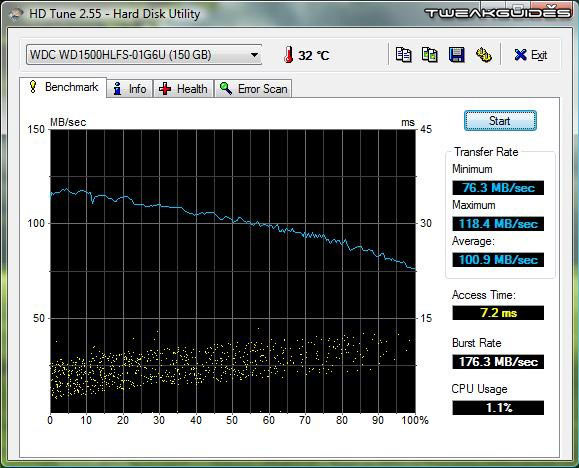
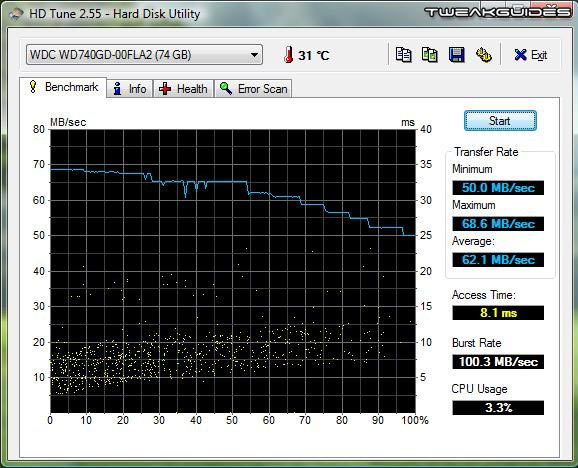
There are several notable differences between these two drives. Key among them is the fact that the VelociRaptor is almost a full millisecond faster in Access Time, and has noticeably lower CPU Usage as well. As Western Digital promised, the Raptor at 62.1MB of Average Transfer Rate is almost 40% slower than the VelociRaptor's 100.9MB rate. The Burst Rate is also 75% higher in the new VelociRaptor. On a personal note, I can vouch for the fact that the new VelociRaptor is indeed much quieter than the older Raptor, and stands at about the same volume as any regular 7200RPM disk. However before comparing this data with your own system, take into consideration the following: on my new system I decided to enable AHCI mode in the BIOS when installing Windows Vista. Normally there are three main options available for storage controllers: AHCI, RAID or IDE mode. Most people run IDE mode as this is the most compatible, and provides good performance. I decided upon AHCI mode, and indeed the choice needs to be made before installing Windows because switching between AHCI or IDE modes will usually result in boot failure with a BSOD.
AHCI's main benefit is that it fully utilizes SATA's advanced capabilities, resulting in more optimal operation, especially when the drive is multi-tasking, along with less drive noise, and less wear and tear. A better explanation, and more importantly, a range of performance benchmarks, can be found in this article. One of the reasons I chose AHCI is because the VelociRaptor has native SATA2 support with NCQ, whereas it should be noted that older Raptors such as my 74GB model do not. Windows Vista and Windows 7 are also the only OSes which natively support AHCI. The downside of AHCI is that it may reduce performance slightly in some cases, indeed benchmarks tend to show this more than real-world usage. Therefore if you compare my 150GB VelociRaptor HD Tune benchmark results with those of someone running the same drive in standard IDE mode, you may notice that my Burst Speed is a bit lower than it could be for example. I don't consider this a major issue, because aside from Burst Speed not being a major determinant of performance, the benefits of AHCI outweigh any negatives in my opinion, especially in multi-tasking scenarios when even a VelociRaptor could become a potential bottleneck.
There are some quirks you should be aware of if you want to use AHCI. The first and most obvious is that as noted earlier, if you wish to enable AHCI, it is strongly recommended that you set it in your BIOS before installing Windows. If you insist on switching from IDE to AHCI on your current install, you'll need to use the method detailed in this Microsoft Article, and it's not without risk, so backup before doing it. The other issue is that you also need to install the Intel Matrix Storage Manager for AHCI to work properly on Intel motherboards. The Intel INF Chipset Utility which is necessary for all Intel chipset motherboards is not enough; the Matrix Storage Manager is not only for RAID setups, it also applies to single-disk AHCI setups as well. I admit I'd overlooked this step as it's been a long time since I've used an Intel-based motherboard, and hadn't examined the Matrix Storage Manager driver closely. While my system functioned normally without it for the most part, my SATA DVD-RW drive was burning DVDs with errors, and my hard drive benchmarks were lower than I'd expected. Once I'd worked out the cause and installed the latest Intel Matrix Storage Manager everything was fixed.
I can summarize the VelociRaptor's performance with one word: wonderful. Having already been spoilt by the previous generation Raptors for several years I wasn't expecting a major improvement, but the VelociRaptor takes a good thing and makes it even better. It ensures your hard drive is a component which can keep up with a fast system rather than something which can slow it down, causing it to pause, stutter and generally make a high-end system feel sluggish. As discussed under the Graphics Card component, gaming on this system in particular is eerily smooth, no doubt helped to a fair degree by the VelociRaptor. It's one of those components that once you have it, you wonder how you did without it.
Obviously some people will think that if one VelociRaptor is good, why not pair them up for even greater speed in RAID 0; the answer is that RAID 0 while boosting performance in longer disk operations such as loading large programs or defragmenting your drive, doesn't necessarily do anything to further reduce stuttering or make things faster in regular usage. Aside from cost, it has other disadvantages as well, doubling the risk of losing your data - one disk failure takes out the entire array, since the data is split evenly between the drives. It can also cause issues with the way Windows detects your drives from one OS to another (in the case of dual boots for example). So while my previous RAID 0 setup lasted over three years without any problems, this time around I didn't consider it worth the potential problems and additional cost, especially since for gaming and general desktop usage I know that RAID 0 is not going to make a significant practical difference.
I should give a quick mention to my choice of optical drive. The Pioneer DVR-216 DVD-RW is a fast and - once the Intel Matrix Storage Manager was installed - solid and problem free solution. I updated it to the latest firmware from within Windows in a matter of minutes, and knowing from my previous Pioneer DVD-RW that it can support a wide range of media, I can essentially not give it as second thought, burning discs without a worry. The fact that it's a SATA drive doesn't make much difference in performance, it's mainly to remove the cable clutter which an IDE ribbon cable introduces into the case, plus the unnecessary IDE controller drivers which are installed along with it. I had briefly considered a Blu-Ray burner to really future-proof my system, but then I remembered just how long it took DVDs to replace CDs as a mainstream media for software and games. I bought my first DVD-ROM drive back in 1999 at a premium price, yet I got very little use out of it until 2005 when games started to come out in DVD format. So there's no point paying a lot more money right now to get a Blu-Ray burner because even if you use it to play Blu-Ray movies on your PC, blank Blu-Ray media costs an arm and a leg, making it totally uneconomical to burn Blu-Ray discs for storage purposes or to make "backups" of movies. If you absolutely must play Blu-Ray discs on your PC, a cheaper option is to buy a BD-ROM/DVD-RW combo drive which can burn CDs and DVDs, but only read Blu-Ray discs. I guarantee that within a year a full BD-RW drive will halve in price, if not more, along with lower prices for blank BD media, and that will be the best time to pick up a Blu-Ray burner if you can wait.
Finally, I'll quickly mention the concept of a RAM Drive, given many people building i7 systems will buy larger amounts of RAM, ranging from 6GB to 12GB, even 24GB in some cases! This can be a compromise for anyone who wants fast drive performance on the cheap, compared with buying an SSD for example. A RAM Drive is a software-based solution which tricks your OS into thinking that a portion of your RAM is actually a separate logical drive. This means you can then temporarily install and run programs from the RAM drive at much higher speeds than a regular hard drive. If you have the spare memory and want to try this form of drive, instructions and the download link to free RAM drive software can be found here. Obviously because RAM is cleared upon reboot, this isn't a perfect solution, and it's not without its problems, but if you have the RAM to spare it can be worth tinkering with while you wait for SSDs to fall in price.
Case
My Choice: Cooler Master Stacker 832 SE
One of the best decisions I made for my previous system was to use a full tower case with plenty of airflow. More than three years on the Cooler Master Stacker 820 I bought still looks almost brand new, the brushed silver aluminum doesn't get scratched all that easily, nor does it crack, fade or rust, and the black metal mesh portions of the case which helped it breathe so well and keep everything cool during hot days only take some minor regular cleaning of the air filters to keep the case free of dust. I attribute a portion of the excellent stability of my previous system to this case and its generous airflow. No amount of fans and massive heatsinks can truly compensate for the lack of airflow which most smaller cases suffer from; the single best investment you can make to keep temperatures (and noise) down is to buy a larger case with naturally good airflow characteristics.
This time around, while I knew that I wanted something similar to my last Stacker case - and even toyed briefly with the idea of getting yet another Stacker 820 to do the job - I felt a change was in order. Because reducing noise was a higher priority this time around, I wanted a case which had even more airflow than the 820, as I wanted to keep the number of case fans to an absolute minimum, and also prevent component fans from running too hard. Instinctively I turned to Cooler Master again because I was really impressed with the build quality of the Stacker, and I found that they had several newer Stacker models worth considering. The main issue then was price and aesthetics.
Let me pause for a moment and say that one of the reasons I didn't seriously consider many of the other cases on the market is because unfortunately the majority of mainstream cases look incredibly childish and/or appear to be constructed from cheap plastic. The closest potential candidate was the Antec 1200, but aside from the fact that it didn't look quite as mature as I would have liked, it didn't seem to have as much natural airflow capacity as the newer Stacker models, instead relying on half a dozen case fans which would noticeably increase noise output. Similarly, Lian Li cases are famous for their build quality, and their cases look quite elegant and mature, but I still didn't like their design and they can be quite expensive to boot. So for a combination of subjective and objective reasons including aesthetics, noise and price, and having experienced the build quality of the Stacker for myself, I forged on with my quest for the right Stacker.
I first checked out the Stacker 830, a silver case of similar size to the Stacker 820, but with much larger open mesh areas for greater airflow. However something about the overall look of the case didn't quite do it for me. So instead I opted for the Stacker 832 SE, which is essentially a slightly redesigned and all black version of the Stacker 830. In fact the installation manual for the Stacker 832 also serves as the manual for the 830, so in most respects these cases are identical. My crappy photos can't do the Stacker 832 justice, so for those interested in seeing it from every possible angle, both inside and out, check this review for a slew of pictures.
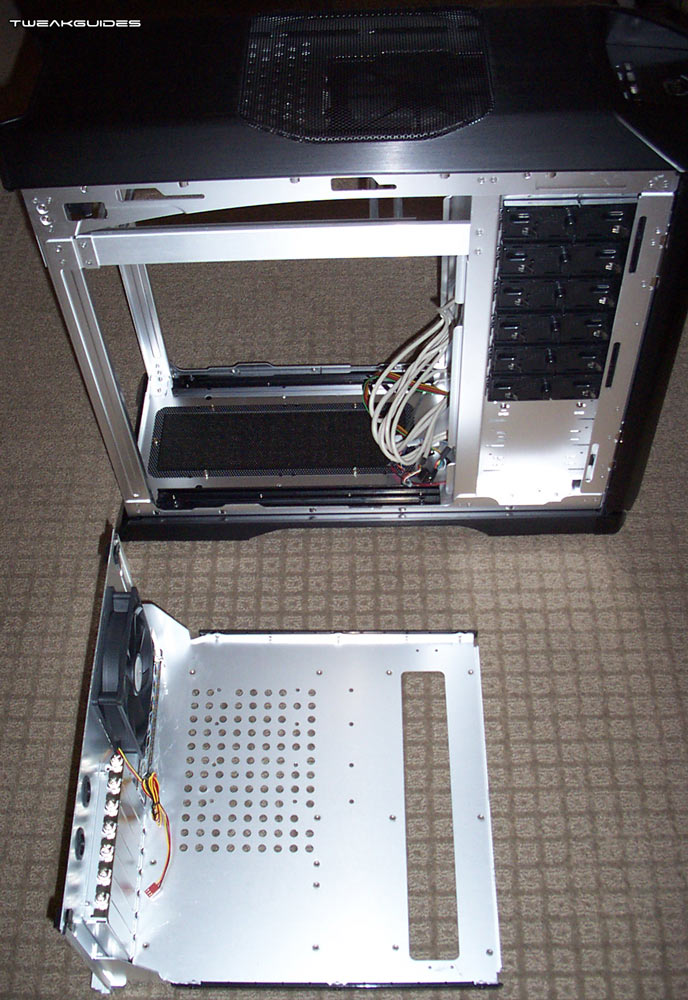
It's one thing to know that a Stacker is a big case, but it's another to see it in the flesh - it really is large. The relatively more flamboyant design of the 832 makes it seem even bigger than the similar-sized but plain 820. Assembling a system with the Stacker 832 seems daunting at first, but the manual lays everything out very clearly, and the case is designed specifically to minimize the use of tools - all you'll need is a phillips head screwdriver in a couple of instances. At every turn there are countless thoughtful features which make installation easier, such as the motherboard tray which can be removed entirely from the case, allowing you to assemble the bulk of your components without any obstruction on a regular desktop for example, before sliding the tray back into the Stacker. There's a separate enclosure at the top of the case which can accommodate most any size or type of PSU, all you do is slide the PSU in, screw the rear facing into it and you're done.
Aside from the side panels which can be a bit tricky to remove and replace at first, the only truly annoying part of the build for me was installing my two Raptors in the '4-in-3' hard drive cage, which requires a bit of manipulation to unscrew and pull out. This was made worse by the fact that one of the screw holes in the drive cage had been partially stripped of its threading, so the screw didn't want to come out - ten minutes of cajoling with a pair of needle-nose pliers finally got it to give itself up, and the drives were installed without any problems.
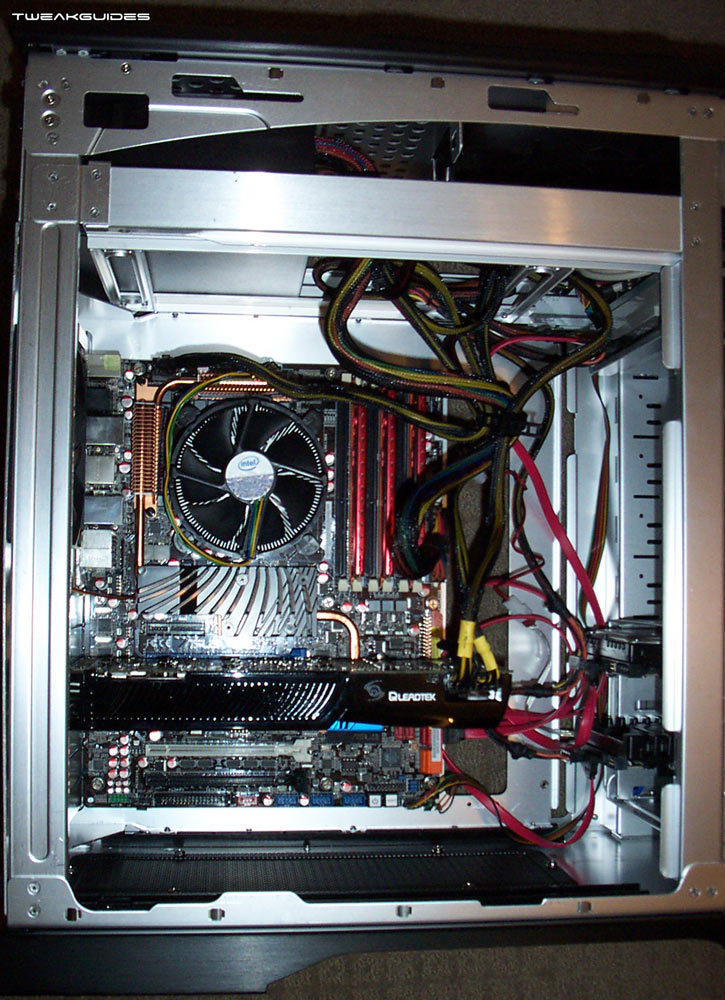
Once all of the components were installed, because the PSU is modular I then added all the necessary cables one by one, though unfortunately since the wires are sleeved in mesh and relatively thick, the resulting cable clutter was still a bit more than I had expected. However since the Stacker 832 has a cavernous interior, the CPU, motherboard, RAM and graphics card have plenty of space around them - which is precisely the benefit of a full tower case, and hence why I strongly recommend them:
Case cooling in the Stacker 832 comes from only two 120mm fans which are included in the package - note that the front one is lit by a bright blue LED by default. One fan sits in front of the hard drive cage at the lower front of the case, sucking cool air into the case over my two hard drives, while the other sits just below the PSU, acting to exhaust the hot air from around the CPU and motherboard Northbridge. The fans can be connected to the motherboard fan headers, and on the P6T Deluxe at least, give you the option to make them variable speed based on temperature using the ASUS QFan feature. However the last thing I want are fans which vary in speed and hence noise, so they're set to spin at a constant 1200RPM, keeping them almost totally silent. For those who desire more cooling in the form of additional fans, aside from a single 120mm fan bracket built into the top of the case, the Stacker 832 also comes with what I would call an overkill solution: a 4x120mm fan tray that sits on the left side of the case. I can't imagine who would need or want an extra four 120mm fans blowing into or out of the case, but suffice it to say that if you aren't satisfied with airflow, the Stacker 832 really can accommodate your needs. I uninstalled this fan tray and hence left a large open mesh-covered area above my components to prevent heat buildup. As I mentioned before, I really don't want lots of fan noise, two large case fans are more than enough.
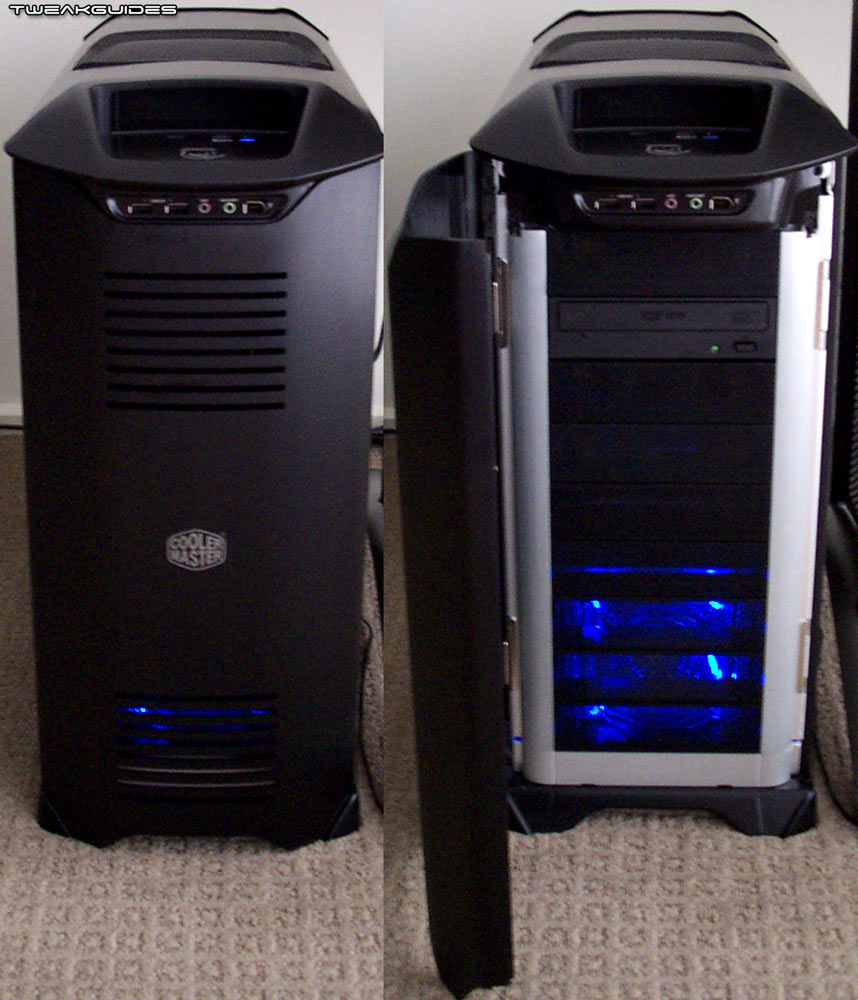
There are two things which I would consider a bit of a drawback to this otherwise perfect case: a lack of any filter material over any of the mesh/grill areas; and no handle for the front door of the case. The filter issue is a matter of personal taste in some respects, because the bare black metal mesh allows a lot more airflow into the case. So far after three weeks I haven't found the interior of the case to have any noticeable dust buildup, but I also live in a fairly dust-free environment. However if you live in a dusty place, then you might want to decide against getting this case, or purchase filter material for it. The front door issue is a relatively minor annoyance, exaggerated by the fact that Cooler Master has thought of everything, even allowing you to easily switch which side the door opens towards, or remove the door altogether. So to overlook a simple handle, or even a recessed area to allow you to get a good grip on the door, seems an odd oversight. The door itself can also be annoying if you want regular access to your optical drives, so those who burn lots of discs might want to consider how the case looks without the door when making the purchasing decision.
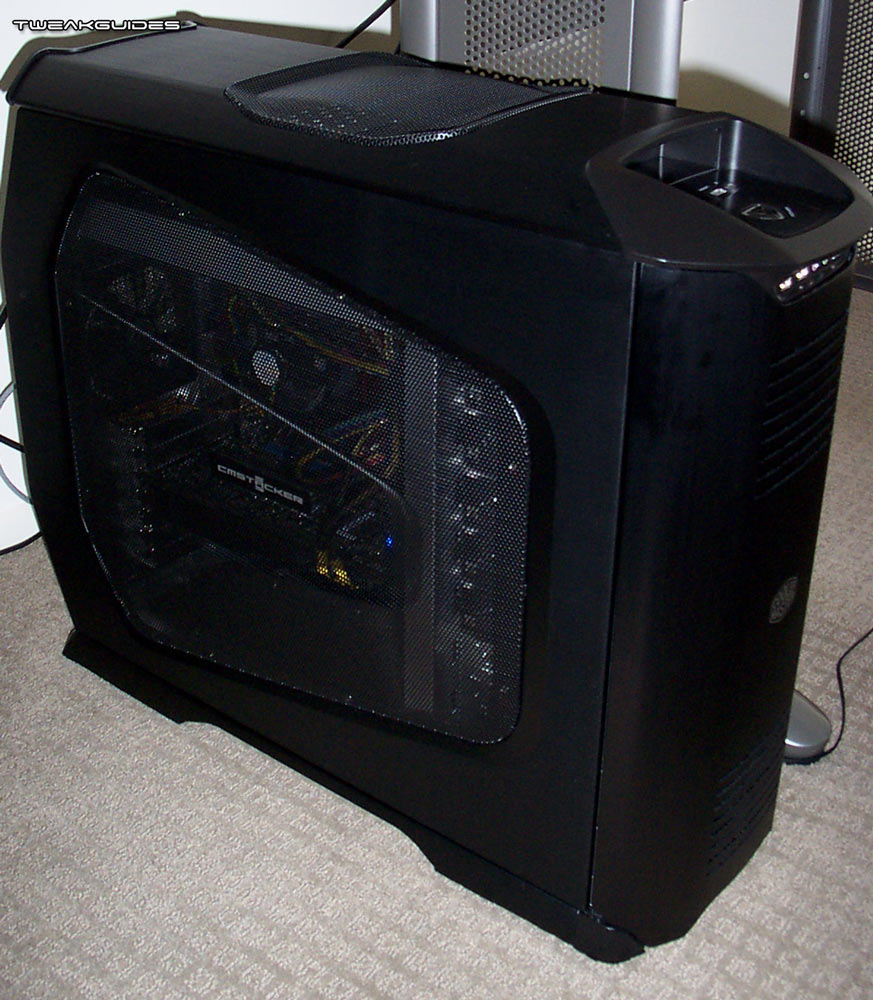
Once completed, the case takes on a very imposing look. The black brushed aluminum does attract dust and fingerprints very quickly, but what I'd thought at first to be permanent scratches and scuff marks on the case's exterior made during the system construction phase were rubbed off in seconds using a damp cloth. In other words the finish is durable and quite scratch-proof, and photos can't do it enough justice; it doesn't look plasticky or cheap in any regard. Everything has a very solid look and feel to it, and as noted several times already, the case has as much natural airflow potential as is possible short of pulling out your components and sitting them bare on your desktop. I'm very satisfied with the decision to get this case despite its somewhat hefty price tag. I can probably justify the extra expense on the basis that it increases stability by preventing heat buildup, which results in less fan noise, and it also matches the rest of my system perfectly. But basically I just wanted this case, and clearly I probably made more of an emotional decision than just a rational one in this instance.
The next page brings the lengthy look at various components to a close.
|
|