
Crysis Tweak Guide
[Page 5] In-Game Settings
This section contains full descriptions and recommendations for all of Crysis' major in-game settings. You can use these to get a good balance between image quality and performance on your machine, however I can't give you precise performance impacts or specific instructions on what to turn on or off. It all depends on your particular hardware combination, and more importantly your personal taste for the trade-off between performance and image quality.
To access the in-game settings, click the Options link in the main menu, then refer to the relevant sections below. Make sure to click the Apply button each time you change any settings, and note that some settings require a restart of the game to be applied properly.
Profiles: It should be noted that any settings you change are applied to the Default profile, unless you create and load up another profile. This profile and its settings are then used for both Singleplayer and Multiplayer. You can create new profiles by clicking the Profile option, and each profile can then hold its own individual settings. This can be useful if more than one person is using the same machine, or more importantly, if you want to have different settings for singleplayer and multiplayer. Also note that your multiplayer player name is determined by your profile name - see the Name command in the Advanced Tweaking section.
Game Settings
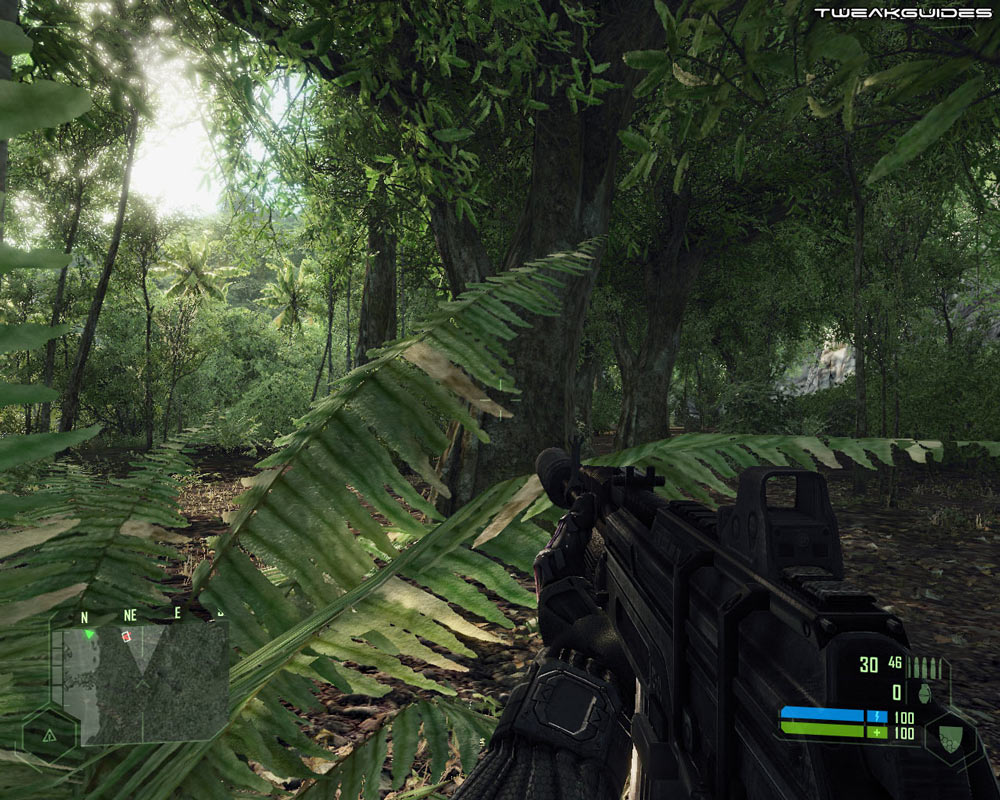
Weapon Intertia: This setting controls the way in which your currently equipped weapon moves in your hands as you move around the game world. The further to the right the slider, the more the weapon will move side to side and up and down while you're moving around. If this bothers you, moving the slider to the left steadily reduces all such weapon movement, which may reduce realism but can also reduce distraction and may improve FPS.
Blood: If ticked, blood splatters will be shown when shooting enemy or living creatures, including splatters which may briefly stick to the screen, as though they've been sprayed onto your mask. The performance impact is usually negligible so set to suit your taste.
Subtitles: If ticked, spoken dialog will have subtitles. Has no performance impact so set to suit your taste.
Difficulty Level: There are four levels of Singleplayer difficulty: Easy, Normal, Hard and Delta. The main impact of this setting is to alter the way the artificial intelligence (the enemy) react and how effective your nanosuit will be. Specifically, at higher levels of difficulty the enemy progressively become faster at detecting you, and more of them will react with greater accuracy, and the time taken for your nanosuit to regenerate your health and its energy increases. Other important changes include the fact that at Hard and Delta you lose the ability to control mounted guns on vehicles while driving, and the enemy lose their 'red glow' effect, making them harder to spot and finish off. Additionally, at Delta difficulty you lose your crosshair, you don't get grenade warnings and the enemies speak Korean instead of English. Note that you can customize the difficulty settings by editing the relevant difficulty .cfg file - see the Advanced Tweaking section.
Multiplayer Settings:
These settings only apply to the multiplayer portion of the game and have no impact on singleplayer.
Static Display of Objective Icons: If ticked, you will see marker icons on your screen indicating the general direction of various objectives. For example in Power Struggle mode, if enabled, this option shows the direction and status of the various control points with graphical icons.
PunkBuster Protection: Crysis multiplayer is protected by PunkBuster anti-cheat software. You will need to tick this option if you wish to play on PunkBuster protected servers (which most are). If you're having problems with PunkBuster, download the PBSetup Tool and follow the instructions to manually update your PB version.
Tutorial Mode: If enabled, runs through a brief tutorial of how to use the various features of each online mode. If you've played the game modes before, you can disable this option here, or press the End key in-game to end a tutorial.
Quick Game Mode: The options in this section only apply if you choose to launch an online game via the 'Quick Game' link under the Multiplayer tab. You can set your preferences for the type of server you want to join.
Mouse & Keyboard Setup:
This section contains all your mouse and keyboard configuration options. Most are self-explanatory, and involve binding specific keys or buttons to various commands. However the following settings bear some description:
Invert Mouse: If ticked, pushing your mouse forward will make your character look down, and pulling your mouse back will make him look up. Set to suit your taste, has no impact on performance.
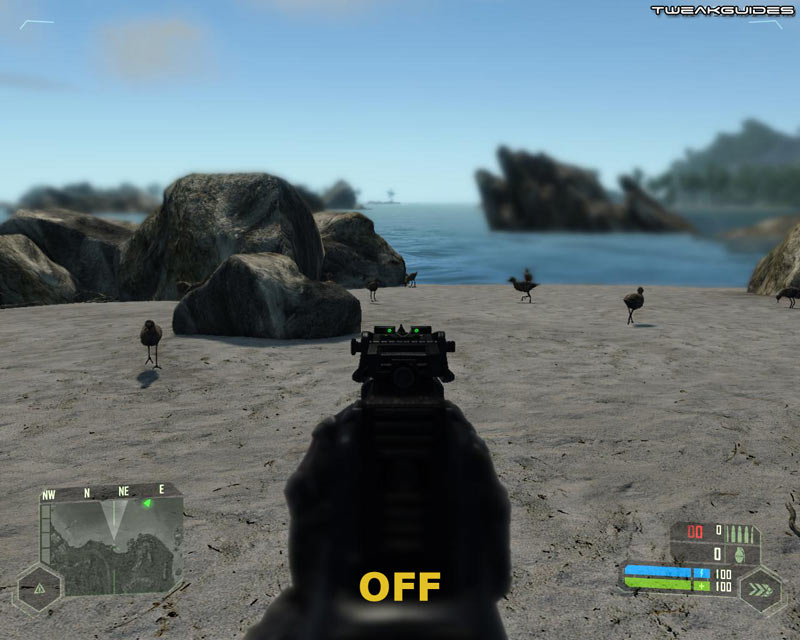
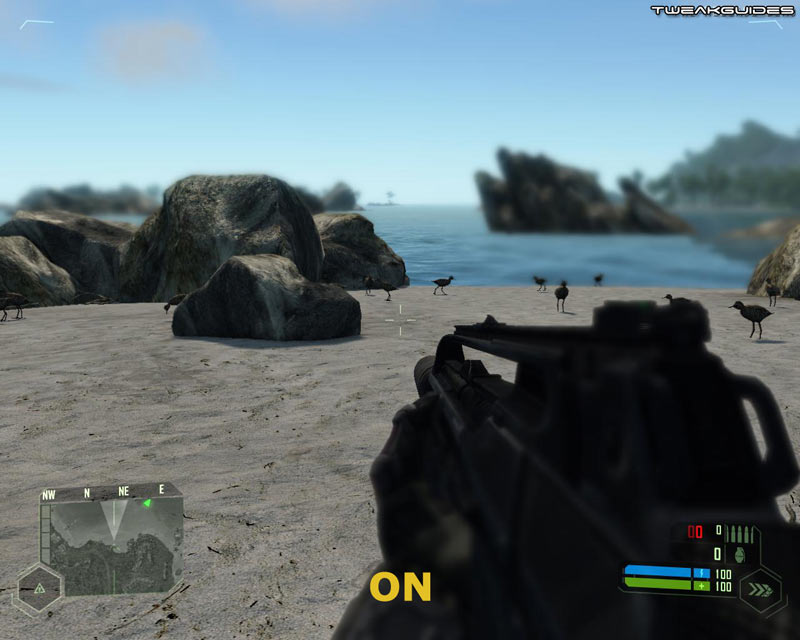
Simple Iron Sight: This setting determines how your weapons' iron sights are displayed when you bring them up for aiming (default is right-click). As the screenshot comparison above shows, when enabled, this setting effectively keeps your gun to the right, and leaves your crosshair visible for aiming. When disabled, a more realistic iron sight is shown and your character aims down it without a crosshair. In both cases if the Depth of Field effect is enabled (See Post Processing Quality below), it will still be used, and performance should be roughly the same. The main reason to change this option would be if you find it easier to aim using crosshairs rather than the 3D iron sights. If you prefer the normal iron sight, but just want to disable depth of field, see the g_dof_ironsight command in the Advanced Tweaking section.
Smooth Mouse: If ticked, this option smooths mouse movements, preventing jerkiness, especially at higher mouse sensitivity settings. Unfortunately it can also increase the feelings of 'mouse lag', so is best left disabled.
Suit Shortcuts: By default, whether this option is ticked or not, you can already access the suit menu by pressing the middle mouse button, or the V key, and either move your mouse in the direction of the suit power you wish to choose, or press a numerical key for each power. You can also press C at any time while holding a weapon to bring up the weapon customization options. However, with this option ticked, you can also activate any suit power simply by double-tapping a particular key (default keys shown):
Some people may wish to disable this option if they find they're accidentally enabling a mode when they don't wish to, e.g. activating Strength mode by accident when quickly tapping the space bar to jump around. Note that you can also adjust the double-tap time to prevent this by using the dt_time command variables - see the Advanced Tweaking section. Note further that you can also bind any key to a suit mode by editing the Actionmaps.xml file - instructions are once again in the Advanced Tweaking section at the bottom of Page 8.
Mouse Sensitivity: This slider controls the sensitivity of your in-game view to your mouse movements. The further to the right the slider, the more sensitive the reaction to movements. Importantly, if you find that your mouse is becoming less responsive at times, also known as 'mouse lag', then firstly make sure to untick the Smooth Mouse option (See further above). Also make sure that VSync is not being forced on through your graphics card's control panel. DX10 Mode may also result in more mouse lag than DX9 mode. Commonly though, mouse lag is due to low framerates. Use the r_displayinfo 1 console command, or a utility like FRAPS to measure your framerates, especially during periods of heavier lag, and if your framerate is around 20FPS or less, you will probably experience some unavoidable mouse lag; alter your settings further to raise your FPS if possible. Note that you can raise your mouse sensitivity much higher than allowed by this in-game slider, by using the cl_sensitivity command; also see the i_mouse_accel command if you wish to enable or disable mouse acceleration in the game - both are in the Advanced Tweaking section.
System Settings
Volume Sliders: These sliders control the volume level of the in-game sound effects, music and dialog, and can be adjusted to taste as they have no performance impact. On multi-speaker setups you can also adjust individual speaker volumes using the s_MusicSpeaker commands in the Advanced Tweaking section.
Suit Active Voice: This option controls the voice used to announce nanosuit configuration changes and status warnings. For example each time you select a new suit mode, the suit voice will announce your choice. You can select either a Male or Female voice, or disable the voice altogether by choosing Off. There is no significant performance impact, so set to suit your taste.
Voice Over IP: This option is only applicable to multiplayer. If the 'Enable Voice Comms' box is ticked, and you have a microphone connected to your PC, when in Multiplayer you will be able to communicate with other players using Voice over IP (VOIP). You can adjust the volume of your voice using the slider. If you are experiencing a fluctuating Ping, in-game lag, are on a slow connection, or if you don't want to use VOIP, then I recommend disabling this option.
Graphics
Brightness, Contrast, Gamma Correction: These sliders allow you to alter the overall brightness of the game image. These have no impact on performance, so set to suit your taste.
HUD Color: This area lets you select the color scheme used for your Heads Up Display (HUD), which is the information text and graphics overlaid on the screen. It has no impact on performance.
Video Mode: This option lets you choose the resolution of the game image, measured in pixels wide by pixels high. The higher the resolution, the more detailed the image on screen, and also the less jagged lines there will be (See Anti-Aliasing Quality below), but the lower your performance. In fact if all else fails to improve your FPS in Crysis, reducing resolution will probably be necessary, since it has a major impact on your performance. For more details see the Resolution section of my Gamer's Graphics & Display Settings Guide. The number of resolutions available here are limited by what both your graphics card and monitor can handle. If you wish to set a custom resolution, use the r_Height and r_Width commands, as covered in the Advanced Tweaking section.
Vertical Sync: Just a note that VSync is disabled by default in Crysis, and this provides the best performance. However if you wish to enable it, either force it via your graphics card's control panel, or use the r_Vsync console command. Note that if you do enable VSync using either method, I strongly recommend also enabling Triple Buffering using the d3d9_TripleBuffering setting, or if using DX10, via one of the tools in the Triple Buffering link just above.
Update: As of the 1.1 Patch, Crysis now has an in-game VSync option to control Vertical Sync. This controls whether VSync is enabled (ticked) or not (unticked), whether in DX9 or DX10 mode.
DirectX 9 vs. DirectX 10
By default, when you run Crysis in Windows Vista on DX10-capable hardware, it will automatically run in DirectX10 mode, whereas Windows XP can only run in DirectX9 mode. You can see what mode the game is running in at any time by using the r_DisplayInfo 1 command. While you can't force DX10 in XP, you can force DX9 mode in Vista, and this can provide a significant performance improvement for a barely-noticeable decline in image quality. To do this, right-click on the Crysis launch icon in Vista's Games Explorer and select 'PlayDX9 ', or right-click on the game's desktop launch icon, select Properties, and in the Target box one blank space after the last character add -dx9.
Most people are wondering what the difference between DX9 and DX10 actually is. In practice the three main differences are:
1. You cannot access 'Very High' mode in DX9 by default.
2. There are more subtle shader effects in DX10 mode.
3. There are some DX10-only command variables, e.g. r_UseGSParticles, d3d10_CBUpdateMethod.
Fortunately, on the first count, you can force Very High mode in XP DX9 using some .cfg editing - see the last page of this guide for detailed instructions on how to do this. On the second count, the most obvious difference I've seen is in the way in which motion blurring is more detailed in DX10 by default - for example when throwing a grenade, or moving your rifle quickly, your arm and weapon are blurred in DX10 mode; using the exact same motion blurring setting (r_MotionBlur=3) in DX9, there is no such additional blurring. However you can use the r_MotionBlur=5 setting in DX9 mode to get a similar though slightly less subtle effect. Finally, in my testing I haven't found any DX10-specific variable that actually makes a significant difference to the game at the moment.
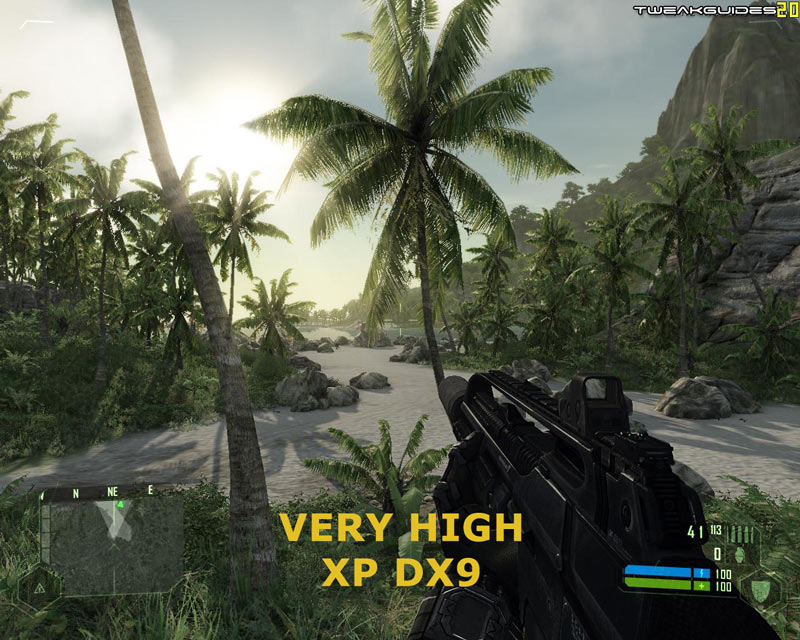
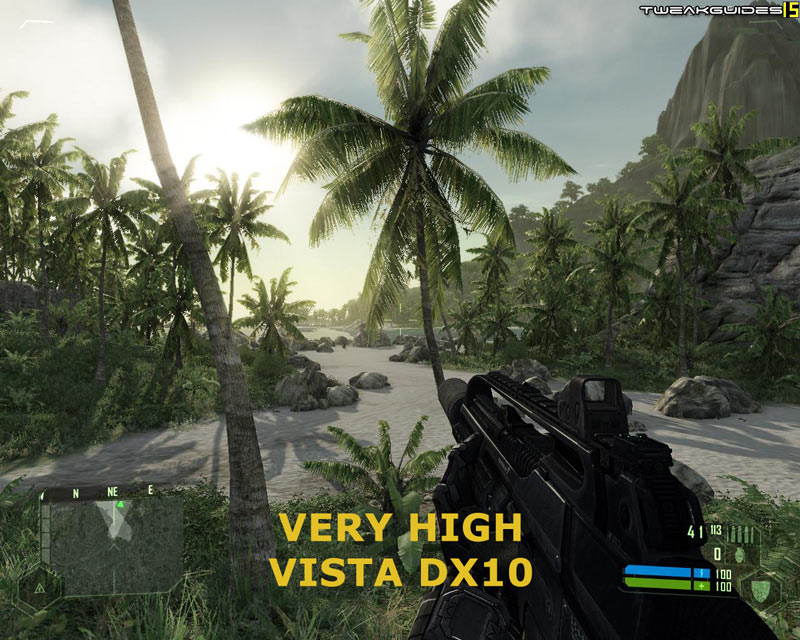
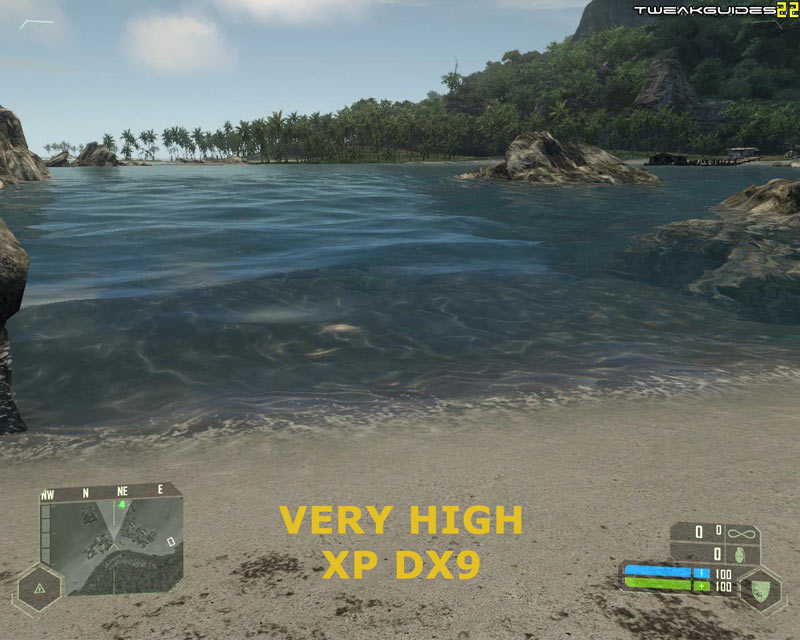
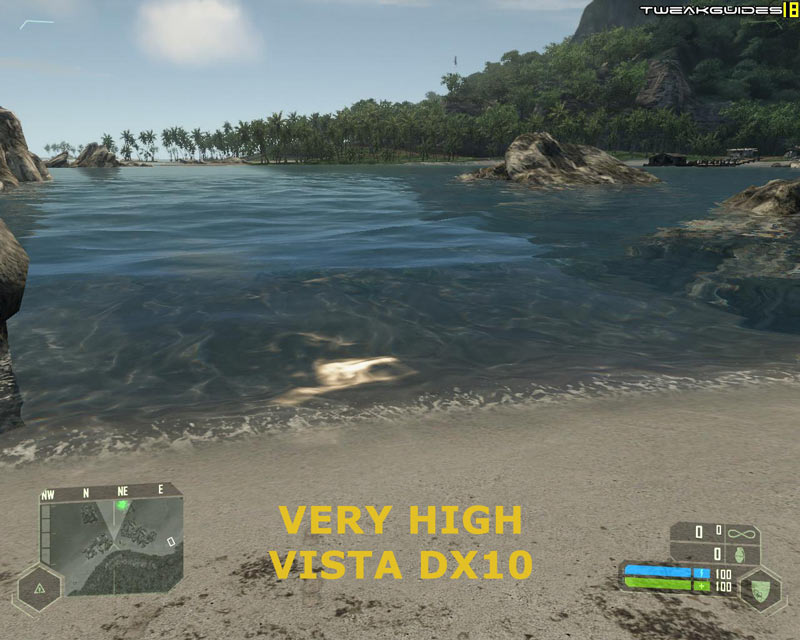
Thus for the most part the visual difference between DX10 and DX9 is not major enough to worry about, especially considering the performance hit of running in DX10 mode is quite significant. On balance, for the moment I would strongly recommend that if given the option, you run in DX9 mode given how system-intensive Crysis is, as on my 8800GTS 640MB for example, it provides a good 10-20% performance boost and feels much more responsive. Above are some screenshots taken at the same scene, with XP DX9 Very High mode vs. Vista DX10 Very High mode, and as you can see for most intents and purposes they're almost identical in appearance. Again, there appear to be subtle shader differences that no screenshot can capture, such as the difference in motion blurring and depth of field, but it's nothing of any real significance, and can be recreated using appropriate advanced tweaks.
Update: Note that in recent months, both after the release of the 1.2 Patch for Crysis, the release of Service Pack 1 for Vista, and graphics driver improvements, the performance difference between Crysis DX9 and DX10 mode is not as major as it once was.
The next page continues the In-Game Settings descriptions.
|
|