
Crysis Tweak Guide
[Page 13] Neat Stuff & Conclusion
This section deals with several important performance and convenience tips and advice. Do not skip this section, as these tips are just as important as any cvar tweak.
Disabling the Introductory Movies
There are a large number of introductory/promotional movies which play before you reach the main menu in Crysis. If you wish to skip these and reach the main menu much more quickly, there's a simple method to do this: go to your \Program Files\Electronic Arts\Crytek\Crysis\Game\Localized\Video directory, and rename all the .sfd files starting with Trailer_, as well as Crytek.sfd, to something else - e.g. give them all ._sfd extensions. Alternatively, create a new folder under that directory, call it whatever you wish, and move all the above .sfd files to that new directory. The game will now automatically skip all these introductory movies and get to the main menu within a shorter space of time.
Note that there is a g_SkipIntro command variable, but it doesn't appear to work in removing the startup movies, regardless of how it is implemented.
Enabling 'Very High' Settings Under Windows XP or Vista DX9
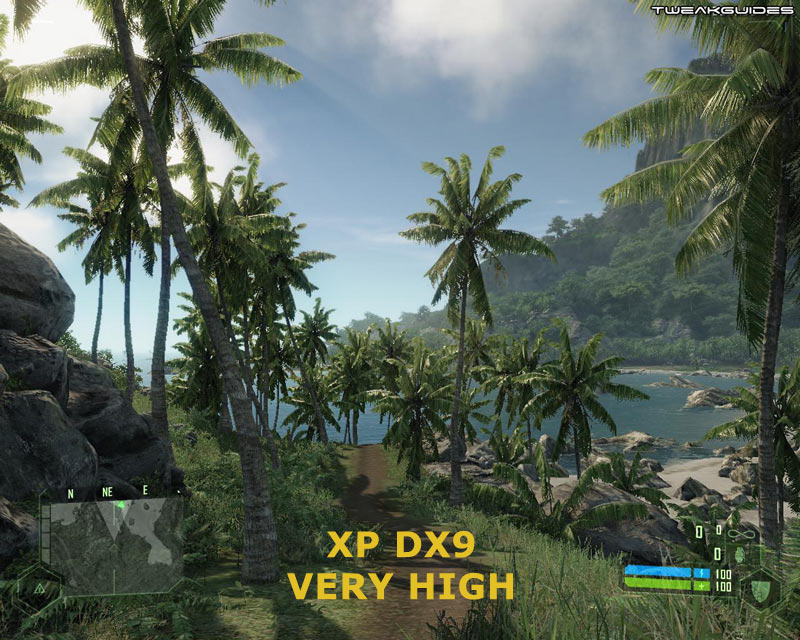
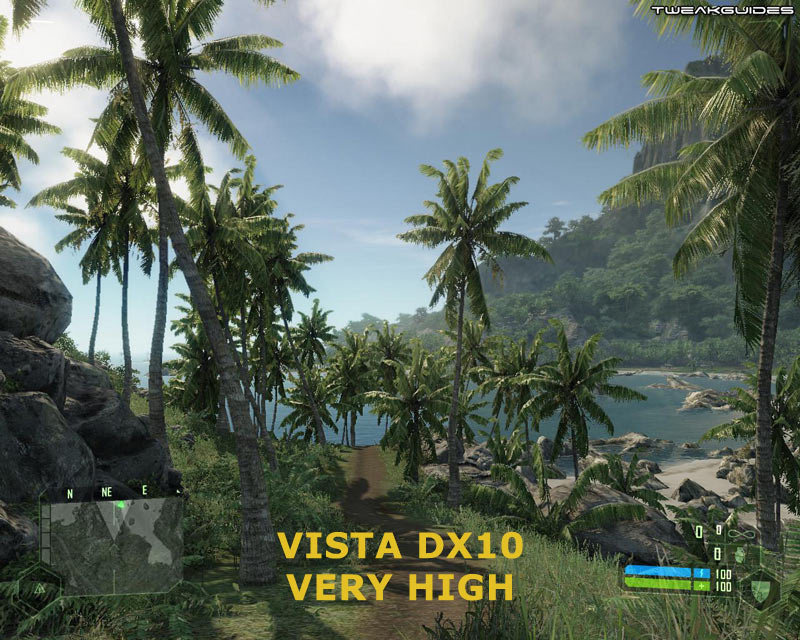
Something controversial about Crysis is that by default you can't enable the 'Very High' level for any of the in-game Advanced settings under Windows XP, nor in Vista DX9 mode, yet you can under Vista DX10 mode. Initially it was thought that this was due to Very High being DX10-exclusive. However this is not correct, it's an artificial limitation imposed by Crytek, and in fact it was during the Crysis Multiplayer Beta that it was discovered that you can indeed force Very High mode in DX9. Before we go any further however, it's important to understand that this is not a "DX10 hack", as under DX10 Crysis does indeed have some additional subtle effects which are exclusive and can't be reproduced in DX9 - see the DX9 vs. DX10 topic under the In-Game Settings section. For most intents and purposes though, Very High in XP (or Vista DX9) will look almost identical to Very High in Vista DX10, and also performs better to boot.
To try this out for yourself, you'll need to go to your \Program Files\Electronic Arts\Crytek\Crysis\Game\Config\CVarGroups directory and make a backup of all the files there. Next open each .cfg file (except sys_spec_Full.cfg), and copy all commands at the very top, beneath the 4 but above the [1], and paste them over all the commands under the [3] at the very bottom of the file, then save each file. If you want to understand what this does, and how these .cfg files work, see the start of the Advanced Tweaking section of this guide. Basically it just forces the game to run the Very High command variables at the in-game High setting. An alternate method which doesn't require pasting over existing settings is to copy all the commands under the '4' of each file and then paste them all into your relevant diff_ .cfg file. Remember, if you just put the commands into System.cfg or autoexec.cfg, some of them won't change since they're system variables and need to be placed in an original system file to work, as explained on page 7 of this guide.
Finally, go into the game and make sure all your Advanced options are set to High, and start up a game. There will now be a range of additional effects now visible - all of which are covered in detail in the In-Game Settings section of this guide - and your performance will also have taken a turn for the worse. To see a comparison between the Very High mode in XP, and the Very High mode in Vista, look at the In-Game Settings section, as well as the screenshots above; there really isn't any noticeable visible difference between the two, but both look noticeably better than High.
Note: There is no 'Ultra High' quality available in Crysis - Very High is the highest possible setting under both Windows XP and Vista. Any sites or custom files/mods promoting 'Ultra High' quality are simply using Very High along with a range of customized .cfg variables which may or may not improve the visuals depending on your tastes. I recommend reading the Advanced Tweaking section and creating your own custom config to better suit your tastes.
'Very High' On The Cheap
There's another thing you can try if you find Very High mode is just a bit too strenuous for your system. You can try the "cheap" version of Very High, which basically only implements the more obvious visual enhancements of Very High. To do this, instead of editing your .cfg files as covered above, all you need to do is set your in-game settings all to High as normal, then add the following commands to your System.cfg file (or just test them in the console first): r_UsePOM=1, r_sunshafts=1, e_water_ocean_fft=1, q_Renderer=3 and r_colorgrading=1. This will make High look extremely similar to Very High in most respects, but with quite a bit less of a performance hit. In a pinch, if you still need extra FPS, try disabling one of the effects, though keep in mind that q_Renderer=3 is necessary for color grading to work. You can also turn off Edge AA (r_UseEdgeAA=0) to make things look crisper and boost performance further.
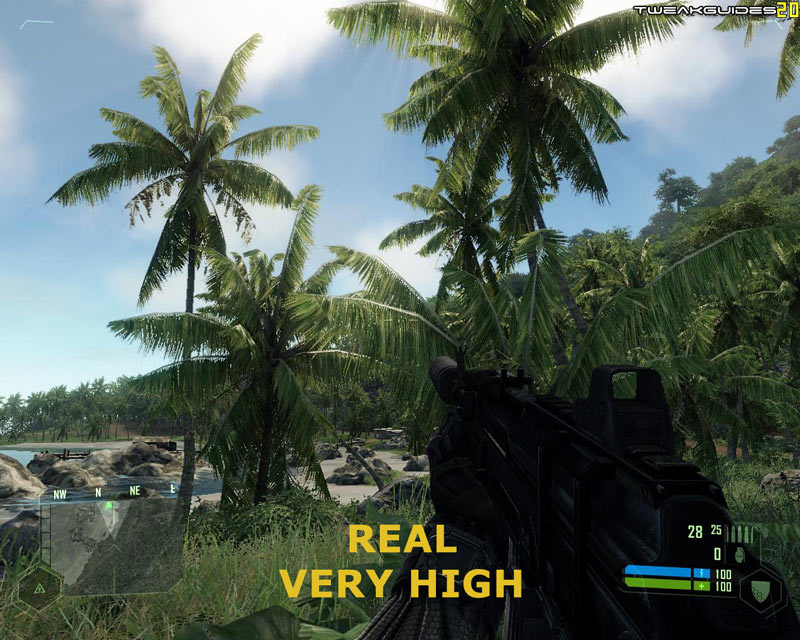
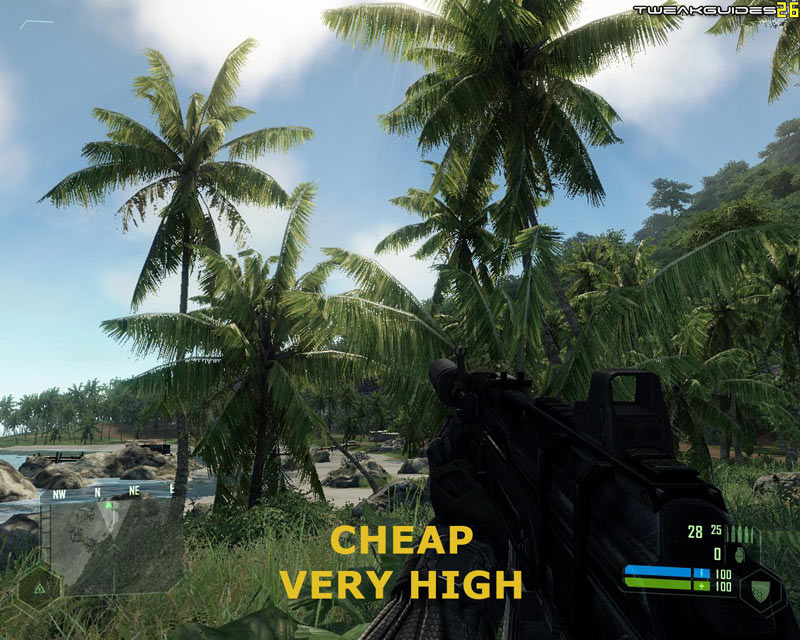
The screenshot comparison above shows that the cheap method looks very close to the real Very High, with the exception of some additional foliage, better water reflections and a few more objects visible in the distance on the left hand side. The FPS difference however is noticeable, as shown at the top right of each shot - 20FPS on the left vs. 26FPS on the right in this example. But this is just the quick way to get Very High on the cheap; obviously if you want to do things in more depth and tailor it to suit your own tastes (which I recommend), then read through the Advanced Tweaking section of this guide and put together your own custom configuration. Alternatively, you can try using the 'Natural Mod' to achieve better image quality as well as improve performance - see page 4 for details.
Measuring Framerates, Taking Screenshots & Videos
If you want to measure your FPS in Crysis, simply use the r_displayinfo 1 console command as covered in the Advanced Tweaking section. To take screenshots in Crysis, by default you can use the r_GetScreenshot console command (or just press the F12 key) and the shot will be taken in JPG format by default and stored under your \My Games\Crysis\ScreenShots directory. To make the screenshots look nicer, you can remove the HUD temporarily before taking the shot by using the cl_hud 0 command, and then cl_hud 1 to restore it again.
Another way to measure framerates, take screenshots, and capture .avi videos of gameplay in an easy manner is to use the free FRAPS utility. Measuring FPS with FRAPS provides no performance hit, but capturing videos can reduce your FPS to a noticeable extent while recording. A sample HD video of my Crysis gameplay captured with FRAPS is here: Crysis Gameplay Video.
Benchmarking
Crysis comes with two built-in benchmarking tools you can use to measure and compare your performance in the game with others. Go to your \Program Files\Electronic Arts\Crytek\Crysis\Bin32 directory (or \Bin64 for 64-bit systems), and run the Benchmark_CPU.bat file for a CPU-based benchmark, and run Benchmark_GPU.bat for a graphics-card focused benchmark. You can then share the results you get with others online, although I would be hesitant to base any purchasing decisions on these benchmark results - your best bet is to see how you perform normally in the game, and whether you get slowdowns during combat, etc. If you want a more automated way of running benchmarks, you can use the HOCBench Crysis Benchmark utility.
Update: As of the 1.1 Patch, a second CPU benchmark has been included with the game. Run the Benchmark_CPU2.bat file found under the same directory as the other benchmarks, and a custom run through the ice-based level is completed.
Conclusion
Once again we're at the end of a very long guide. The Crysis Tweak Guide has taken me a lot of time and effort to research, test and compile. I certainly hope you find it a comprehensive and useful source of information to add to your enjoyment of Crysis. As with all of my other guides, I'll be making sure to keep the guide fully updated, so make sure to check back on it regularly. I must stress that unfortunately I can't provide any tech or tweaking support/advice, and I also don't provide permission for the guide to be reproduced or translated elsewhere for several reasons. All the information you need to optimize and troubleshoot your system for Crysis is right here in this guide, and in also in my other guides like the TweakGuides Tweaking Companion. There are no quick fixes, no magic bullets, no easy ways out - it takes a bit of patience and effort to get there, but I promise you the results are worth it once you put your mind to it.
Anyway I hope you've found the guide useful, and until next time, take care!
|
|